

Craving a quick and tasty meal? Try my cheesy beef wraps! They are simple to make and loaded with flavor. You’ll mix ground beef with melted cheese and fresh veggies for a hearty dish. This easy recipe is perfect for busy nights or gatherings. Stick with me as I guide you through the ingredients and steps to make these delicious wraps that will please everyone at the table!
Ingredients
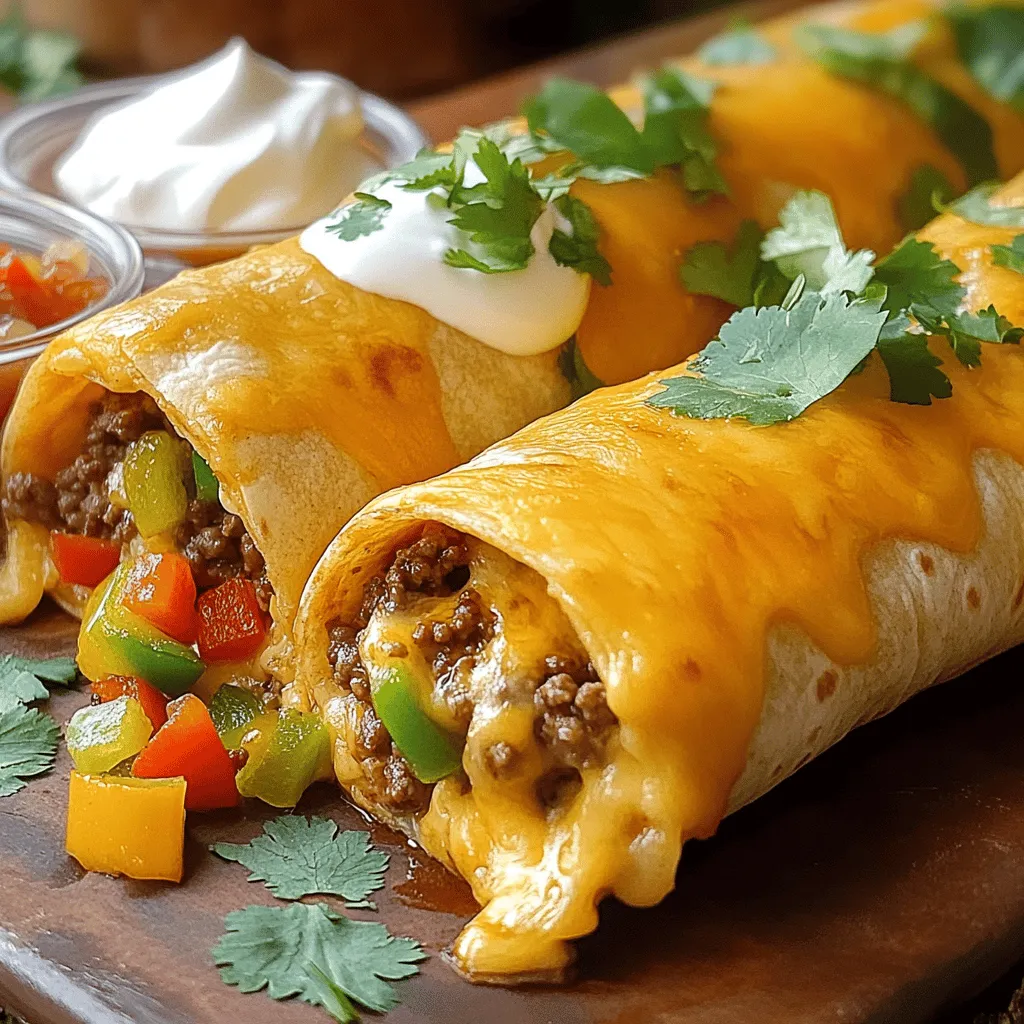
Main Ingredients for Cheesy Beef Wraps
- 1 lb ground beef
- 1 cup shredded cheese (cheddar or a blend)
- 1 cup bell pepper, diced (any color)
- 1 small onion, diced
- 2 cloves garlic, minced
- 1 tablespoon taco seasoning
- 1 tablespoon olive oil
- 4 large tortillas (flour or whole wheat)
To make cheesy beef wraps, you need a few key ingredients. Ground beef is the star of the dish. It gives a hearty flavor and texture. I recommend using 80/20 beef for the best taste. Next, choose cheese. Cheddar works well, but you can also mix different cheeses for extra flavor.
You will also need some fresh vegetables. Diced bell peppers add crunch and color. Onions give sweetness when cooked. Garlic adds a nice aroma. Don’t forget the taco seasoning! It packs in great flavor. Use olive oil to cook your beef and vegetables. And for the wraps, opt for large tortillas, either flour or whole wheat.
Optional Ingredients for Serving
- ½ cup sour cream (optional for serving)
- Fresh cilantro or parsley, chopped (for garnish)
- Salsa (for serving)
When serving your cheesy beef wraps, you can add some fun toppings. Sour cream is always a hit. It adds creaminess and coolness. Salsa can bring a kick of spice and flavor. Fresh cilantro or parsley makes for a lovely garnish. These optional ingredients can take your wraps to the next level. You can mix and match to suit your taste.
Step-by-Step Instructions
Preparation Steps
Cooking the beef and sautéing vegetables
Start by heating the olive oil in a large skillet over medium heat. Add the diced onion and bell pepper. Sauté them for about 3 minutes until they are soft. This step adds flavor and color to your dish. Next, add the ground beef to the skillet. Break it into small pieces with a spatula. Cook it for 5-7 minutes until it turns brown. You might need to drain any extra fat.
Adding garlic and seasoning the mix
Once the beef is browned, stir in the minced garlic. Cook it for 1 more minute. This brings a nice aroma to the mix. Now, sprinkle the taco seasoning over the beef. Stir well to combine everything. Let it cook for another 2-3 minutes. This helps the flavors blend nicely.
Assembly and Cooking
Filling and wrapping technique
Take a large tortilla and place about a quarter of the beef mixture in the center. Make sure not to overfill it. Roll the tortilla tightly, folding in the sides as you go. This helps keep all the filling inside. Repeat this for each tortilla until you use all the beef mix.
Toasting the wraps for a crispy finish
Now it’s time to toast your wraps! Heat a clean skillet over medium heat. Place the wraps seam side down in the skillet. Cook them for 2-3 minutes on each side until they are lightly browned and crispy. This adds a nice crunch to your wraps. Once toasted, slice them in half and serve with sour cream, salsa, and chopped herbs. Enjoy these cheesy beef wraps for a tasty meal!
Tips & Tricks
Perfecting the Beef Mixture
To get great results with your beef, start by heating your skillet properly. This step helps brown the beef well. Avoid adding cold beef to a hot pan; this can lead to steaming instead of browning. Break the beef apart as it cooks. This method helps it brown evenly. Look for a crispy texture, which adds flavor.
For the tortillas, choose large flour or whole wheat ones. These types hold up better than smaller ones. You want your wrap to stay intact when you bite into it. Warm the tortillas slightly before filling them. This makes them soft and easy to roll.
Enhancing Flavor and Texture
To melt cheese evenly, use shredded cheese instead of blocks. Shredded cheese melts faster and more evenly. Add it to the beef mixture off the heat. This step will help it melt without getting tough. Mix well to ensure every bite has cheese.
For cooking methods, toasting the wraps on a skillet gives you a nice, crispy finish. Press down gently with a spatula while toasting. This technique helps the edges seal and keeps the filling inside. You can also bake the wraps for a softer texture. Just place them seam-side down on a baking sheet and bake until warm.
Variations
Ingredient Substitutes
You can easily make cheesy beef wraps fit your taste. If you want a vegetarian option, swap the ground beef for black beans or lentils. These alternatives are packed with protein and flavor. You can also use tofu or tempeh for a meat-like texture.
For cheese, try different blends. Pepper Jack adds a spicy kick, while Monterey Jack gives a creamy taste. Mix cheeses, like cheddar and mozzarella, for a unique flavor. Feel free to experiment with what you love.
International Twists
Want to spice things up? Try a Mexican twist! Add chili powder and cumin for extra heat. You can even include jalapeños for a fiery touch. Top your wraps with guacamole or pico de gallo for a fresh taste.
For a Mediterranean style, use feta cheese and Kalamata olives. Add roasted red peppers and spinach for a fresh crunch. These wraps will take your taste buds on a flavorful journey.
Storage Info
Storing Leftover Wraps
To store your cheesy beef wraps, first let them cool. Place them in an airtight container. You can keep them in the fridge for about 3-4 days. If you want to keep them longer, you can freeze them. Wrap each one in plastic wrap, then place them in a freezer bag. They can last up to 2 months in the freezer.
When reheating, use a skillet for the best results. Heat it over medium heat. Place the wraps in the skillet for about 3-4 minutes on each side. This keeps them crispy and warm. You can also use a microwave, but this might make them a bit soft.
Shelf Life of Ingredients
The shelf life of your cheesy beef wraps depends on the ingredients. Here’s a quick guide:
- Ground beef: Raw ground beef lasts 1-2 days in the fridge. Cooked beef lasts 3-4 days.
- Shredded cheese: Unopened cheese can last a month in the fridge. Once opened, use it in 5-7 days.
- Bell peppers: Fresh bell peppers last about 1 week in the fridge.
- Onions: Whole onions can last a month. Once chopped, use them within 7-10 days.
- Tortillas: Store tortillas in a cool, dry place. They can last 1-2 weeks in the fridge.
If your wraps smell sour or look slimy, toss them out. Always check before eating. Eating spoiled food can make you feel sick.
FAQs
How do you make cheesy beef wraps without sour cream?
You can skip sour cream and use other tasty dips. Try guacamole for a creamy touch. Salsa also adds a nice kick. You can even use hummus for a unique twist. Just pick what you like best!
Can I make these wraps ahead of time?
Yes, you can prepare these wraps in advance. Cook the beef mixture and let it cool. Wrap it tightly in foil or plastic. Store it in the fridge for up to two days. When ready to eat, just warm it up! This saves time on busy days.
What sides go well with cheesy beef wraps?
A few great sides pair well with cheesy beef wraps. Try a fresh salad for crunch. You can also serve chips and guacamole for a fun snack. Rice is another good option to fill you up. Don’t forget some fresh veggies on the side!
Cheesy beef wraps are easy to make and fun to enjoy. We covered the main ingredients like beef, cheese, and spices, plus tasty extras like salsa. You learned step-by-step prep and cooking tips to get a nice crispy finish. Remember, feel free to swap ingredients for new spins or even store leftovers right. In the end, these wraps can fit any taste. Now, grab your ingredients and start cooking! Enjoy every bite!