Are you ready to spice up your meals with a crunchy twist? My easy refrigerator pickled okra recipe is just what you need! Packed with flavor, this simple dish makes a perfect snack or fun side. With just a few fresh ingredients and simple steps, you can add a zesty touch to your kitchen. Let’s dive into creating this delightful treat that everyone will love!
Ingredients
Essential Ingredients
– 1 pound fresh okra, trimmed
– 1 cup distilled white vinegar
– 1 cup water
– 2 tablespoons kosher salt
– 2 tablespoons sugar
– 2 cloves garlic, peeled and lightly crushed
– 1 teaspoon black mustard seeds
– 1 teaspoon coriander seeds
– 1 teaspoon red pepper flakes (adjust to taste)
– 1 fresh dill sprig (optional)
– 1 teaspoon black peppercorns
To make refrigerator pickled okra, you need fresh okra. Choose firm, bright green pods. Trim the ends but keep them whole. This step keeps the okra crunchy.
You will also need distilled white vinegar and water. They create the tangy brine. The kosher salt and sugar help balance the flavors. The garlic adds depth. Black mustard seeds and coriander seeds bring unique tastes. Red pepper flakes give a spicy kick.
If you like dill, add a fresh sprig. Black peppercorns add warmth and flavor. This mix of ingredients makes your pickled okra delicious. You can adjust spice levels to fit your taste.
Step-by-Step Instructions
Preparation Steps
1. Wash and trim the okra
Start by washing the okra under cold running water. This step removes dirt and makes it clean. Next, trim the ends of the okra. Be careful not to cut too deep. Keeping the shape of the okra helps in pickling.
2. Combine vinegar, water, salt, and sugar
In a medium saucepan, mix together the distilled white vinegar, water, kosher salt, and sugar. Heat this mixture over medium heat. Stir until both the salt and sugar dissolve completely. Once done, remove it from the heat. Let it cool slightly before using.
3. Cool the mixture
Allow the vinegar mixture to cool for a few minutes. This prevents cooking the okra when you pour it in the jar. A cooler mixture also helps the flavors blend better when pickling.
Packing the Jar
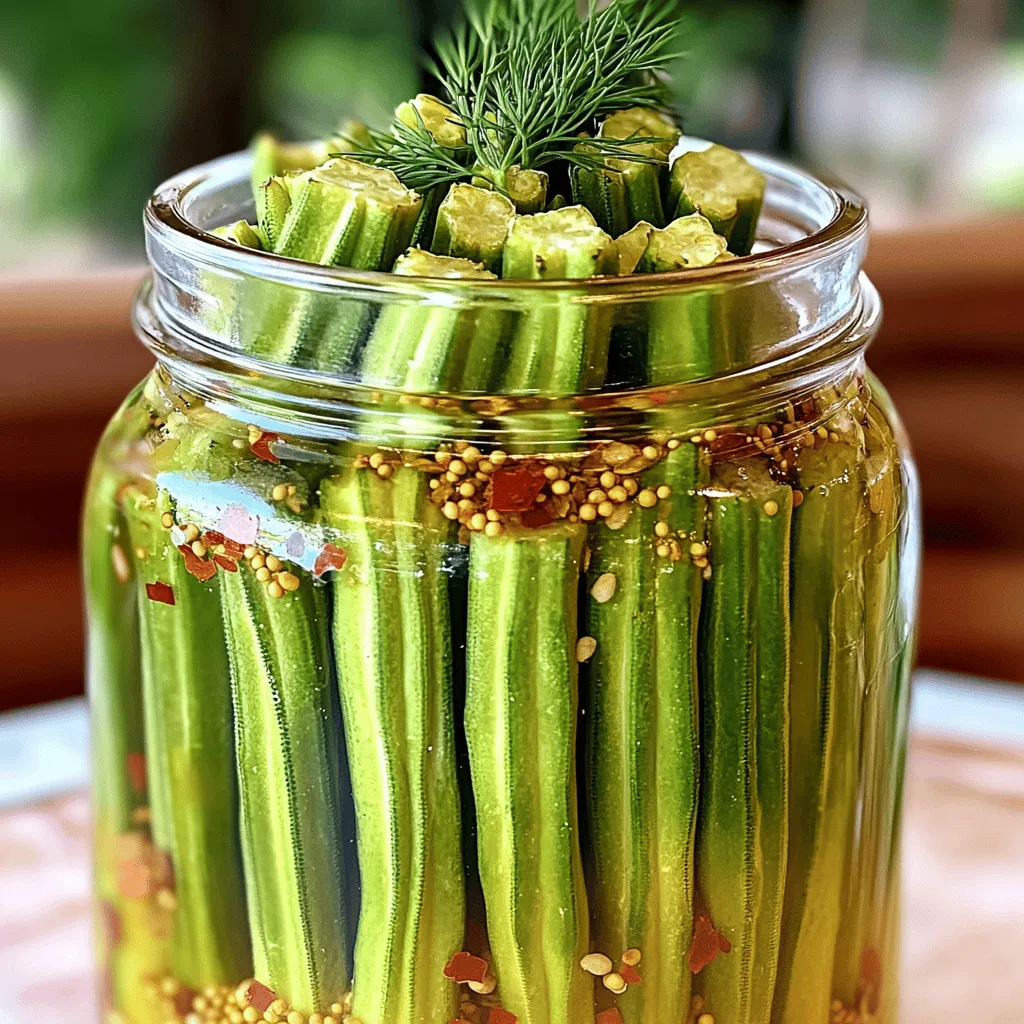
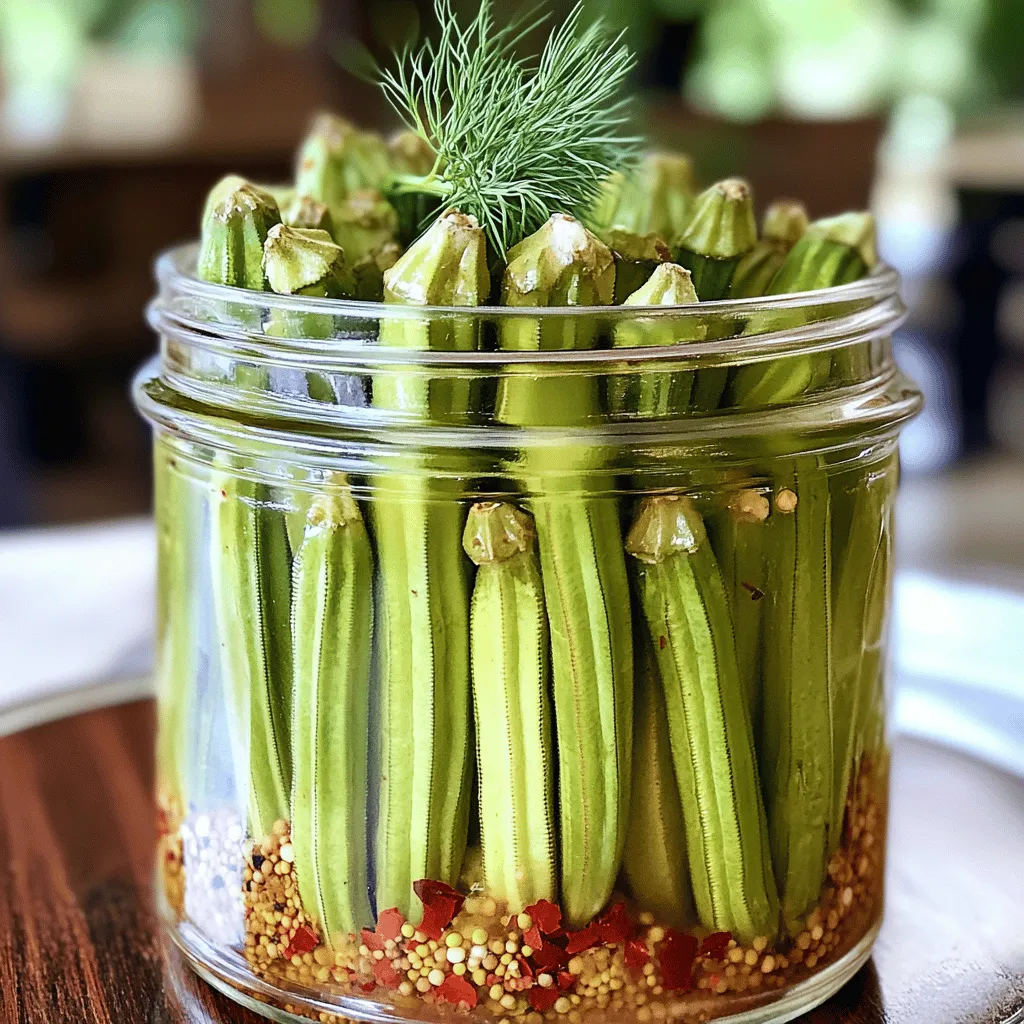
1. Layer spices at the bottom
Take a clean quart-sized jar. Start by placing the crushed garlic, black mustard seeds, coriander seeds, red pepper flakes, black peppercorns, and the fresh dill sprig (if you choose to use it) at the bottom. This layering helps the spices infuse into the okra.
2. Arrange okra in the jar
Now, pack the okra upright into the jar. Make sure they fit snugly but are not squished. This way, they will pickle evenly and absorb all those delicious flavors.
Finishing Touches
1. Pour the vinegar mixture over okra
Carefully pour the cooled vinegar mixture over the okra. Fill the jar until the okra is completely submerged. Remember to leave about half an inch of headspace at the top. This space is important for expansion and flavor mixing.
2. Seal and shake the jar
Seal the jar tightly with a lid. Once sealed, gently shake the jar to distribute the spices throughout the mixture. This ensures that every okra piece gets a taste of the brine. Store the pickled okra in the refrigerator for at least 24 hours before you start enjoying it. The flavors develop better with time.
Tips & Tricks
Perfecting Flavor
To make your refrigerator pickled okra just right, adjust the spice levels to suit your taste. If you love heat, add more red pepper flakes. For a milder kick, use less. Taste the vinegar mixture before pouring it over the okra. You can tweak it until it’s perfect for you.
After pickling, let the okra rest for at least 24 hours. This time allows the flavors to mix well. The longer you wait, the better the taste. If you can, wait for three days. You will notice a big difference in flavor!
Presentation Suggestions
When it comes to serving, think simple but bright. Use a small dish to showcase the pickled okra. They look great on a cheese board or as a snack. You can also use them to jazz up your cocktails. They add a zesty touch to drinks like martinis.
For salads, slice the pickled okra and toss them in. They add a nice crunch and tang. You can even mix them into grain bowls for an extra flavor boost. Use your imagination to enjoy these pickled treats!
Variations
Additional Ingredients
You can make your pickled okra special by adding spices. Try bay leaves for their depth. A pinch of turmeric adds a lovely yellow color and a hint of warmth. You can also mix in other vegetables. Carrots, peppers, or even cauliflower work well. They add crunch and color to your jars.
Flavor Ideas
Changing the vinegar can create a whole new taste. Apple cider vinegar brings sweetness. Rice vinegar gives a milder flavor. You can also add fruits to your brine. Slices of lemon or orange add a zesty twist. Pineapple chunks can make the pickles sweeter. These variations keep your pickled okra exciting and fresh.
Storage Info
Proper Storage Methods
To store pickled okra in the fridge, first, make sure your jar is sealed well. I always use a clean quart-sized jar to keep my okra fresh. Place the jar in the main part of your fridge, not in the door. The door has warmer air that can affect the pickles. Keep the okra submerged in the vinegar mixture. This helps keep the flavor strong and prevents spoilage.
Here are some tips to maintain freshness:
– Always use a clean utensil when removing okra.
– Avoid touching the okra with your hands.
– Store the jar away from light to keep colors bright.
Shelf Life
For the best taste, eat your pickled okra within three weeks. This ensures you enjoy the crisp texture and bright flavor. Keep an eye on the jar for any signs of spoilage. Look for any cloudiness in the brine or mold on the surface. If you see any of these signs, it’s best to throw the jar away. Trust your senses—if it smells off, don’t eat it.
Remember, freshness means flavor. Enjoy every crunchy bite!
FAQs
Common Questions
How long do I have to wait before eating pickled okra?
You need to wait at least 24 hours. This time allows the flavors to blend well. The okra gets tastier with each passing day. I often wait two to three days for the best taste.
Can I use frozen okra for this recipe?
I do not recommend frozen okra. It can become mushy when pickled. Fresh okra holds its crunch and flavor better. If you can, stick with fresh okra for this recipe.
Troubleshooting Tips
Why is my pickled okra too soft?
Soft pickled okra usually happens if it’s overcooked or pickled too long. Always use fresh okra and follow the pickling time. If this happens, you can try a shorter pickling time next time.
How can I make my pickled okra less salty?
To cut the salt, rinse the okra before pickling. You can also reduce the salt in the brine. Taste the brine before adding okra to find the right balance.
Nutritional Information
Health benefits of okra
Okra is low in calories and packed with nutrients. It is high in fiber, which aids digestion. It also contains vitamins A and C, which are great for your skin and immune system.
Caloric content per serving
Each serving of pickled okra has about 30 calories. This makes it a light and tasty snack option. Enjoy it without the guilt!
Now you know how to make pickled okra. We covered essential ingredients, step-by-step instructions, and storage tips. Adjust spices to suit your taste. Remember to let your pickled okra rest before enjoying. This dish adds unique flavor to many meals. Test different ingredients and vinegars for variety. With proper care, your pickled okra can stay fresh and tasty. Enjoy your creation and share it with others. Happy pickling!