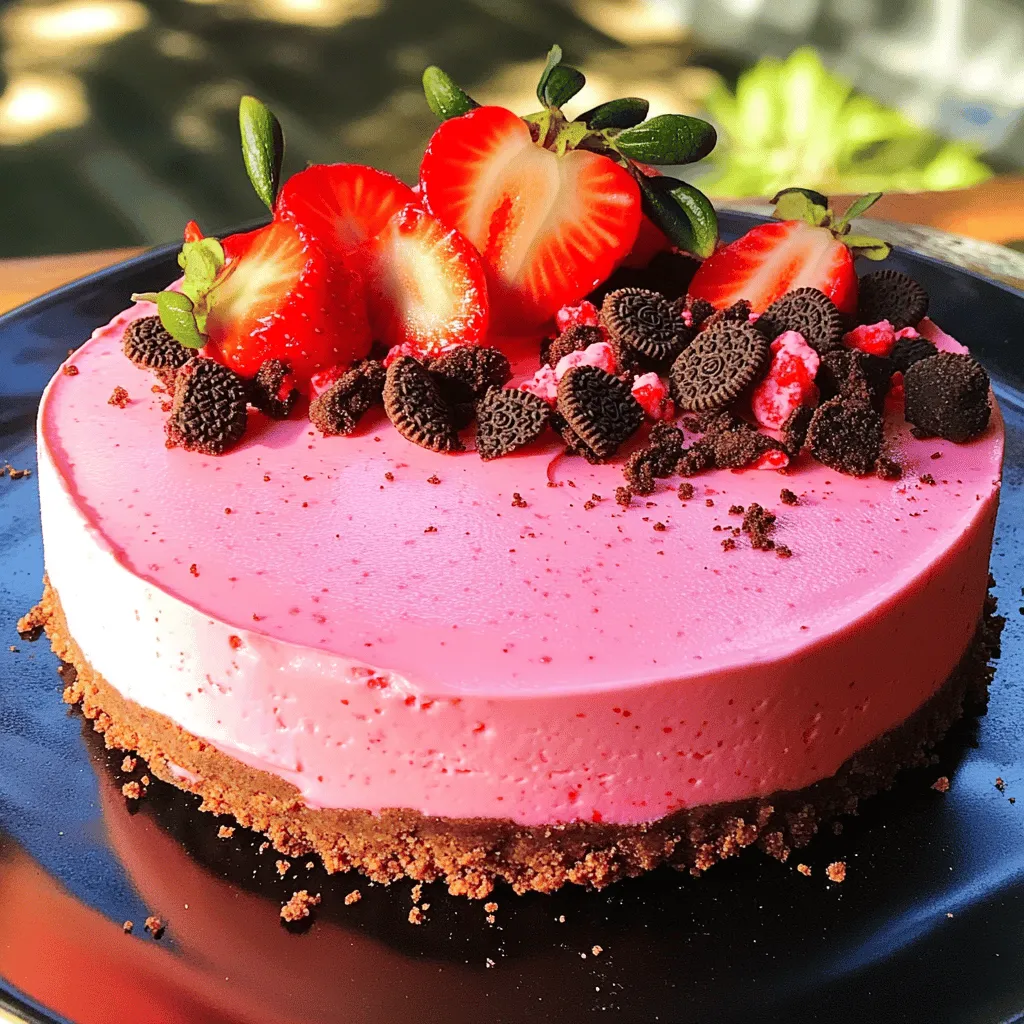
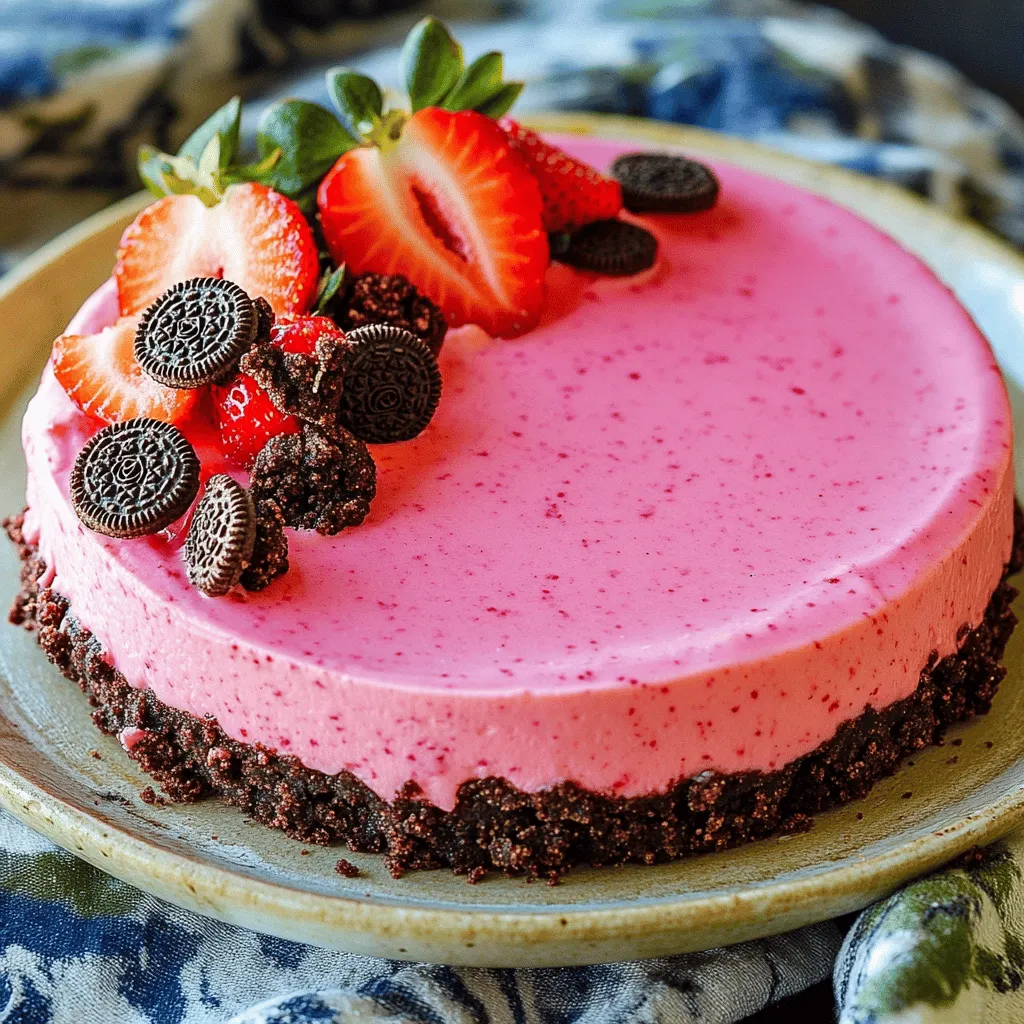
Craving something sweet and fun? Let me introduce you to my Pink Oreo No-Bake Cheesecake! This easy and creamy delight blends the rich taste of cream cheese with the unique twist of pink Oreos. Whether it’s for a special occasion or just a treat for yourself, this cheesecake is sure to impress. Ready to dive into the recipe? Let’s get started!
Ingredients
Main Ingredients
– 20 pink Oreo cookies, crushed (plus extra for garnish)
– 4 tablespoons unsalted butter, melted
– 1 cup cream cheese, softened
– 1 cup powdered sugar
– 1 teaspoon vanilla extract
– 1 cup heavy whipping cream
– 1/2 cup pink food coloring (adjust to desired shade)
– 1/4 cup fresh strawberries, pureed (optional, for a fruity flavor)
To make the Pink Oreo No-Bake Cheesecake, you need just a few key ingredients. The pink Oreo cookies give it the fun color and taste. Cream cheese makes the filling rich and smooth. Heavy whipping cream adds lightness and a creamy texture.
Optional Ingredients
– Fresh strawberries (for puree)
– Additional pink food coloring
You can add fresh strawberries for a fruity twist. Also, if you want a brighter pink, use more food coloring. But don’t worry; the cheesecake tastes great even without these extras.
Equipment Needed
– 9-inch springform pan
– Mixing bowls
– Electric mixer
You will need a 9-inch springform pan to hold your cheesecake. Mixing bowls help you combine everything nicely. An electric mixer makes it easy to beat the cream cheese until it is smooth.Enjoy making this easy and creamy treat!
Step-by-Step Instructions
Prepare the Crust
To start, take 20 pink Oreo cookies and crush them finely. You can use a food processor or place them in a bag and crush them with a rolling pin. Next, melt 4 tablespoons of unsalted butter. Mix the crushed cookies with the melted butter until it sticks together. Press this mixture firmly into the bottom of a 9-inch springform pan. Make sure it is even and compact. Finally, place the pan in the refrigerator for about 15 minutes to set.
Make the Cheesecake Filling
Now, grab a large mixing bowl. Beat 1 cup of softened cream cheese with an electric mixer until it is smooth and creamy. Slowly add 1 cup of powdered sugar. Mix until fully blended. Then, add 1 teaspoon of vanilla extract. Blend again until combined.
Combine and Chill
If you want a fruity flavor, blend in 1/4 cup of fresh strawberry puree at this step. Then, add 1/2 cup of pink food coloring to achieve your desired shade. In another bowl, whip 1 cup of heavy whipping cream until stiff peaks form. Carefully fold the whipped cream into the cream cheese mixture. Pour this creamy filling over your prepared Oreo crust. Smooth the top with a spatula. Cover the cheesecake with plastic wrap and refrigerate it for at least 4 hours, or overnight for best results. Enjoy your Pink Oreo No-Bake Cheesecake!
Tips & Tricks
Achieving the Perfect Consistency
To get fluffy whipped cream, start with a cold bowl and cold beaters. This helps the cream whip faster. Use heavy cream, as it whips best. Whip until stiff peaks form, but don’t overwhip. Overwhipping makes butter, which you don’t want in your cheesecake. When folding the whipped cream into the cheese mix, do it gently. Use a spatula and fold slowly. This keeps your cream light and airy.
Ensuring a Flavorful Cheesecake
Sweetness is key. Taste your mix as you go. If you like it sweeter, add more powdered sugar. You can also use fresh fruit puree for flavor. Strawberries are great, but mango or raspberry works well too. Just blend the fruit and mix it in. This adds a fresh taste that makes your cheesecake shine.
Presentation Tips
Garnishing makes a big difference. Crush extra pink Oreos and sprinkle them on top. Add fresh strawberries for color and charm. You can also use edible flowers for a fancy touch. When serving, cut clean slices with a warm knife. This keeps the edges neat. For fun, serve in individual cups for parties!
Variations
Flavor Variations
To make your Pink Oreo No-Bake Cheesecake more fun, try different Oreo flavors. You can use regular Oreos, golden Oreos, or even mint Oreos. Each flavor gives a unique taste and twist to your cheesecake. If you want a little zing, add citrus zest. Lemon or lime zest adds a fresh kick. Just mix in a teaspoon of zest to the cream cheese. This brightens the flavor and makes it even more special.
Dietary Adjustments
Want to make it gluten-free? Use gluten-free Oreo cookies instead of regular ones. They will give you the same great taste without the gluten. If you are looking for vegan options, you can replace cream cheese with vegan cream cheese. There are great brands available that taste amazing. You can also use coconut cream instead of heavy whipping cream. This keeps it creamy and delicious while being plant-based.
Serving Variations
Serving your cheesecake can be fun! Try making individual cheesecake cups. Just layer the crust and filling in small cups. This makes for a perfect party treat. You can also make mini cheesecakes. Use a muffin tin lined with cupcake liners. This way, each person gets their own little cake. These options are great for events or just a fun family treat.
Storage Info
Best Practices for Refrigeration
You can keep your Pink Oreo No-Bake Cheesecake in the fridge for up to five days. Store it in an airtight container to keep it fresh. If you leave it uncovered, it may absorb other smells from your fridge.
Freezing Instructions
To freeze your cheesecake, wrap it tightly in plastic wrap. Then, place it in a freezer-safe container. This keeps the cheesecake safe from freezer burn. You can freeze it for up to three months. When you’re ready to eat, move it to the fridge. Let it thaw for about four hours before serving.
Reusing Leftovers
If you have leftover cheesecake, get creative! You can crumble it over yogurt for a tasty breakfast. Use it to make cheesecake parfaits by layering it with fruit and whipped cream. You can also blend it into a milkshake for a sweet treat.
FAQs
Can I make this cheesecake ahead of time?
Yes, you can make this cheesecake ahead of time. I often prepare it a day before serving. This allows the flavors to blend well. It also ensures the cheesecake sets nicely in the fridge. Just cover it with plastic wrap after chilling. You can store it in the refrigerator for up to five days. If you plan to serve it later, keep it covered to avoid drying out.
What should I do if my cheesecake doesn’t set?
If your cheesecake doesn’t set, check the chilling time. It needs at least four hours in the fridge. If you want a firmer texture, consider adding more whipped cream. Ensure you whip the cream until stiff peaks form. Also, make sure to fold it gently into the cream cheese mix. If it still doesn’t set, it may need more time in the fridge. Sometimes, a brief freeze can help firm it up too.
How can I customize the flavor?
Customizing this cheesecake is fun and easy. You can add different flavors to the filling. Try mixing in lemon zest for a citrus twist. Alternatively, consider adding chocolate syrup for a richer taste. You can also use different Oreo flavors, like mint or red velvet. If you want a fruity touch, mix in more strawberry puree or other fruit purees. Toppings can change the flavor too. Add fresh fruit, chocolate shavings, or a drizzle of caramel for variety.
This blog post guides you through making a delicious pink Oreo cheesecake. We covered the key ingredients, such as pink Oreos and cream cheese. You learned how to prepare the crust and cheesecake filling step by step. Tips on achieving perfect texture and presentation added extra value.
In conclusion, this dessert is easy to customize and fun to make. With clever variations and storage tips, your cheesecake will impress friends and family. Enjoy creating sweet moments with this delightful treat!