

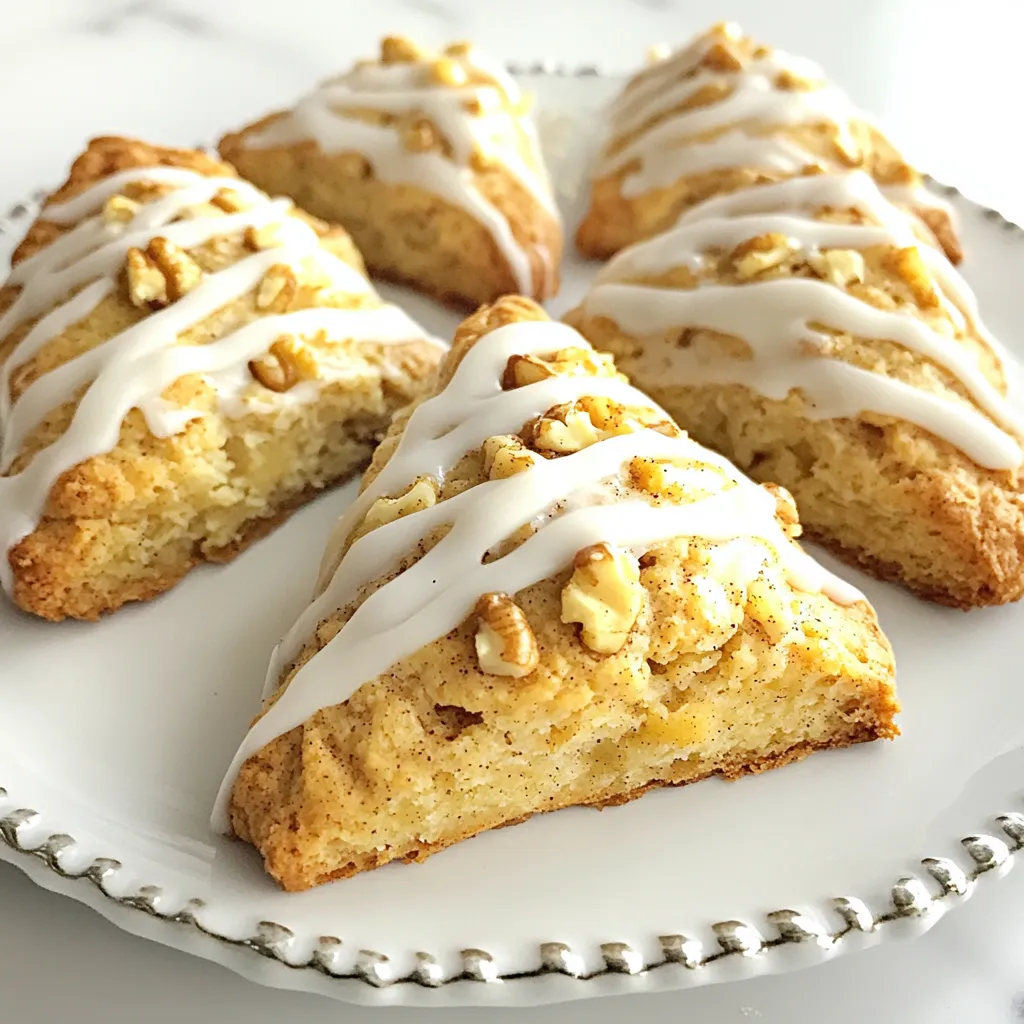
Craving the cozy taste of Starbucks pumpkin scones? I’ve got the perfect recipe for you! This easy guide shows you how to whip up these soft, sweet treats right at home. With simple steps and tasty variations, you’ll never want to buy scones again. Let’s dive into this delightful fall treat and make your kitchen smell amazing!
Why I Love This Recipe
- Fall Flavor Delight: These scones are packed with the warm and comforting flavors of pumpkin spice, perfect for cozy autumn mornings.
- Easy to Make: With simple ingredients and straightforward steps, this recipe is perfect for bakers of all skill levels.
- Versatile Treat: Whether enjoyed for breakfast, as a snack, or with afternoon tea, these scones fit any occasion.
- Customizable Goodness: Feel free to add your favorite nuts or substitute the icing for a glaze, making it uniquely yours!
Ingredients
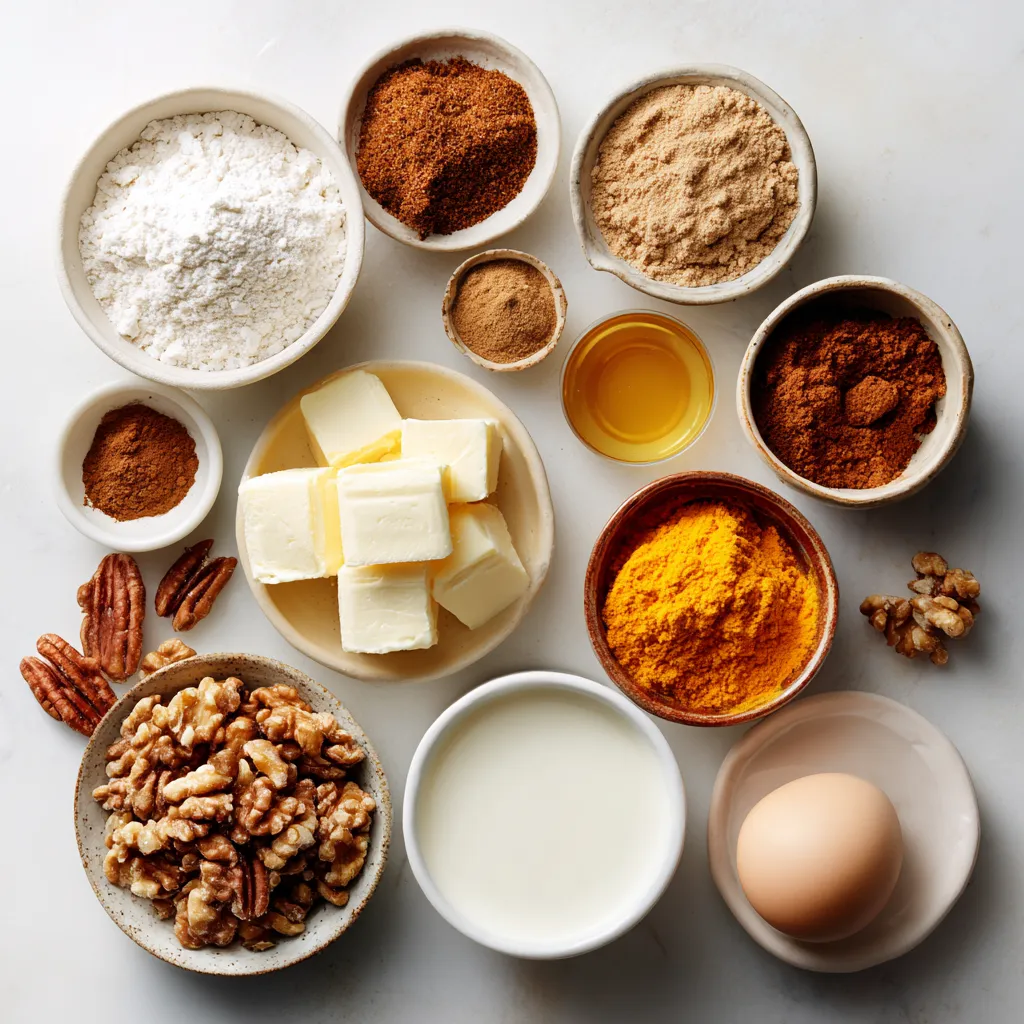
Essential Ingredients for Starbucks Style Pumpkin Scones
To make these tasty scones, you need a few key items:
- 2 cups all-purpose flour
- 1/4 cup brown sugar
- 1 tablespoon baking powder
- 1 teaspoon ground cinnamon
- 1/2 teaspoon ground nutmeg
- 1/4 teaspoon ground ginger
- 1/4 teaspoon salt
- 1/2 cup cold unsalted butter, cubed
- 1/2 cup pumpkin puree
- 1/4 cup heavy cream
- 1 large egg
- 1 teaspoon vanilla extract
These ingredients give the scones a soft and moist texture. The spices add warmth and flavor, making them perfect for fall.
Optional Add-ins for Customization
You can make your scones unique by adding extras. Consider these options:
- 1/2 cup chopped walnuts or pecans
- Chocolate chips
- Dried cranberries
These add-ins can enhance the taste and add a nice crunch.
Ingredient Substitutes
If you run out of an ingredient, here are some swaps you can use:
- Replace all-purpose flour with a gluten-free blend.
- Use honey or maple syrup instead of brown sugar.
- Swap heavy cream for almond or coconut milk.
These substitutes help you adapt the recipe to your needs while still enjoying delicious scones.
Step-by-Step Instructions
Prepping Your Oven and Baking Sheet
First, set your oven to 400°F (200°C). This heat helps the scones rise well. Next, line a baking sheet with parchment paper. This keeps the scones from sticking and makes cleanup easy.
Mixing Dry Ingredients
In a large bowl, add 2 cups of all-purpose flour, 1/4 cup of brown sugar, and 1 tablespoon of baking powder. Then, mix in 1 teaspoon of ground cinnamon, 1/2 teaspoon of ground nutmeg, 1/4 teaspoon of ground ginger, and 1/4 teaspoon of salt. Whisk these dry ingredients together until they’re well mixed.
Combining Wet Ingredients
In another bowl, pour in 1/2 cup of pumpkin puree, 1/4 cup of heavy cream, and crack in 1 large egg. Add 1 teaspoon of vanilla extract. Whisk these ingredients until the mixture is smooth and well blended.
Forming and Cutting the Dough
Now, pour the wet mixture into the dry ingredients. Stir until just combined. If you want, fold in 1/2 cup of chopped walnuts or pecans for extra flavor. Transfer the dough to a floured surface. Gently knead it a few times until it holds together. Shape it into a round disc about 1 inch thick. Cut the dough into 8 equal triangles, like a pizza.
Baking Instructions
Place the scones on the prepared baking sheet. Leave space between them. Bake for 15 to 18 minutes. They should turn golden-brown, and a toothpick should come out clean when tested. Once done, let them cool before adding icing.
Tips & Tricks
Achieving the Perfect Dough Consistency
To get the best dough, start with cold butter. Cold butter makes the scones fluffy. Use your fingers or a pastry cutter to mix the butter into the flour. Stop when it looks like coarse crumbs. If the dough is too sticky, add more flour slowly. If it’s too dry, add a bit of cream.
Best Practices for Baking Scones
When you bake, preheat your oven to 400°F (200°C). This helps the scones rise. Line your baking sheet with parchment paper to prevent sticking. Space the scones apart, so they cook evenly. Bake for 15-18 minutes. They should be golden-brown and firm. Always check with a toothpick. If it comes out clean, they are done.
Tips for Making the Icing
For the icing, mix powdered sugar and milk in a small bowl. Start with 1 tablespoon of milk. If it’s too thick, add more milk slowly. Whisk until smooth. Once the scones cool, drizzle or spread the icing on top. This adds a sweet touch that makes them extra special.
Pro Tips
- Use Cold Butter: Make sure your butter is very cold; this helps create flaky layers in the scones.
- Don’t Overmix: Mix the wet and dry ingredients just until combined to avoid tough scones.
- Chill the Dough: For even better texture, chill the dough for 15-20 minutes before cutting and baking.
- Adjust Icing Consistency: Add more milk to the icing for a drizzle or less for a thicker spread.
Variations
Different Flavors to Add
You can easily switch up the flavor of pumpkin scones. Here are some fun ideas:
- Chocolate Chip: Add 1/2 cup of chocolate chips to the dough for a sweet twist.
- Cranberry: Mix in 1/2 cup of dried cranberries for a tart flavor.
- Maple: Replace some of the brown sugar with maple syrup for a rich taste.
- Spices: Try adding cardamom or allspice for deeper flavor notes.
Each of these options can make your scones unique and exciting.
Gluten-Free Adaptations
You can make these scones gluten-free. Just follow these steps:
- Flour: Substitute all-purpose flour with a 1:1 gluten-free flour blend.
- Baking Powder: Ensure your baking powder is gluten-free.
- Texture: The texture may vary, so don’t worry if they feel different.
With these swaps, you can enjoy the same great taste without the gluten.
Serving Suggestions
These pumpkin scones are great for any occasion. Here are some serving ideas:
- Breakfast: Serve warm with butter or cream cheese for a hearty start.
- Coffee Break: Pair with your favorite coffee or tea for a cozy afternoon snack.
- Dessert: Drizzle icing on top and enjoy as a sweet treat after dinner.
Don’t forget to share them with friends or family! They will love these tasty scones.
Storage Info
How to Store Leftover Scones
To keep your leftover scones fresh, place them in an airtight container. This helps prevent them from drying out. You can store them at room temperature for up to two days. If you want to keep them longer, refrigerate them. Just remember, refrigerating can change their texture a bit.
Freezing Scones for Later Use
Freezing scones is a great way to enjoy them later. First, let the scones cool completely. Then, wrap each one in plastic wrap. Place them in a freezer bag or container. Make sure to label it with the date. Frozen scones can last for up to three months. When you’re ready to enjoy them, you can thaw them overnight in the fridge.
Reheating Instructions
To reheat your scones, preheat your oven to 350°F (175°C). Place the scones on a baking sheet. Heat them for about 10-15 minutes. This will help restore their warmth and texture. If you prefer a softer scone, you can microwave them for about 15-20 seconds. Just be careful not to overheat, or they may get tough. Enjoy your Starbucks Style pumpkin scones fresh again!
FAQs
How do I make Starbucks Style Pumpkin Scones more flavorful?
You can add more spices for a bolder taste. Try using more cinnamon or nutmeg. You can also mix in some chocolate chips or dried fruit. A touch of maple syrup can enhance sweetness too. These tweaks create a richer flavor profile. Don’t be afraid to experiment with flavors you love.
Can I use fresh pumpkin in the recipe?
Yes, you can use fresh pumpkin! Just make sure to cook and puree it first. Fresh pumpkin gives a lovely taste and texture. It may add some moisture, so adjust the flour if needed. Aim for a similar consistency to canned pumpkin puree.
What is the best way to serve pumpkin scones?
Serve pumpkin scones warm for the best flavor. You can add a drizzle of icing on top. Pair them with coffee or tea for a cozy treat. Enjoy them for breakfast or as a snack. You can also serve them with butter or cream cheese.
How long do homemade scones last?
Homemade scones last about 2-3 days at room temperature. Store them in an airtight container to keep them fresh. You can also freeze them for up to a month. Just make sure to wrap them well before freezing. Reheat them in the oven for a fresh taste.
In this post, we covered how to make tasty Starbucks-style pumpkin scones. I shared essential ingredients and optional add-ins to customize your scones. You learned step-by-step instructions for baking, tips for the perfect dough and icing, and how to store your scones. Don’t forget to try the fun variations we discussed. Enjoy your baking journey, and share these scones with friends and family! You’ll impress everyone with your skill

Pumpkin Spice Bliss Scones
Ingredients
- 2 cups all-purpose flour
- 0.25 cup brown sugar
- 1 tablespoon baking powder
- 1 teaspoon ground cinnamon
- 0.5 teaspoon ground nutmeg
- 0.25 teaspoon ground ginger
- 0.25 teaspoon salt
- 0.5 cup cold unsalted butter, cubed
- 0.5 cup pumpkin puree
- 0.25 cup heavy cream
- 1 large egg
- 1 teaspoon vanilla extract
- 0.5 cup chopped walnuts or pecans (optional)
- 0.5 cup powdered sugar (for icing)
- 1 tablespoon milk (for icing)
Instructions
- Preheat your oven to 400°F (200°C) and line a baking sheet with parchment paper.
- In a large bowl, whisk together the flour, brown sugar, baking powder, cinnamon, nutmeg, ginger, and salt until combined.
- Add the cubed butter into the dry mixture using a pastry cutter or your fingers until the mixture resembles coarse crumbs.
- In a separate bowl, whisk together the pumpkin puree, heavy cream, egg, and vanilla extract until smooth.
- Pour the wet ingredients into the dry ingredients and stir until just combined. If desired, fold in the chopped walnuts or pecans.
- Transfer the dough onto a floured surface and gently knead it a few times until it comes together. Pat it into a round disc about 1-inch thick.
- Cut the dough into 8 equal triangles (like a pizza) and place them onto the prepared baking sheet, spacing them slightly apart.
- Bake in the preheated oven for 15-18 minutes, or until the scones are golden-brown and a toothpick comes out clean.
- While the scones cool, prepare the icing by whisking together the powdered sugar and milk in a small bowl until smooth. Adjust the consistency with more milk if needed.
- Drizzle or spread the icing over the scones once they are completely cool.
