Craving a sweet and rich dessert without the hassle of baking? You’re in luck! These No Bake Mocha Cheesecake Jars are a breeze to make and taste amazing. With creamy layers and a crunchy cookie base, they bring delight to every spoonful. I’ll guide you through the simple steps and helpful tips to create these tasty treats. Get ready to impress your friends and family with your new favorite dessert!
Ingredients
Cream Cheese and Whipped Cream
For this recipe, you need 8 oz of softened cream cheese. This makes the base smooth and creamy. Then, you will add 1 cup of whipped cream. This lightens the mix and gives it a fluffy texture. Combining these two makes a great base for your cheesecake.
Sweeteners and Flavorings
You will also use 1/2 cup of powdered sugar. This adds sweetness without making the mix too heavy. Next, add 1/4 cup of strong brewed coffee. Make sure it is cooled first to avoid melting the cream. Add 2 tablespoons of cocoa powder for a rich chocolate flavor. Finally, include 1 teaspoon of vanilla extract for a warm touch.
Cookie Base and Garnishes
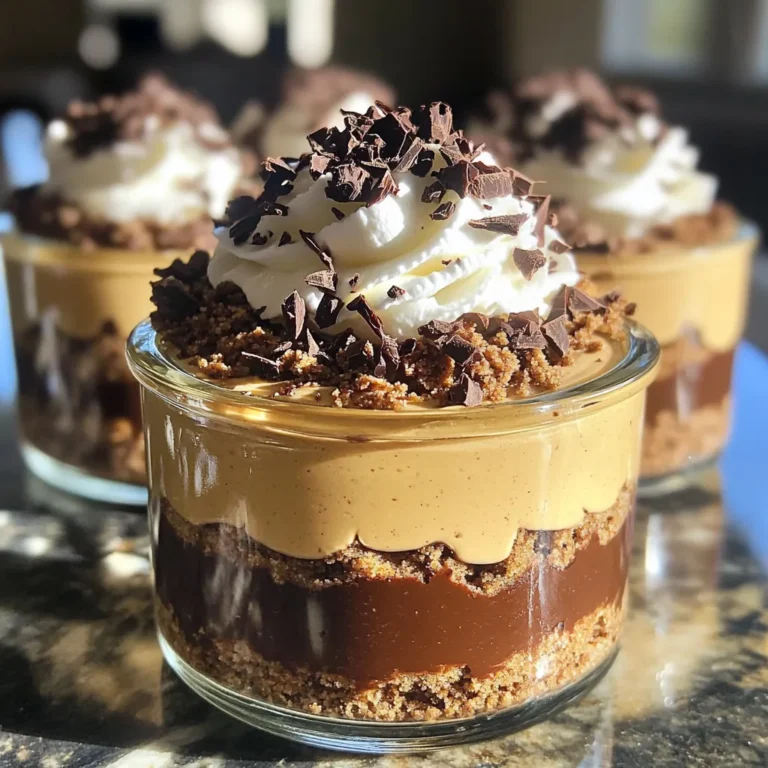
For the cookie base, you need 1 cup of chocolate cookie crumbs. These bring crunch and a lovely taste. Mix this with 2 tablespoons of melted butter. This mixture should feel like wet sand. For a finishing touch, use dark chocolate shavings or cocoa nibs as a garnish. They add a nice look and extra flavor to your jars.
Step-by-Step Instructions
Preparing the Cheesecake Filling
To make the cheesecake filling, start with softened cream cheese. Beat it in a bowl until it’s smooth and creamy. This should only take a few minutes. Next, add powdered sugar, cocoa powder, cooled brewed coffee, and vanilla extract. Mix these together until they blend well and become fluffy. This step is key to a light filling. Lastly, gently fold in whipped cream. This makes the filling airy and delicious.
Making the Cookie Crust
Next, we need to make the cookie crust. In a separate bowl, combine chocolate cookie crumbs with melted butter. Mix this until the crumbs look like wet sand. This texture is perfect for the crust. It will hold together well in the jars. Make sure all the crumbs are coated. This helps the crust stay crunchy and flavorful.
Assembling the Cheesecake Jars
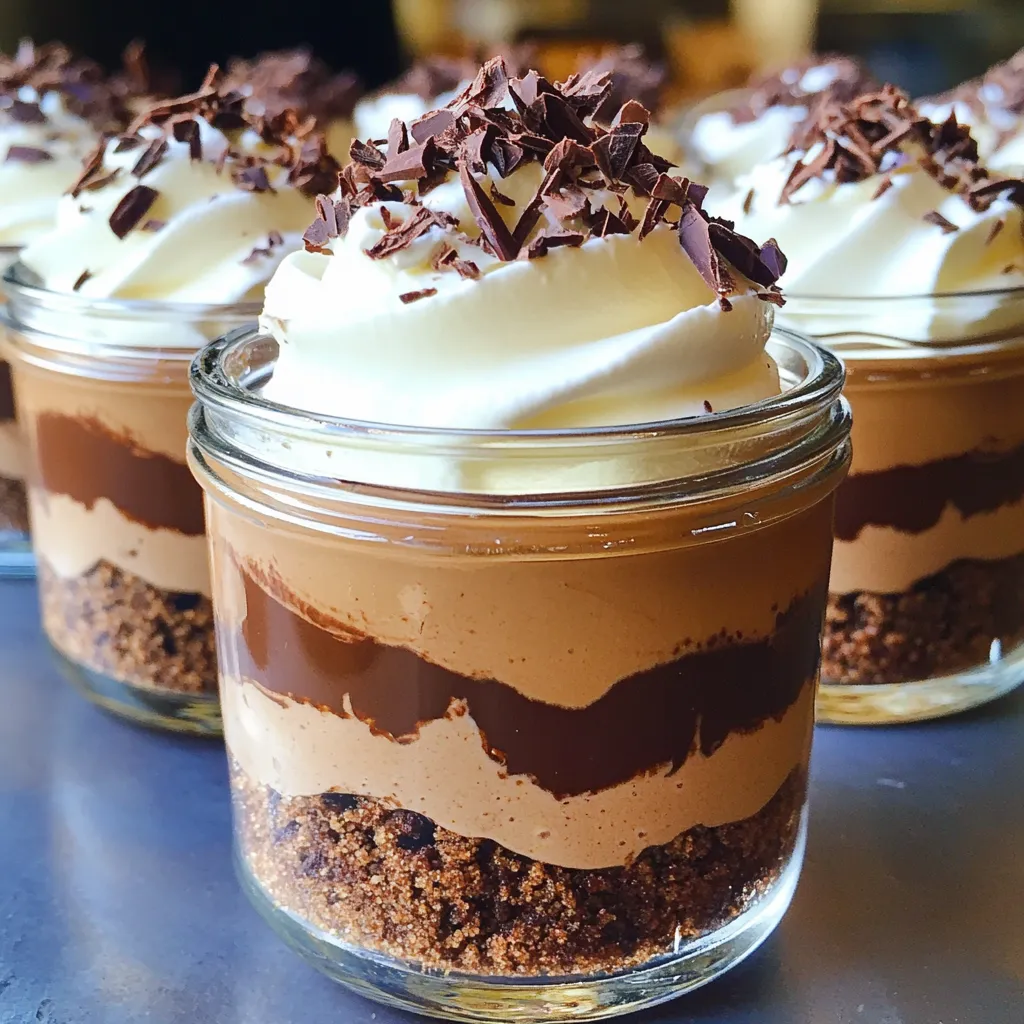
Now comes the fun part: assembling the jars! Start with a layer of the cookie crust at the bottom. Then, add a layer of the mocha cheesecake filling. Repeat these layers until you fill the jar. You can make as many layers as you like. Finish with a layer of whipped cream or more cookie crumbs on top. For a fancy touch, add dark chocolate shavings or cocoa nibs. These add great flavor and look nice too. After assembling, refrigerate the jars for at least 2 hours. This helps the dessert set and makes it easier to serve.
Tips & Tricks
How to Achieve the Perfect Texture
To get the best texture, use softened cream cheese. It mixes well and stays smooth. Be sure to beat it until creamy. This makes your filling light and fluffy. When adding whipped cream, fold it in gently. This keeps the air in your mix. The end result should be soft and creamy, not dense.
Best Practices for Layering
Layering is key to a great dessert. Start with your cookie crust at the bottom. Press it down gently for a firm base. Next, add a layer of the mocha filling. Use a spoon to help with even layers. Keep repeating until you fill your jars. Finish with whipped cream on top for a nice touch.
Serving and Presentation Ideas
Presentation makes a big impact. Use clear jars to show off the layers. Top your jars with dark chocolate shavings or cocoa nibs. This adds a nice crunch. For extra flair, drizzle some chocolate sauce on the jars. Serve them cold for a refreshing treat.
Variations
Flavor Modifications
You can change the flavor of your No Bake Mocha Cheesecake Jars in fun ways. Try using different coffee types, like espresso or flavored coffee. You can also swap cocoa powder for caramel or peanut butter for a twist. Want a minty kick? Add peppermint extract to the filling. For a fruity touch, fold in some pureed berries or citrus zest. This lets you create a treat that fits your mood.
Dietary Adjustments
If you want to make this dessert fit certain diets, it’s easy. For a dairy-free version, use vegan cream cheese and whipped cream. You can also choose a gluten-free cookie for the crust. For a lower sugar option, swap powdered sugar with a sugar substitute. Just ensure it’s safe for baking. These small changes help everyone enjoy this dessert without worry.
Serving Suggestions
Serving this treat can be fun and creative. You can layer the jars in clear cups to show off the pretty layers. Top each jar with fresh berries or a drizzle of chocolate sauce. You might even sprinkle some nuts or toasted coconut on top. For parties, place jars on a tray for guests to grab. This makes serving easy and keeps things neat.
Storage Info
Best Refrigeration Practices
Store your No Bake Mocha Cheesecake Jars in the fridge. Use airtight containers to keep them fresh. This method prevents the cheesecake from absorbing any odors. I suggest placing a piece of plastic wrap on top before sealing the jars. This small step helps maintain the texture and flavor.
Freezing Options
You can freeze these jars, but only for a short time. Place the jars in a freezer-safe container to avoid freezer burn. Leave some space at the top, as the filling may expand. When ready to enjoy, let them thaw in the fridge overnight. Do not refreeze after thawing, as this can change the texture.
Shelf Life and Freshness Tips
These jars last up to five days in the fridge. Keep an eye on the freshness, especially if you added whipped cream on top. If you notice any changes in texture or smell, it’s best to discard them. Always check for any signs of spoilage before serving.
FAQs
Can I use different types of cookies for the crust?
Yes, you can use many types of cookies for the crust. Chocolate cookies work well, but you can try others too. For a twist, use graham crackers or even Oreo cookies. Each type adds a unique flavor and texture. Just crush them and mix with melted butter, like the recipe says.
How long can I store No Bake Mocha Cheesecake Jars?
You can store these jars in the fridge for up to four days. Just keep them covered to keep them fresh. The flavors will blend and make each bite even better. However, if you wait too long, the crust may get soggy. So, enjoy them soon!
Can I make this recipe dairy-free?
Yes, you can make this recipe dairy-free. Use vegan cream cheese instead of regular cream cheese. For whipped cream, try coconut cream or a dairy-free alternative. You can also use plant-based butter for the crust. With these swaps, you still get a tasty mocha cheesecake!
In this post, you learned to create No Bake Mocha Cheesecake Jars. We covered key ingredients like cream cheese and sweeteners, plus the cookie base. I shared step-by-step instructions for making the filling and crust. You also gained tips for perfecting texture and presentation. Consider flavor variations and diet adjustments to suit your taste. Store them well for optimal freshness. This tasty treat is fun, easy, and sure to impress. Enjoy every delicious bite!

