Are you ready to indulge in a sweet treat that combines rich chocolate and nutty hazelnut flavor? Join me as I take you through my favorite recipe for Chocolate Hazelnut Spread Cookies. These soft, chewy delights are easy to make and perfect for any occasion. Whether you’re a baking novice or a pro, you’ll find joy in crafting these delicious cookies that taste heavenly. Let’s get started!
Ingredients
Main Ingredients
- 1 cup all-purpose flour
- 1/2 cup unsweetened cocoa powder
- 1/2 cup chocolate hazelnut spread (like Nutella)
Optional Ingredients
- 1/2 cup chopped hazelnuts
- Sea salt for sprinkling
Dietary Alternatives
- Gluten-free flour alternatives
- Dairy-free butter options
When you make these cookies, you need the right ingredients. The main ingredients include flour, cocoa powder, and chocolate hazelnut spread. These three ingredients create the rich, sweet base.
Optional ingredients, like chopped hazelnuts, add a lovely crunch. A sprinkle of sea salt on top enhances the flavor, making each bite exciting.
If you need dietary alternatives, you can use gluten-free flour. There are many options available that work well. You can also choose dairy-free butter for a lactose-free treat.Enjoy the process as you mix, scoop, and bake.
Step-by-Step Instructions
Prepping the Oven and Baking Sheet
- Preheat your oven to 350°F (175°C).
- Line a baking sheet with parchment paper.
This step is key. Preheating the oven ensures even baking. The parchment paper will stop cookies from sticking. You want nice, clean cookies that slide right off the sheet.
Mixing the Dry Ingredients
- Sift together flour, cocoa powder, baking soda, and salt.
Sifting helps mix these dry ingredients well. It also removes lumps. A fine mix will give you soft, tasty cookies. Set this bowl aside for now.
Combining the Wet Ingredients
- Cream together butter and sugars.
- Add egg and vanilla extract.
In a big bowl, beat the softened butter with granulated sugar and brown sugar. You want it creamy and smooth. Then, add the egg and vanilla. Mix until it’s all combined. This step makes the cookies rich and sweet.
Forming the Cookie Dough
- Combine wet and dry ingredients.
- Fold in chocolate hazelnut spread and optional hazelnuts.
Now, take your dry mix and add it to the wet mix. Stir gently until just combined. Then, fold in the chocolate hazelnut spread. This is where the magic happens! If you like, toss in chopped hazelnuts for extra crunch.
Baking the Cookies
- Scoop dough onto the baking sheet.
- Bake for 10-12 minutes.
Use a spoon to scoop the dough onto the baking sheet. Space them about 2 inches apart. Press each ball down a bit for even baking. Bake them for 10 to 12 minutes. The edges should be firm, but the centers can stay soft. Let them cool for a few minutes before moving them to a wire rack.Enjoy every bite of these delightful cookies!
Tips & Tricks
Perfecting Cookie Texture
To achieve chewy cookies, use softened butter, not melted. This keeps the cookies tender. Don’t overbake! The edges should be firm while the center stays soft. Check them at 10 minutes. If they look just set, they are ready. Let them cool on the sheet for a few minutes to finish cooking.
For even baking, make sure your oven is preheated. Rotate the baking sheet halfway through baking. This helps cookies bake uniformly. If your oven has hot spots, use an oven thermometer to check the temperature.
Serving Suggestions
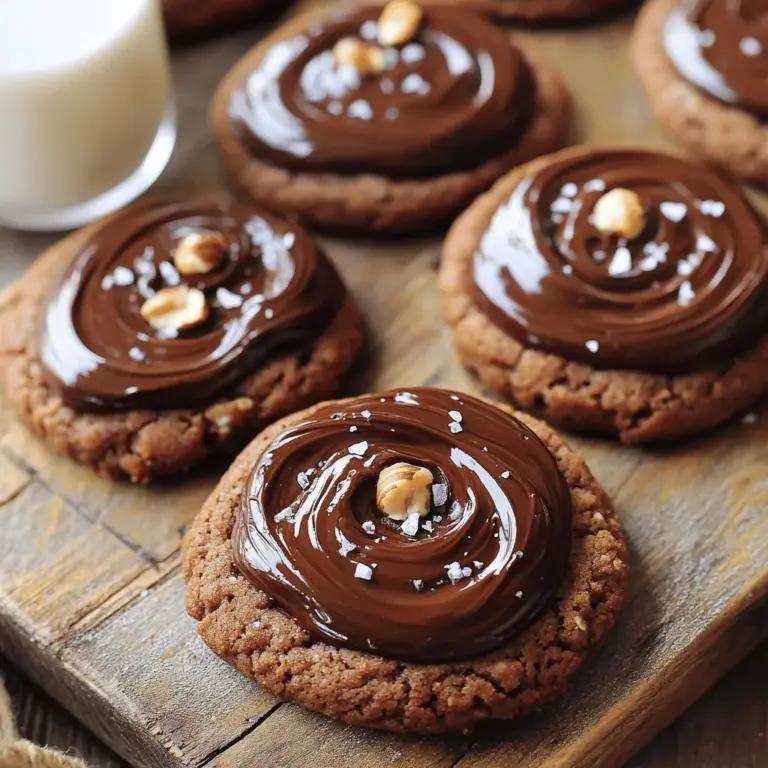
For a fun presentation, place the cookies on a rustic wooden board. You can stack them high for a tasty display. A colorful plate also adds charm. Pair your cookies with a glass of cold milk. The creamy milk balances the rich chocolate flavor. You can also serve them with coffee or tea. Both drinks enhance the cookie experience.
Common Mistakes to Avoid
One common mistake is overmixing the dough. Mix just until the ingredients are combined. Overmixing can make the cookies tough.
Another mistake is not chilling the dough. If you have time, chill the dough for 30 minutes. This helps the cookies hold their shape while baking. It also improves the flavor.

Variations
Flavor Variations
You can spice up your cookies by adding flavors. Try cinnamon for warmth. A dash of espresso gives a nice boost. You can also mix in chocolate chips for extra chocolatey goodness. The chocolate hazelnut spread already adds a rich taste. Adding these flavors will take them to a new level.
Dietary Modifications
Want to make these cookies vegan? You can replace the butter with coconut oil. Use a flax egg instead of a real egg. This will keep your cookies soft. For a low-sugar option, use a sugar substitute. You can try monk fruit sweetener or stevia. These swaps help you enjoy cookies without too much sugar.
Seasonal Themes
You can also have fun with seasonal themes. For Christmas, add peppermint extract to the dough. It gives a festive touch! For Halloween, use orange sprinkles or candy corn. You can also add pumpkin spice for a fall flavor. Seasonal ingredients can make your cookies special for any time of year.
Storage Info
Storing Baked Cookies
To keep your cookies fresh, store them in an airtight container. This helps seal in moisture and flavor. Place a piece of bread in the container to keep them soft. Bread adds moisture, which helps prevent drying out. If you want to store cookies for longer, freezing is a great option.
To freeze cookies, let them cool completely. Then, place them in a single layer on a baking sheet. Freeze for about an hour. Once firm, transfer them to a freezer-safe bag or container. Label the bag with the date. You can store them for up to three months.
How Long Do Cookies Last?
Baked cookies can last about one week at room temperature. They may start to lose their flavor after a few days. Check for signs of staleness. If they feel hard or dry, it’s time to toss them.
You can also look for visual clues. If the cookies lose their shine or look dull, they may be stale. Fresh cookies should look soft and have a nice sheen.
Reheating Instructions
To enjoy your cookies warm and fresh, reheating is easy. Preheat your oven to 350°F (175°C). Place the cookies on a baking sheet. Reheat for about 5 minutes. This warms them without making them too hard.
If you prefer a microwave, use a microwave-safe plate. Heat the cookies for 10-15 seconds. Be careful not to overheat them. This can make them chewy instead of soft. Enjoy your Chocolate Hazelnut Spread Cookies warm!
FAQs
Can I use any type of chocolate hazelnut spread?
Yes, you can use different brands of chocolate hazelnut spread. Each brand has a unique flavor and texture. For example, Nutella is smooth and sweet. Other brands might be thicker or less sweet. Experiment with different spreads to find your favorite. Just remember, the spread you choose will impact the taste of your cookies.
How do I know when the cookies are done?
Look for a few visual clues. The edges should be firm, and the center should still look soft. If the tops start to crack, that’s a good sign too. You can also lightly press the center. If it springs back, the cookies are done. Be careful not to overbake them, as they will harden when cooling.
What can I substitute for eggs in the recipe?
If you need an egg substitute, try using flaxseed meal. Mix one tablespoon of flaxseed meal with three tablespoons of water. Let it sit for a few minutes until it thickens. You can also use applesauce. Use 1/4 cup of unsweetened applesauce for one egg. Both options work well and keep your cookies moist.
Can I make the dough ahead of time?
Yes, you can prepare the dough in advance. Simply mix the ingredients as usual and store it in the fridge. Wrap the dough tightly in plastic wrap. It can stay fresh for up to three days. When ready to bake, take it out and let it sit at room temperature for a few minutes.
Making cookies from scratch can be fun and rewarding. You learned about key ingredients like flour, cocoa powder, and chocolate hazelnut spread. I also provided steps that make the process simple. Remember to avoid common mistakes, like overmixing the dough. Lastly, be creative with flavors and variations to suit your taste. These cookies are not just a treat; they’re a chance to express your baking skills. Enjoy baking and sharing these delicious cookies!