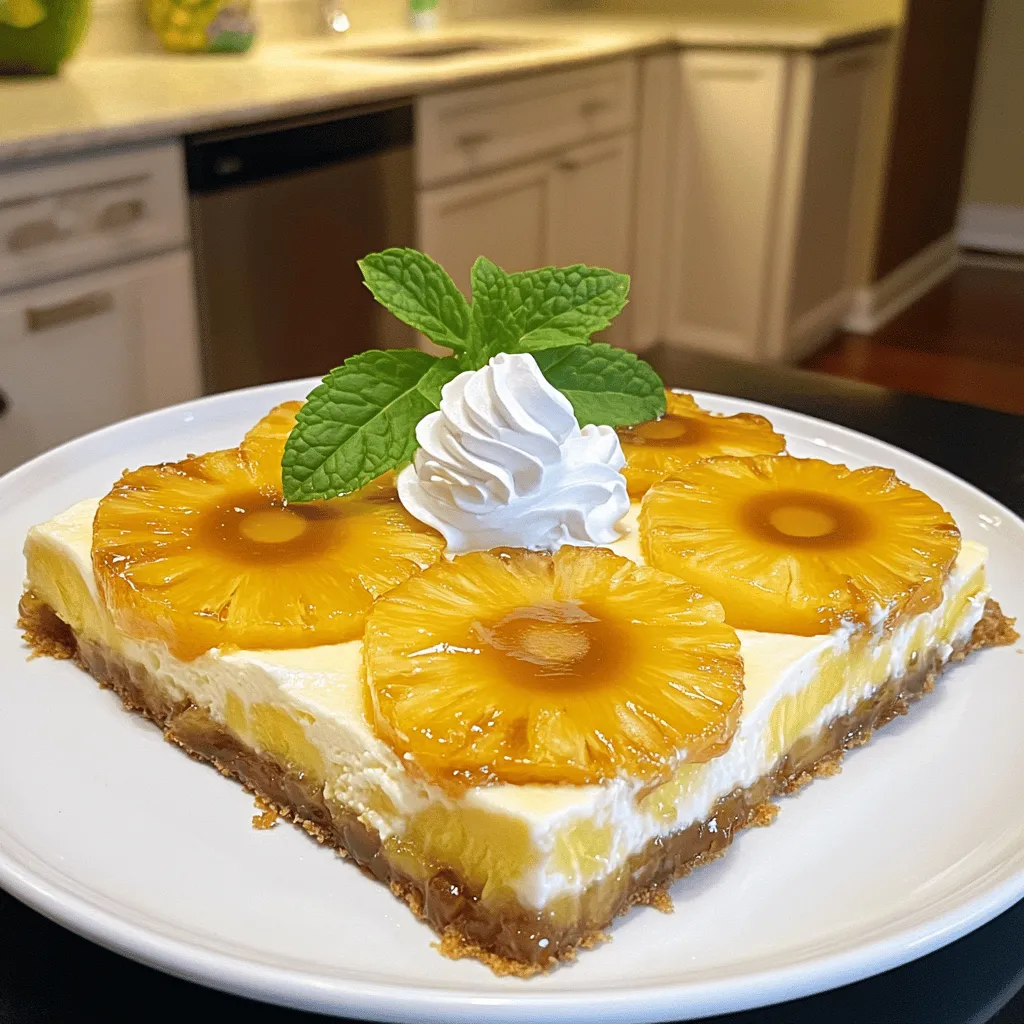
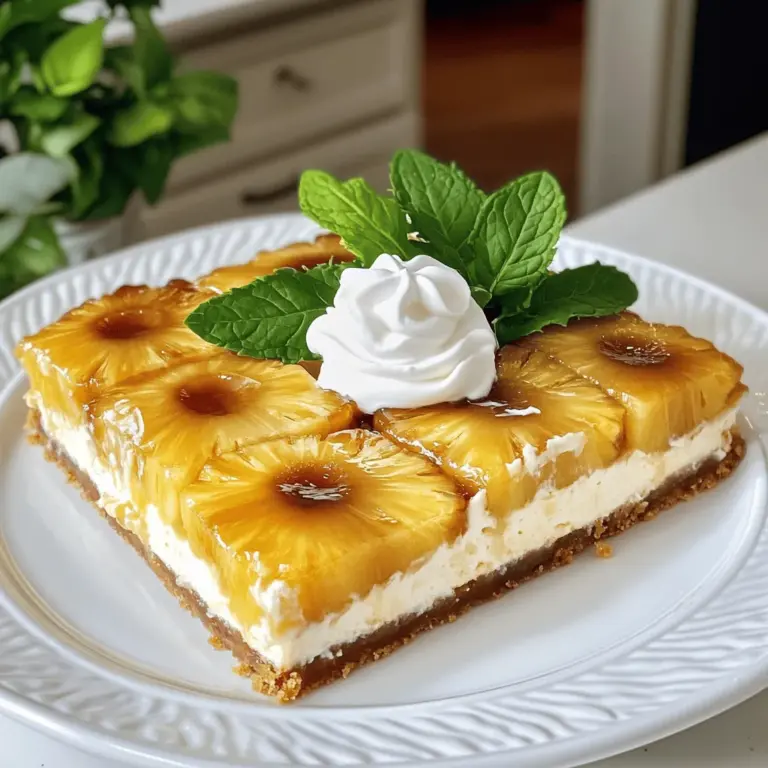
Are you ready for a dessert that’s as stunning as it is delicious? This Pineapple Upside-Down Cheesecake will impress everyone at the table. Imagine creamy cheesecake paired with sweet pineapple and a buttery crust. In this recipe, I’ll guide you step-by-step to create this tasty treat. Whether you’re a baking novice or a pro, you’ll find joy in making this dessert. Let’s get started!
Ingredients
Pineapple Topping
- 1 can of pineapple slices
- Brown sugar and unsalted butter
For the pineapple topping, start with one can of pineapple slices. You want the juice, but drain the slices first. This helps create a sweet and sticky layer. Next, you’ll need brown sugar and unsalted butter. The butter melts and combines with the sugar, making a rich caramel for the top.
Cheesecake Filling
- Cream cheese, granulated sugar, and vanilla extract
- Eggs, sour cream, and lemon juice
For the cheesecake filling, grab some cream cheese. Make sure it’s soft for easy mixing. Add granulated sugar to sweeten it up. A splash of vanilla extract brings out great flavor. Then, crack in a couple of eggs for richness. Sour cream adds creaminess, while lemon juice gives a nice zing. This mixture creates a smooth and tasty filling.
Crust
- Graham cracker crumbs
- Granulated sugar and unsalted butter
Now for the crust! Use graham cracker crumbs for a crunchy base. Mix in some granulated sugar for sweetness. Melt unsalted butter and combine it with the crumbs. Press this mixture into the bottom of your pan. This crust holds everything together and adds a delightful crunch.Enjoy your cooking!
Step-by-Step Instructions
Preheat the Oven
Set the temperature to 350°F (175°C). This step ensures your cheesecake bakes evenly.
Prepare the Pineapple Base
In a small pot, combine 2 tablespoons of unsalted butter, 1/4 cup of brown sugar, and the reserved pineapple juice. Heat over medium heat until it starts to bubble. Stir until mixed well, then remove from heat.
Arrange the drained pineapple slices in a single layer at the bottom of a 9-inch springform pan. Pour the butter-sugar mix evenly over the pineapples. Make sure they are well-coated; this adds a sweet flavor.
Make the Cheesecake Mixture
In a large bowl, beat 8 oz of softened cream cheese until smooth. Gradually mix in 1/2 cup of granulated sugar and 1 teaspoon of vanilla extract. The mixture should be creamy and well-blended.
Add 2 large eggs one at a time. Mix well after each addition. Then, stir in 1 cup of sour cream and 1 teaspoon of lemon juice. This will give your cheesecake a rich taste.
Assemble and Bake
In another bowl, combine 1 cup of graham cracker crumbs with 1/4 cup of granulated sugar. Stir in 1/2 cup of melted butter until it looks like wet sand. Press this mixture into the bottom of the springform pan over the pineapples. Bake for 10 minutes to set the crust.
Now, pour the cheesecake mixture over the crust. Spread it evenly. Bake in the preheated oven for about 50 to 60 minutes. The edges should be set, but the center can still jiggle. It will firm up as it cools.
After baking, turn off the oven and crack the door open. Let the cheesecake cool for 1 hour in the oven. Then, cool it to room temperature for 30 more minutes. Refrigerate for at least 4 hours or overnight.
For serving, run a knife around the edges of the springform pan. Release it, then flip the cheesecake onto a plate. Enjoy the beautiful caramelized pineapple topping!
Tips & Tricks
Perfecting the Cheesecake Texture
To make a smooth cheesecake, start with soft cream cheese. Beat the cream cheese until it’s creamy and fluffy. This helps the texture. Add the sugar slowly while mixing. This keeps the mixture light. When you add the eggs, do it one at a time. Mix well after each egg. This helps air mix in, making a fluffier cheesecake.
Achieving a Smooth Finish
To avoid cracks, don’t overmix the batter. Overmixing adds too much air. After you pour the batter into the pan, tap it gently on the counter. This releases air bubbles. Bake your cheesecake in a water bath if possible. This keeps the temperature even and helps prevent cracks.
Serving Suggestions
For a great finish, garnish your cheesecake with whipped cream. Add fresh mint leaves for color. This not only looks nice but adds flavor too. Serve each slice with a bit of the caramelized pineapple on top. It makes a lovely presentation.

Variations
Flavor Additions
You can make your Pineapple Upside-Down Cheesecake even more fun. Try adding chocolate chips or coconut flakes to the cheesecake filling. Each bite will burst with extra flavor. Simply fold in about a half cup of either ingredient after mixing your batter. This small tweak gives your dessert a new twist. It’s still creamy but with a delightful crunch or richness.
Alternative Crust Options
If you want to change up the crust, think outside the box. Using Oreo cookies can add a rich, chocolatey flavor. Just crush them and mix with melted butter like you would with graham crackers. For a nutty taste, try a crust made from ground almonds or pecans. This adds a nice texture and flavor to the base. Keep in mind that these crusts may bake differently, so watch them closely.
Vegan or Gluten-Free Options
You can easily adapt this recipe to fit your needs. For a vegan version, replace cream cheese with a mix of soaked cashews and coconut cream. Blend until smooth for a rich filling. For gluten-free options, use gluten-free graham crackers or almond flour for the crust. You can also use chia seeds mixed with water instead of eggs. This makes your cheesecake dairy-free and still delicious!
Storage Info
Proper Refrigeration
Store your Pineapple Upside-Down Cheesecake in the fridge. Wrap it tightly with plastic wrap. This keeps it fresh and prevents odors from mixing. You can also use an airtight container. Place it in the fridge for up to five days. This helps maintain its creamy texture and tasty pineapple topping.
Freezing Instructions
To freeze, first, let the cheesecake cool completely. Slice it into pieces for easy serving. Wrap each slice in plastic wrap. Then, place the wrapped slices in a freezer bag. Make sure to remove as much air as possible. If you prefer to freeze the whole cheesecake, wrap it well in plastic and then in aluminum foil. This method keeps it fresh for up to three months.
Shelf Life
In the fridge, your cheesecake lasts about five days. When frozen, it can stay good for three months. For the best taste, eat it within this time. Always check for any signs of freezer burn before serving. Enjoy your delicious treat!
FAQs
How long does it take to make Pineapple Upside-Down Cheesecake?
Making Pineapple Upside-Down Cheesecake takes about 30 minutes to prep and 50-60 minutes to bake. After baking, allow the cheesecake to cool for an hour in the oven. Then, chill it for at least 4 hours, or better yet, overnight. In total, expect about 6 hours from start to finish, including cooling and chilling time.
Can I make this cheesecake ahead of time?
Yes, you can make this cheesecake a day or two ahead. To store it, wrap it tightly in plastic wrap or place it in an airtight container. Keep it in the fridge until you’re ready to serve. This cheesecake tastes great after a day in the fridge, as the flavors meld together nicely.
What can I substitute for eggs in the recipe?
If you need an egg substitute, there are several options. You can use 1/4 cup of unsweetened applesauce for each egg. Mashed bananas work well too, using the same amount. Silken tofu blended until smooth also makes a great replacement. These substitutes help bind the cheesecake without altering the taste much.
You learned how to make a delicious Pineapple Upside-Down Cheesecake. We covered the key ingredients like pineapple, cream cheese, and graham cracker crumbs. The step-by-step guide ensures perfect results every time. I shared tips to improve texture and finish, along with fun variations for everyone. Remember to store your cheesecake properly for the best taste. Enjoy this treat with friends and family, and don’t hesitate to get creative with your own twists! Your dessert will surely impress.


