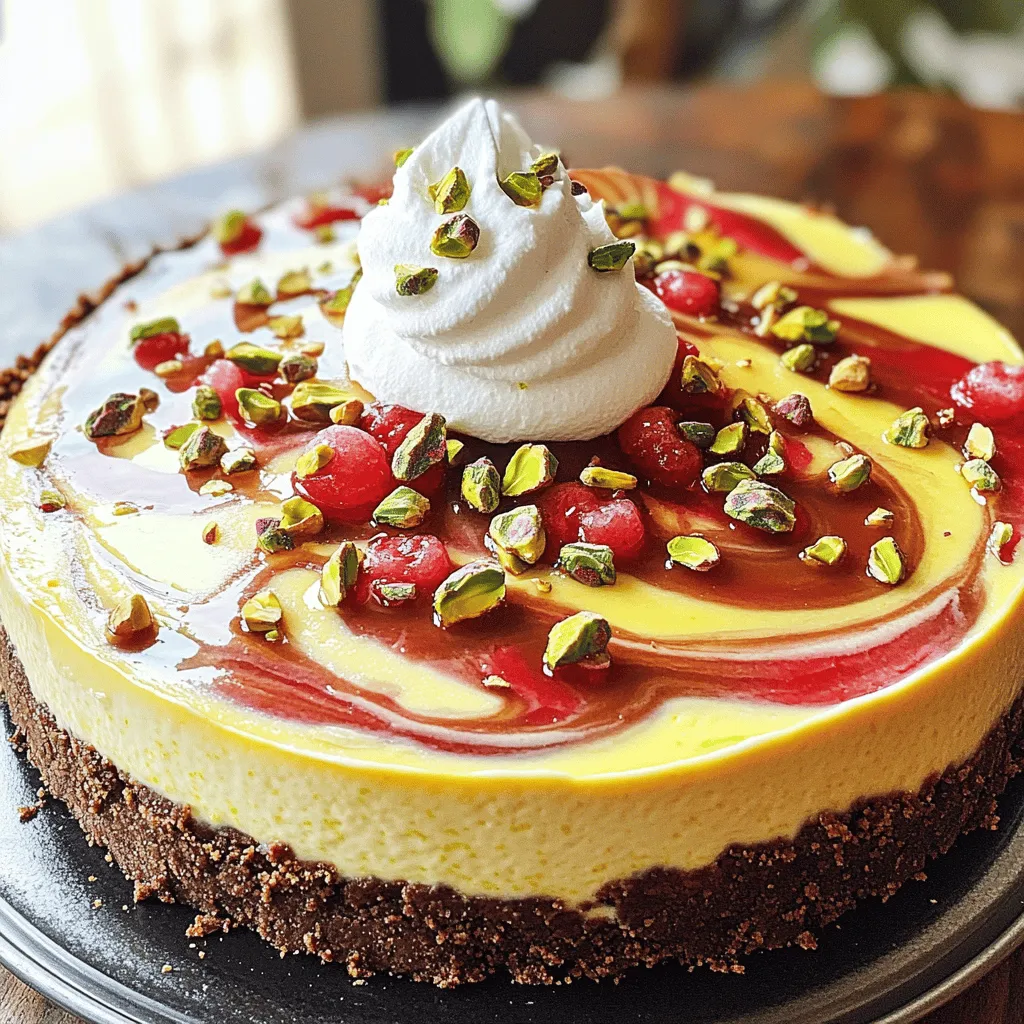
Welcome to a sweet adventure! I’m excited to share my Lemon-Lime Cherry Pistachio Cheesecake Delight recipe. This dessert combines tangy citrus, cherry flavor, and crunchy pistachios for a treat everyone will love. Whether you’re a baking novice or a pro, this step-by-step guide will make it easy. Get ready to impress your family and friends with a cheesecake that’s as bright in taste as it is in color!
Ingredients
To create the Lemon-Lime Cherry Pistachio Cheesecake, gather these simple ingredients:
– 1 ½ cups graham cracker crumbs
– ⅓ cup unsweetened cocoa powder
– ½ cup unsalted butter, melted
– 1 cup unsalted pistachios, shelled and roughly chopped
– 16 oz cream cheese, softened
– 1 cup granulated sugar
– 3 large eggs
– 1 teaspoon vanilla extract
– 1 tablespoon lemon zest
– 1 tablespoon lime zest
– ½ cup sour cream
– 1 cup fresh or frozen cherry pie filling
– Whipped cream for topping (optional)
These ingredients provide a blend of sweet and tart flavors. The graham cracker crumbs and cocoa powder create a rich crust. The cream cheese adds creaminess, while the lemon and lime zest give a bright kick. Pistachios add crunch and a lovely green color.Enjoy this delightful mix of flavors!
Step-by-Step Instructions
Preheating the Oven
Preheat your oven to 325°F (160°C). This step makes sure the cheesecake bakes evenly.
Preparing the Crust
Combine these ingredients in a bowl:
– 1 ½ cups graham cracker crumbs
– ⅓ cup unsweetened cocoa powder
– ½ cup unsalted butter, melted
Mix until the crumbs are well-coated. Press this mixture into the bottom of a 9-inch springform pan. Make sure it forms an even layer. Next, sprinkle half of the chopped pistachios over the crust. Press them slightly into the base. Set this aside.
Making the Cheesecake Filling
In another bowl, blend together:
– 16 oz cream cheese, softened
– 1 cup granulated sugar
Beat until smooth and creamy. Add in 3 large eggs, one at a time. Mix well after each one. Then stir in:
– 1 teaspoon vanilla extract
– 1 tablespoon lemon zest
– 1 tablespoon lime zest
– ½ cup sour cream
Make sure everything is fully mixed together.
Assembling and Baking
Pour the cheesecake filling over your prepared crust. Smooth it out evenly with a spatula. Next, take 1 cup of cherry pie filling and drop dollops on top. Use a knife or skewer to swirl them into the batter. This creates a lovely marbled effect. Bake in the preheated oven for 50-60 minutes. The edges should set, but the center can still jiggle slightly.
Cooling Process
When baking is done, turn off the oven. Leave the cheesecake inside with the door slightly ajar for about an hour. This cooling step helps prevent cracks. Afterward, let it cool completely at room temperature. Then, refrigerate for at least 4 hours, but overnight is best. Now, you’re ready to serve this delightful cheesecake!
Tips & Tricks
Achieving the Perfect Texture
Room temperature ingredients make a big difference. When cream cheese and eggs are warm, they mix better. This creates a smoother filling. Take the cream cheese out an hour before you start. Let the eggs sit out too. This small step helps your cheesecake feel rich and creamy.
Swirling Techniques
Want that beautiful marbled look? It’s simple. After you pour the cheesecake mix into the pan, add dollops of cherry filling. Use a knife or skewer to swirl gently. Don’t overmix! You want those pretty swirls to stay visible. This adds a pop of color and flavor.
Serving Suggestions
How you serve your cheesecake matters. Top it with whipped cream for a light touch. Sprinkle extra chopped pistachios on top for crunch. Fresh cherries or a drizzle of cherry sauce can also add flair. Serve slices on colorful plates to make them stand out. Everyone loves a pretty dessert!
Variations
Flavor Alternatives
You can switch up the flavor of this cheesecake by using different fruits. Strawberries or blueberries work great. They add a fresh taste and color. Just replace the cherry filling with your chosen fruit. You can even use mixed berries for a fun twist.
Dietary Adjustments
If you need a gluten-free option, use gluten-free graham crackers for the crust. For a vegan version, substitute cream cheese with a plant-based option. You can also use flax eggs instead of chicken eggs. These changes keep the flavor without losing the creamy texture.
Baking Times
If you use a smaller or larger pan, adjust the baking time. For smaller pans, start checking at 40 minutes. For larger pans, you may need up to 70 minutes. Always look for a slight jiggle in the center to make sure it’s done.
Storage Info
Proper Cooling Techniques
Let the cheesecake cool down slowly. After baking, turn off the oven. Leave the door slightly open. This helps prevent cracks. Let it sit in the oven for about an hour. Once it cools, take it out. Allow it to reach room temperature. This step is key before storing.
Ideal Storage Conditions
Refrigerate the cheesecake in an airtight container. This keeps it fresh and safe. If you want to freeze it, wrap it tightly in plastic wrap. Then place it in a freezer-safe bag. Use parchment paper between layers to avoid sticking. These methods help preserve the texture and taste.
Shelf Life
In the fridge, the cheesecake lasts about 5 to 7 days. In the freezer, it can stay fresh for up to 2 months. Always check for any signs of spoilage. If it looks or smells off, it’s best to toss it. Enjoy this delightful dessert at its best!
FAQs
How do I know when the cheesecake is done?
You can tell the cheesecake is done by looking for a few signs. First, the edges should be firm, while the center has a slight jiggle. This jiggle means it will set as it cools. If the top looks slightly puffed, that’s a good sign too. Use a knife to check the edges; it should come out clean but may have a little batter clinging on.
Can I make this cheesecake ahead of time?
Yes, you can make this cheesecake ahead of time! I suggest preparing it a day before you plan to serve it. Once it cools, cover it with plastic wrap and store it in the fridge. This allows the flavors to meld and improves the taste. Just remember to add any toppings before serving.
What if I don’t have cherry pie filling?
If you don’t have cherry pie filling, there are many great substitutes. You can use fresh or frozen cherries, just cook them down with a bit of sugar. You could also use other fruits, like blueberries or raspberries. These options will still give you a burst of flavor.
Can I use a different nut instead of pistachios?
Absolutely! If you prefer a different nut, almonds or walnuts work well in this recipe. They add a nice crunch and flavor. Just make sure to chop them roughly, so they mix well into the cheesecake.
This blog post covered how to make a delicious cheesecake using simple steps. We discussed the key ingredients and provided tips for creating the perfect texture. You can even try different flavors or dietary options. Remember to store your cheesecake properly for the best taste.
Enjoy experimenting in the kitchen and impressing your friends and family with this rich dessert! Now, you can create a dessert that everyone will love.