Are you ready to spice up your coffee routine? My DIY Pumpkin Coffee Creamer is a tasty way to add fall flavors to your morning brew. With simple ingredients and easy steps, you can create a creamy treat that’s perfect for any season. Plus, I’ll share tips, variations, and storage know-how to make this recipe your own. Let’s dive into making your coffee a little sweeter and a lot more flavorful!
Ingredients
To make your own pumpkin coffee creamer, you need a few key ingredients. Here’s what you’ll need:
– Heavy cream or coconut cream
– Milk or almond milk
– Pure pumpkin puree
– Maple syrup or honey
– Vanilla extract
– Pumpkin pie spice or spice mix
– Salt
Using heavy cream gives a rich flavor, while coconut cream offers a dairy-free choice. Milk or almond milk can lighten the texture. Pure pumpkin puree adds that classic fall taste. Sweeteners like maple syrup or honey bring in a lovely sweetness. Vanilla extract enhances the flavors, while pumpkin pie spice adds warmth. A pinch of salt balances everything.
This blend creates a smooth, tasty creamer that transforms your coffee. With only a few steps, you can enjoy a delightful drink.
Step-by-Step Instructions
Preparation Steps
1. Heating the cream and milk
Start by taking a medium saucepan. Add one cup of heavy cream and one cup of milk. You can also use coconut cream and almond milk if you prefer. Heat the mixture over medium-low heat. Stir it occasionally. You want it warm, but do not let it boil.
2. Mixing in pumpkin and spices
Once the cream and milk are warm, whisk in half a cup of pure pumpkin puree. Next, add a quarter cup of maple syrup or honey for sweetness. Then, stir in one teaspoon of vanilla extract and one teaspoon of pumpkin pie spice. Don’t forget a pinch of salt! Mix it all well until smooth.
3. Cooking time and consistency
Continue to heat the mixture while stirring frequently. Let it cook for about five minutes. You will notice it thickens slightly. This step brings out the rich flavors!
4. Cooling and storage
After five minutes, remove the saucepan from the heat. Let the creamer cool for a few minutes. Once cool, pour the mixture into a clean mason jar or an airtight container. You can store your pumpkin coffee creamer in the fridge. It will last up to one week. Remember to shake it well before using, as the ingredients may separate.Enjoy making your own pumpkin coffee creamer!
Tips & Tricks
Flavor Enhancements
– Using different sweeteners: You can swap maple syrup for agave nectar or stevia. Each sweetener adds a unique touch to your creamer. Experiment to find your favorite!
– Adding additional spices: Try adding a dash of nutmeg or a hint of clove. These spices will enhance the warm flavors of your pumpkin coffee creamer. You can even mix in a bit of cocoa powder for a chocolate twist!
– Making it dairy-free: If you want a dairy-free version, use coconut cream and almond milk. This keeps the rich taste and makes it suitable for all diets. The coconut adds a lovely flavor that pairs well with pumpkin.
Presentation Suggestions
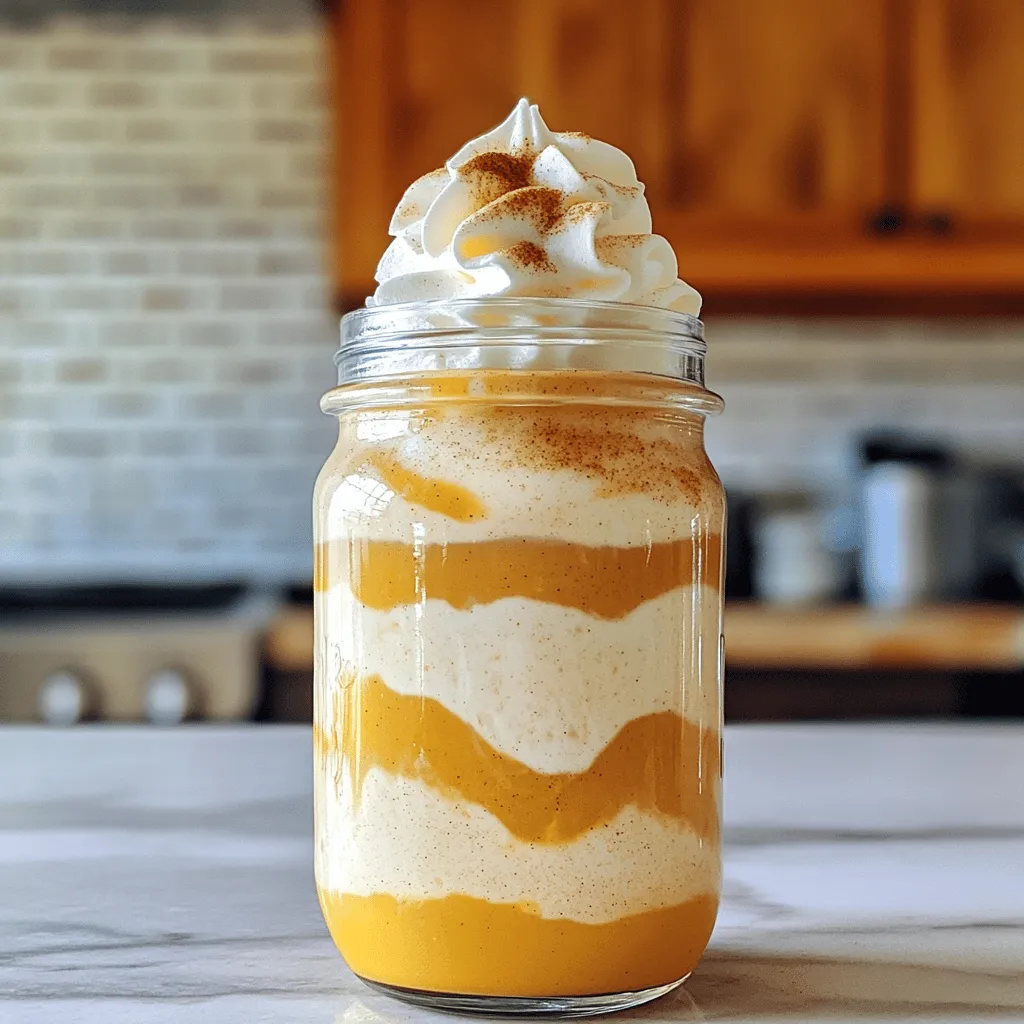
– Serving ideas: Pour the creamer into a clear glass for a beautiful look. You can layer it with coffee to show the colors. This simple touch makes your drink feel special.
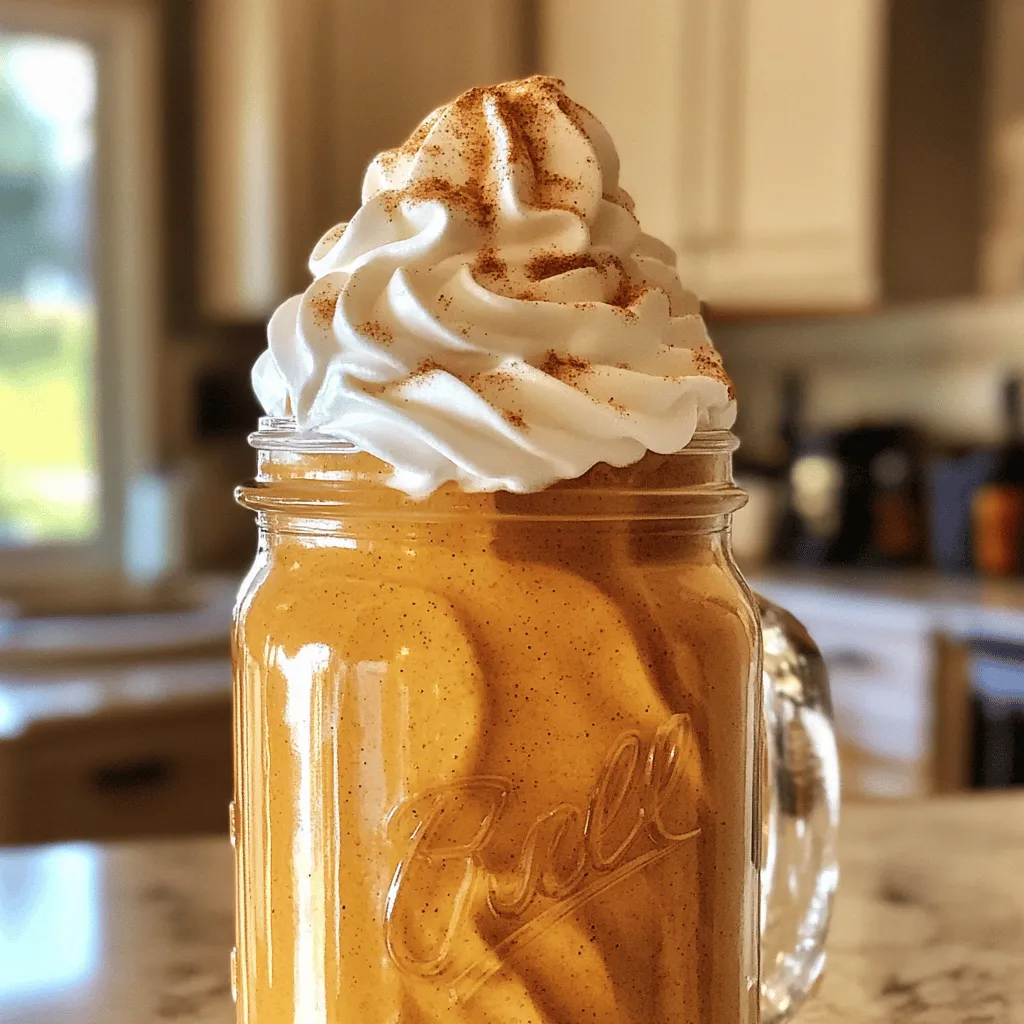
– Whipped cream topping: Add a generous dollop of whipped cream on top of your coffee. It gives a nice texture and looks great. You can sprinkle some pumpkin pie spice on the cream for extra flair.
– Garnishes: Use a cinnamon stick as a stirrer for your coffee. It adds a lovely aroma and a hint of spice. You can also add a few pumpkin seeds on top for crunch and color. This makes your drink fun and festive!
Try these tips to make your DIY pumpkin coffee creamer truly special. You can enjoy the rich flavors while impressing your friends and family.
Variations
Seasonal Options
You can switch up your pumpkin coffee creamer for the holidays. Try adding flavors like gingerbread or peppermint. A splash of nutmeg can add warmth. For a fun twist, make an iced version. Blend your creamer with ice and coffee for a cool treat. You can enjoy it all year!
Alternative Milk Choices
If you need a lactose-free option, use almond milk or oat milk. These options taste great and add a nice flavor. For nut-free choices, soy milk works well, too. You can even use coconut cream for a rich, creamy texture. Each milk makes the creamer unique, so feel free to experiment and find your favorite mix!
Storage Info
Refrigeration Guidelines
To store the creamer, first, let it cool down. You can use a clean mason jar or any airtight container. Make sure to seal it well. The pumpkin coffee creamer stays fresh in the fridge for about one week. Remember to shake it well before each use. This helps mix the ingredients, as they may separate over time.
Freezing Instructions
Yes, you can freeze pumpkin coffee creamer! This is a great way to keep it longer. Pour it into an ice cube tray for easy use. Once frozen, transfer the cubes to a freezer bag. When you want to use it, just take out the number of cubes you need.
Thaw the cubes in the fridge overnight before using. If you need it fast, you can microwave them for a few seconds. Just make sure you check and stir often. Enjoy your creamy coffee even when you freeze it!
FAQs
Common Questions
How long does homemade pumpkin coffee creamer last?
Homemade pumpkin coffee creamer lasts about one week in the fridge. Store it in a clean mason jar or airtight container. Always shake it well before using. The ingredients can separate when sitting.
Can I use a sugar alternative?
Yes, you can use a sugar alternative! Options like stevia, monk fruit, or agave syrup work well. Adjust the amount to fit your taste. Just remember that these may change the flavor slightly.
Is this recipe suitable for vegan diets?
This recipe can be made vegan. Simply swap heavy cream for coconut cream and use almond milk. You can also replace maple syrup with agave syrup. This way, you can enjoy the creamy pumpkin flavor without dairy.
This blog post covered making pumpkin coffee creamer, from the ingredients to storage. You learned about using fresh pumpkin, sweeteners, and different milk types. I shared tips on flavor, serving, and how to store your creamer well.
Final thoughts: Homemade pumpkin coffee creamer adds a fun fall twist to your coffee. Try it out and enjoy your cozy drinks!