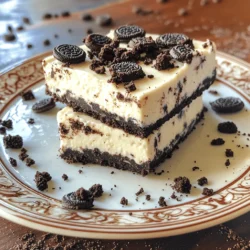
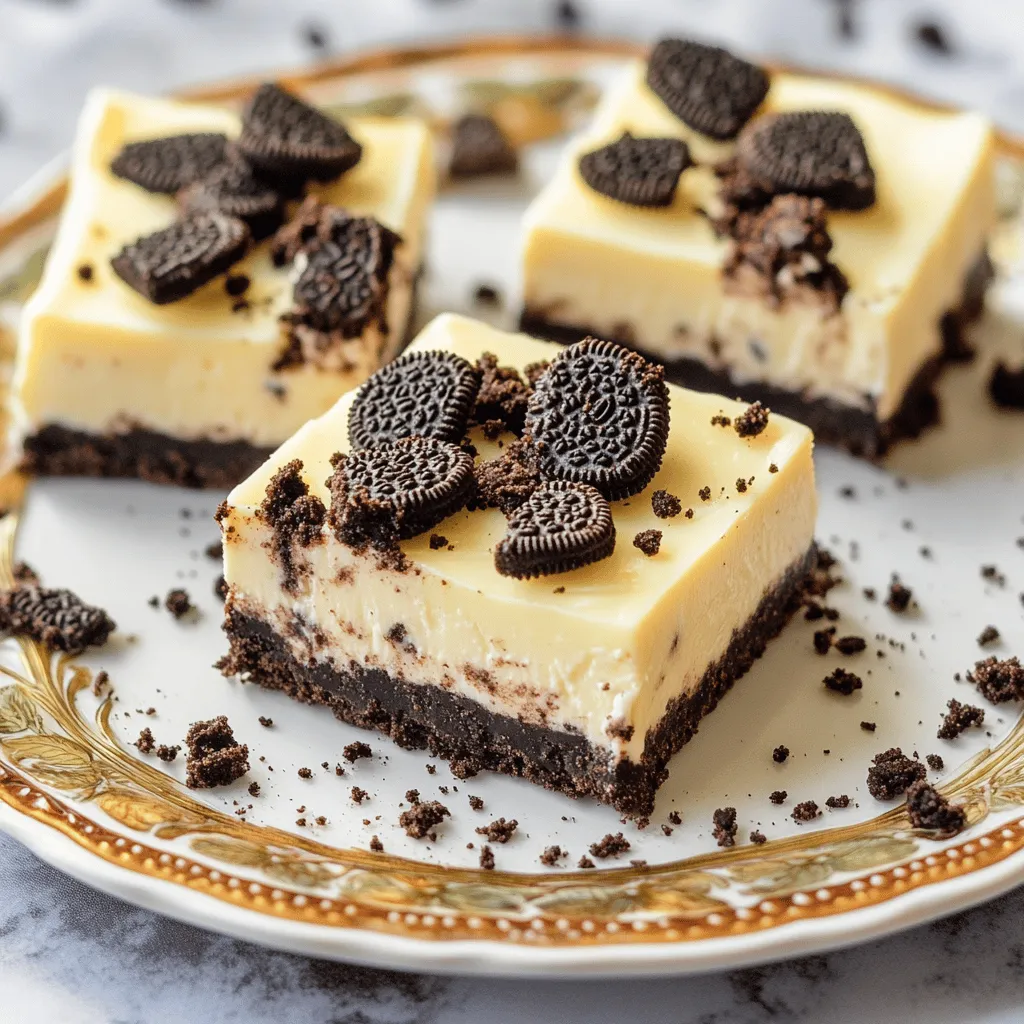
Craving a sweet treat without the oven? You’re in luck! These No-Bake Oreo Cheesecake Bars are easy, delicious, and sure to impress. With just a few key ingredients like creamy cheese and crunchy Oreos, you can whip up this delightful dessert in no time. Join me as I guide you through each simple step, plus tips and variations to make it your own. Let’s dive into this tasty adventure!
Ingredients
Key Ingredients List
- 24 Oreo cookies, crushed
- 4 tablespoons unsalted butter, melted
- 16 oz cream cheese, softened
- 1 cup powdered sugar
- 1 teaspoon vanilla extract
- 1 cup heavy cream
- 12 Oreo cookies, chopped (for filling and topping)
The main star of these bars is the Oreo cookies. You will need 24 crushed cookies for the crust. These cookies add a rich chocolate flavor. They also provide a crunchy texture that balances the creamy filling. For the crust, mix the crushed cookies with melted butter. The butter helps the crust hold together.
Next, we have cream cheese. You need 16 ounces of softened cream cheese. It forms the base of the cheesecake filling. Softened cream cheese mixes well and gives a smooth texture. This is key for a creamy dessert.
Powdered sugar sweetens the filling. You will use 1 cup to balance the flavors. Adding 1 teaspoon of vanilla extract brings warmth and depth to the cheesecake.
For fluffiness, we incorporate 1 cup of heavy cream. Whipping the cream adds air and lightness to the mixture. The heavy cream helps achieve that dreamy cheesecake texture.
Finally, you will chop 12 more Oreo cookies. These pieces add extra crunch to the filling and serve as a tasty topping.
With these ingredients, you can make a delicious no-bake treat that everyone will love!
Step-by-Step Instructions
Preparation of the Crust
To start, gather your ingredients for the crust. You need 24 crushed Oreo cookies and 4 tablespoons of melted unsalted butter.
1. In a medium bowl, mix the crushed Oreos and melted butter. Stir until the crumbs look wet and sticky.
2. Next, take a 9×9 inch baking dish. Firmly press the Oreo mixture into the bottom. Make sure it is even and compact.
3. Once done, place the crust in the fridge while you make the filling. This helps it set up nicely.
Making the Cheesecake Filling
Now, let’s create the yummy cheesecake filling. You will need 16 oz of softened cream cheese, 1 cup of powdered sugar, and 1 teaspoon of vanilla extract.
1. In a large mixing bowl, beat the softened cream cheese with a hand mixer. Keep mixing until it’s smooth and creamy.
2. Gradually add the powdered sugar and vanilla extract. Mix until everything combines well.
3. In another bowl, whip 1 cup of heavy cream until it forms stiff peaks. This will make the filling light and fluffy.
4. Carefully fold the whipped cream into the cream cheese mixture. Do this gently to keep it airy.
5. Finally, add in 12 chopped Oreo cookies. Fold them in so they are well-distributed.
Assembling the Bars
It’s time to bring it all together!
1. Pour the cheesecake filling over the chilled Oreo crust. Spread it evenly with a spatula.
2. Next, sprinkle more chopped Oreo cookies on top for a nice finish.
3. Cover the dish and place it in the fridge. Let it set for at least 4 hours. This chilling time is key for the best texture.
Once set, slice your bars into squares and serve them cold. Enjoy the deliciousness!
Tips & Tricks
Ensuring Smooth Filling
To get a smooth filling, start with softened cream cheese. Softening cream cheese makes it easy to blend. You can leave it out for about an hour before using it. If you forget, you can microwave it for 10 seconds. This helps create a creamy texture without lumps.
When you fold in the whipped cream, do it gently. Use a spatula and scoop from the bottom. This keeps the air in the whipped cream. The air adds lightness to your cheesecake bars.
Perfecting the Crust
Press the crust firmly into the dish. A strong base helps keep the bars together. Use the bottom of a measuring cup to press down evenly. If it’s too crumbly, add a bit more melted butter. This helps the crumbs stick better.
Make sure the butter is fully melted. If it’s not, it won’t coat the crumbs well. The right butter amount gives the crust a nice texture.
Serving Suggestions
For a great presentation, serve each bar on a nice plate. You can sprinkle crushed Oreo around the edges. This adds a fun touch.
You can top the cheesecake bars with whipped cream or chocolate sauce. Fresh berries also make a nice pair. They add color and a burst of flavor.
Variations
Flavor Variations
You can change the flavor of your No-Bake Oreo Cheesecake Bars easily. Try using different cookie flavors to mix things up. Mint Oreos give a fresh twist. Chocolate Oreos add a rich taste. You can also add toppings like caramel or fudge. Drizzling chocolate sauce over the bars looks great and tastes amazing. Adding fresh fruit will brighten up the dessert, too. Think strawberries or raspberries for a fruity touch.
Dietary Substitutions
If you need gluten-free options, there are choices. Look for gluten-free Oreos. They work just like regular Oreos. For a vegan version, swap the cream cheese for a plant-based cream cheese. Use coconut cream instead of heavy cream. This keeps the bars creamy and delicious without dairy. These swaps help everyone enjoy the dessert, no matter their diet.
Storage Info
How to Store the Cheesecake Bars
To keep your No-Bake Oreo Cheesecake Bars fresh, refrigeration is best. Place the bars in an airtight container. This will help them stay tasty. If you want to keep them longer, you can freeze them too. Wrap each bar in plastic wrap, then place them in a freezer-safe bag.
- Refrigeration: These bars will last for up to 5 days in the fridge.
- Freezing: If frozen, they can last for up to 3 months.
Make sure to label the container with the date. This helps you track how long they have been stored.
Tips for Reheating
If you freeze your cheesecake bars, you will need to thaw them before serving. Here are the best steps to follow:
- Thawing: Move the bars from the freezer to the fridge. Let them sit for 4-6 hours or overnight. This keeps the texture nice.
- Serving: Once thawed, serve them chilled. If you want to enhance the taste, top them with extra whipped cream or crushed Oreos right before serving.
Following these steps ensures that your cheesecake bars taste as good as when you made them!
FAQs
How long do No-Bake Oreo Cheesecake Bars need to set?
No-Bake Oreo Cheesecake Bars need at least 4 hours to set. Chilling helps the bars firm up, making them easier to slice. If you want the best results, let them chill overnight. The longer they sit, the better the texture will be. The cool temperature allows all the flavors to blend perfectly.
Can I make these bars ahead of time?
Yes, you can make these bars ahead of time. They are perfect for parties or gatherings. Prepare them a day or two in advance and store them in the fridge. This way, you can save time on the day of your event. Just remember to cover them well to keep them fresh.
What can I substitute for heavy cream?
If you need a substitute for heavy cream, you have a few options. You can use coconut cream for a dairy-free choice. Another option is to mix milk with butter, using 3/4 cup of milk and 1/4 cup of melted butter. This will help you achieve a similar texture and taste in your bars.
You now know how to make No-Bake Oreo Cheesecake Bars. We covered the key ingredients, preparation steps, and tips for a smooth finish. I shared ways to customize your bars and how to store them properly. These cheesecake bars are easy to make and can impress anyone. Remember, use softened cream cheese for the best texture. Enjoy making these treats and experimenting with your own flavors! Your friends will love them, and you’ll feel proud of your work.