. This link will take you to all the details you need to make these tasty nachos. Grilled Street Corn Nachos are tasty and easy to make. You now know the key ingredients, simple steps, and helpful tips. With variations for dietary needs and flavor twists, you can customize this dish. Remember to store leftovers properly and enjoy them later. These nachos will be a hit at your next gathering. Try them out and impress your friends with your cooking skills!](https://chellesrecipes.com/wp-content/uploads/2025/07/d853dca9-9d4c-4ead-9314-924111ac7d9e-768x768.webp)
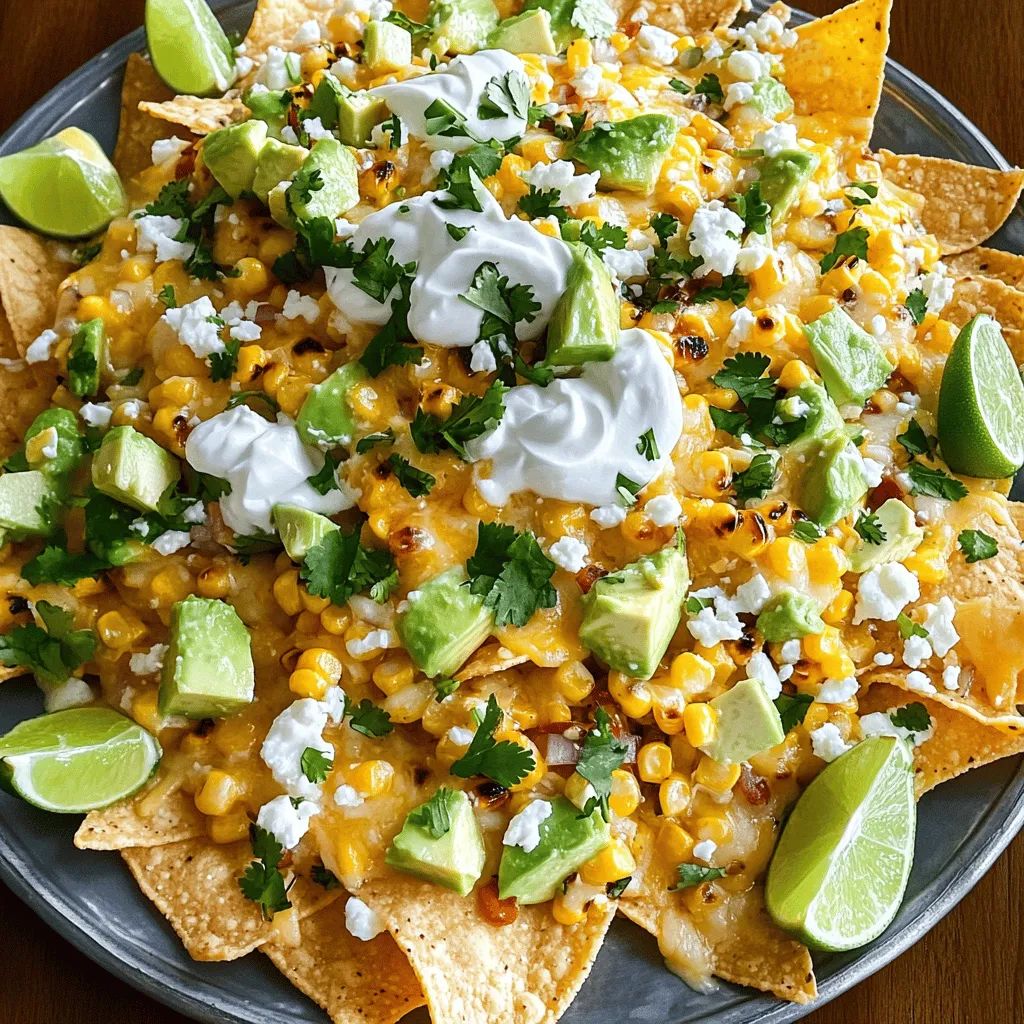
Get ready for a flavor explosion with Grilled Street Corn Nachos! This dish combines sweet, smoky corn with the crunch of tortilla chips and gooey cheese. With simple ingredients and easy steps, you can whip up this tasty snack in no time. Perfect for gatherings or a cozy night in, these nachos will impress your friends and family. Let’s dive into the delicious details that will take your nacho game to the next level!
Ingredients
List of Required Ingredients
- 4 ears of corn, husked
- 1 tablespoon olive oil
- 1 teaspoon chili powder
- 1 teaspoon smoked paprika
- 1 lime, juiced
- 1 cup tortilla chips
- 1 cup shredded cheese (cheddar or a Mexican blend)
- 1/2 cup crumbled feta cheese (optional)
- 1/4 cup sour cream
- 1/4 cup fresh cilantro, chopped
- 1 avocado, diced
- Salt and pepper to taste
Gathering the right ingredients makes a big difference. Fresh corn is key. It brings sweetness and crunch to your nachos. Olive oil helps the spices stick and enhances flavor. Chili powder and smoked paprika add warmth and depth. Lime juice brightens everything up, making your taste buds dance.
Tortilla chips are the base for your nachos. Choose sturdy ones; they need to hold all the toppings. Shredded cheese creates that gooey, melty goodness. Feta cheese adds a creamy, tangy kick if you choose to include it. Sour cream gives a cool touch, while cilantro and avocado add freshness.
This mix of flavors creates a tasty explosion in every bite.
Step-by-Step Instructions
Preparing the Corn
- Preheat the grill to medium-high heat.
- Brush the corn with olive oil and season with chili powder, smoked paprika, salt, and pepper.
Getting the corn ready is simple and fun. The oil helps the spices stick and adds flavor. Make sure to cover the corn well. The spices give the corn a nice kick. You want to taste that chili and paprika in every bite.
Grilling the Corn
- Grill the corn until charred and tender.
Place the corn on the grill and cook it for about 10-15 minutes. Turn it often so it cooks evenly. Look for those nice char marks; they mean flavor! When it feels soft, it’s done. Remove it from the grill and let it cool down a bit.
Assembling the Nachos
- Cut the corn off the cob and mix with lime juice.
- Layer tortilla chips and toppings before broiling.
Once the corn cools, carefully cut the kernels off the cob. Toss the corn in a bowl with lime juice. This adds zest and keeps it fresh. On a baking sheet, spread out the tortilla chips. Sprinkle the shredded cheese over the chips. Add the grilled corn mix on top.
Now, place the nachos under the broiler for about 3-5 minutes. Watch them closely! You want the cheese to melt and bubble. When they’re golden and gooey, take them out. Finally, add dollops of sour cream, crumbled feta, diced avocado, and chopped cilantro.
This step makes every bite a tasty flavor explosion!
Tips & Tricks
Perfecting Grilled Corn
To get the best char and flavor on your corn, start with fresh ears. The natural sugars in fresh corn caramelize nicely on the grill. Brush each ear with olive oil. This not only adds flavor but also helps achieve that beautiful char. Season with chili powder and smoked paprika for a smoky kick. Try different seasonings like garlic powder or lime zest for a unique twist.
Cheese Melting Tips
For gooey cheese, use a mix of cheeses. Cheddar melts well, but a Mexican blend adds depth. Spread the cheese evenly over the chips before broiling. Keep an eye on the nachos as they broil. You want the cheese to be melted but not burnt. If you want a different flavor, try queso blanco or pepper jack for a spicy kick.
Serving Suggestions
Presentation matters! Serve the nachos on a large platter. Top with sour cream, crumbled feta, diced avocado, and chopped cilantro. Add extra lime wedges for a zesty touch. Pair these nachos with a refreshing drink like iced tea or a light beer. They also go well with fresh salsa or guacamole on the side.
Variations
Ingredient Substitutions
For a twist on the classic recipe, you can change a few ingredients. Try using black beans or grilled chicken as alternative proteins. Both add great flavor and nutrition. If you want a dairy-free option, use almond or cashew cheese instead of regular cheese. These swaps keep the taste while catering to different diets.
Flavor Enhancements
Want some heat? Add jalapeños or a splash of hot sauce. These spicy additions bring life to your nachos. If you prefer a sweet touch, corn salsa or diced mango pairs well with the grilled corn. Both options create a delightful balance of flavors.
Dietary Adaptations
You can easily make these nachos vegan. Just skip the cheese and sour cream, and use avocado instead. For gluten-free nachos, simply choose gluten-free tortilla chips. These adaptations ensure everyone can enjoy this tasty dish without missing out on flavor.
Storage Info
How to Store Leftovers
To keep nachos fresh, store them in an airtight container. Place a paper towel inside to absorb moisture. This helps maintain crispiness. Refrigerate your nachos within two hours of serving. They will last for about 2-3 days. Keep in mind that cheese and chips may soften over time.
For reheating, use an oven instead of a microwave. Preheat it to 350°F (175°C). Spread the nachos on a baking sheet. Heat for about 10 minutes, or until warm. This will help restore some of their original texture. Avoid soggy nachos by reheating them slowly.
Best Practices for Freezing
Can you freeze nachos? Yes, you can! However, it’s best to freeze toppings separately from the chips. Freeze the corn and cheese mixture in airtight bags. This way, you can keep the chips crispy.
When you’re ready to enjoy your nachos, thaw the toppings in the fridge overnight. Then, assemble your nachos and reheat them as mentioned before. This method helps keep your nachos tasty and enjoyable.
FAQs
What are Grilled Street Corn Nachos?
Grilled street corn nachos are a fun twist on classic nachos. They use grilled corn, tortilla chips, and cheese. The flavors burst with chili, lime, and cheese goodness. You get a mix of smoky, sweet, and tangy tastes. Each bite is a flavor explosion that makes your mouth water.
How can I make Grilled Street Corn Nachos healthier?
You can make these nachos lighter by using less cheese. Try using a low-fat cheese option. Swap sour cream for Greek yogurt for extra protein. You can also add more veggies, like diced tomatoes or jalapeños. These small changes can cut calories and fat while keeping the taste great.
Can I use canned corn instead of fresh?
You can use canned corn, but fresh is better. Fresh corn has a crunch and sweet taste. Canned corn may be softer and less flavorful. If you use canned corn, drain it well and rinse it to remove extra salt. This way, you still get a tasty nacho dish.
What dips pair well with Grilled Street Corn Nachos?
For dips, I recommend salsa, guacamole, or a creamy cheese sauce. A spicy chipotle dip adds a nice kick. You can also try a fresh avocado dip for a cool contrast. These dips enhance the nachos and make them even more fun to eat.This link will take you to all the details you need to make these tasty nachos.
Grilled Street Corn Nachos are tasty and easy to make. You now know the key ingredients, simple steps, and helpful tips. With variations for dietary needs and flavor twists, you can customize this dish.
Remember to store leftovers properly and enjoy them later. These nachos will be a hit at your next gathering. Try them out and impress your friends with your cooking skills!
. This link will take you to all the details you need to make these tasty nachos. Grilled Street Corn Nachos are tasty and easy to make. You now know the key ingredients, simple steps, and helpful tips. With variations for dietary needs and flavor twists, you can customize this dish. Remember to store leftovers properly and enjoy them later. These nachos will be a hit at your next gathering. Try them out and impress your friends with your cooking skills!](https://chellesrecipes.com/wp-content/uploads/2025/07/d853dca9-9d4c-4ead-9314-924111ac7d9e-250x250.webp)
