Looking for a sweet treat that’s easy to make? This Mini Crème Brûlée Cheese Recipe is a delightful twist on a classic dessert. With simple ingredients and straightforward steps, you’ll impress your friends and family in no time. Whether you prefer a creamy texture or a crispy top, I’ll guide you through every little detail. Get ready to indulge in a tasty bite-sized dessert that everyone will love!
Ingredients
List of Ingredients
- 8 oz (225g) cream cheese, softened
- 1/2 cup (100g) granulated sugar
- 1/2 cup (120ml) heavy cream
- 1 teaspoon vanilla extract
- 2 large egg yolks
- 1 tablespoon cornstarch
- 1/4 cup (50g) brown sugar (for topping)
- Fresh berries (for garnish, optional)
- Mint leaves (for garnish, optional)
Ingredient Notes
Choosing the right cream cheese is key. Look for a full-fat version. It gives the best flavor and texture. Avoid low-fat cream cheese. It can make your dessert too watery and less rich. If you need a substitute for heavy cream, use coconut cream or blended silken tofu. These options can help you keep the creamy texture.
Serving Size and Yield
This recipe makes 12 mini cheesecakes. Each cheesecake is a perfect bite-sized treat. You can serve them as a dessert for a small gathering or a special dinner. Each portion is small, but very satisfying.
Step-by-Step Instructions
Preparation Steps
1. Preheat your oven to 325°F (163°C). This step is key.
2. Get out a muffin tin. Line it with mini cupcake liners or grease it lightly.
3. In a bowl, beat the softened cream cheese with granulated sugar. Use an electric mixer. Mix until smooth and creamy.
4. Add heavy cream and vanilla to the cream cheese mix. Stir until it’s all combined.
5. In another bowl, whisk egg yolks and cornstarch. Make sure it’s smooth.
6. Gradually add this mix to the cream cheese blend. Beat until fully mixed.
Baking Process
1. Pour the cheesecake batter into the muffin tin. Fill each liner about 3/4 full.
2. Place the muffin tin in a larger baking dish. Fill the dish with hot water. The water should reach halfway up the sides of the muffin tin. This creates a water bath.
3. Bake in the preheated oven for about 20-25 minutes. The edges should be set, but the centers will jiggle slightly.
4. When done, remove the baking dish. Let the mini cheesecakes cool at room temperature for about 30 minutes.
5. After cooling, transfer them to the fridge. Chill for at least 2 hours to set.
Finishing Touches
1. Once the cheesecakes are set, sprinkle a thin layer of brown sugar on top of each.
2. Use a kitchen torch to caramelize the brown sugar. Watch it melt and bubble. This creates a crispy top.
3. Let it cool for a couple of minutes to harden.
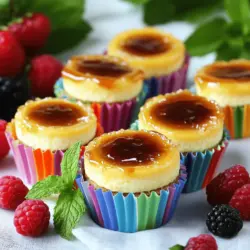
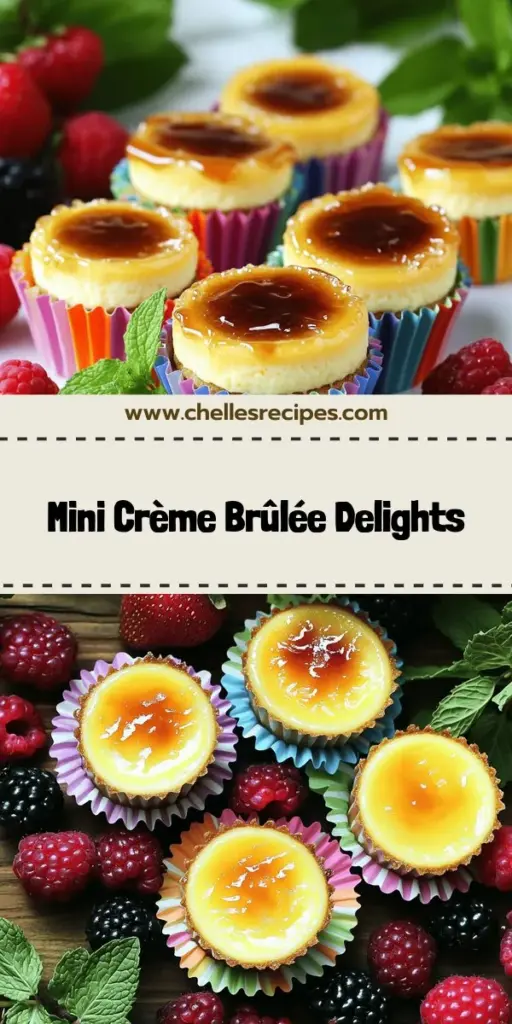
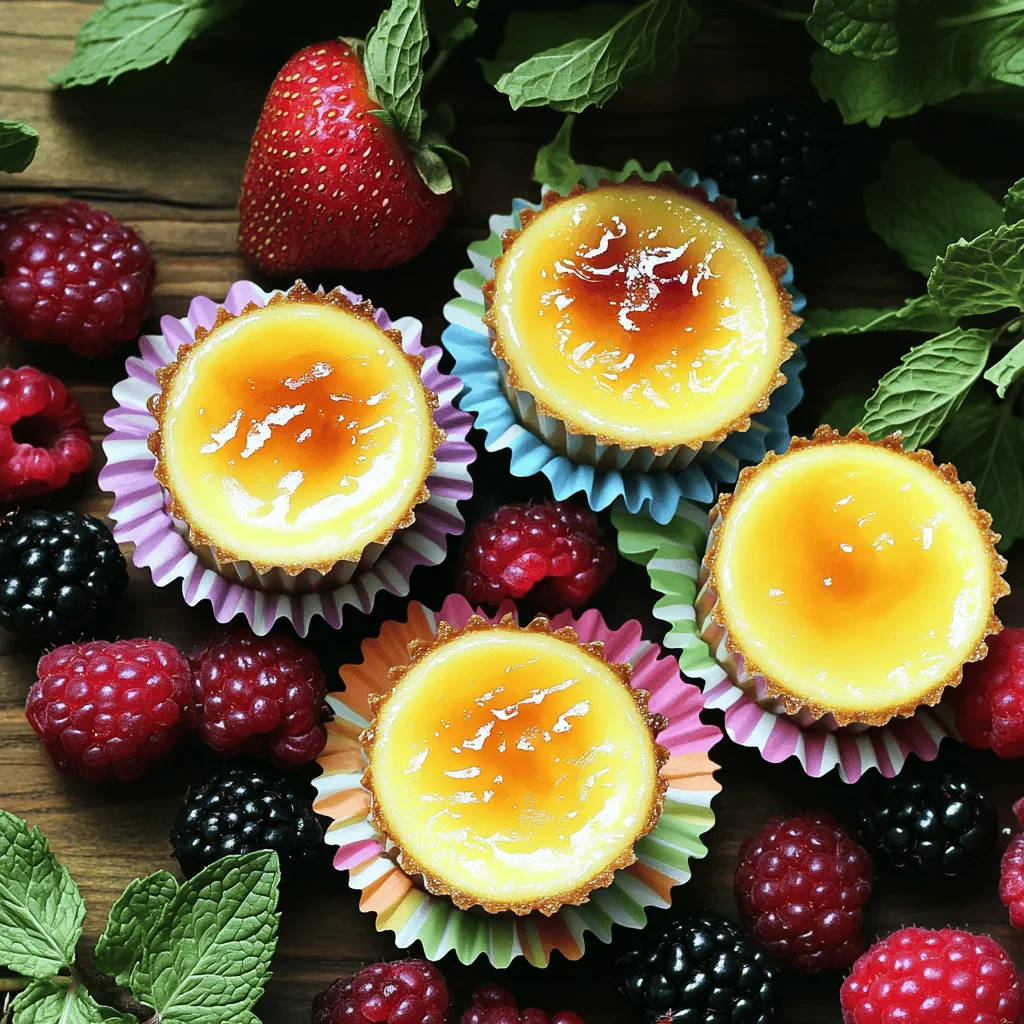
4. Optionally, you can garnish with fresh berries and mint leaves. This adds color and freshness.Enjoy your mini crème brûlée cheesecakes!
Tips & Tricks
Perfecting the Texture
To get that creamy texture, use softened cream cheese. Beat it well with sugar until smooth. Make sure you mix in the heavy cream slowly. This helps keep the mix light and airy. Always check for lumps. If you see any, keep mixing until smooth.
Common baking mistakes can ruin your mini treats. First, don’t overbake them. They should jiggle a bit in the center when done. Second, make sure to create a water bath. This keeps the heat even and prevents cracks. It’s simple: place the muffin tin in a larger dish filled with hot water.
Caramelization Techniques
You have two main ways to caramelize the sugar: using a kitchen torch or a broiler. A kitchen torch gives you more control. Hold it a few inches above the sugar and move it in circles until it melts. If you use a broiler, watch closely. The sugar can burn fast.
For the perfect crispy top, sprinkle a thin layer of brown sugar. Don’t make it too thick. A thin layer melts better and forms a nice crust. Let it cool for a few minutes after caramelizing. This will let the top harden and form that iconic crunch.
Serving Recommendations
Pair your mini crème brûlée cheesecakes with drinks like coffee or sweet dessert wine. The rich flavors work well together. For a fun twist, try serving with fruit cocktails.
Make your presentation shine for special occasions. Use fresh berries on top and a sprig of mint. This adds color and flair. You can also serve them on a nice platter. A sprinkle of powdered sugar around the cheesecakes can make them pop.
Variations
Flavor Variations
You can change the cheese to fit your taste. Cream cheese is great, but mascarpone or goat cheese can add a twist. Mixing in fruit purees can also bring fun flavors. Try raspberry or mango purees for a fruity kick. You can also use almond or coconut extracts for a unique taste.
Dietary Substitutes
If you’re gluten-free, this recipe works well. All the ingredients are naturally gluten-free. For dairy-free options, use cashew cream or coconut cream instead of heavy cream. You can also find dairy-free cream cheese at some stores. For a low-sugar treat, you can replace granulated sugar with a sugar substitute like stevia or erythritol.
Portion Size Adjustments
You can make smaller or larger versions of these treats. For mini cheesecakes, use a standard muffin tin. For larger ones, use a pie dish. Just adjust the baking time. Mini versions bake for about 20-25 minutes. Larger ones may need 30-40 minutes. Always check if the edges are set and the center jiggles slightly.
Storage Info
Refrigeration Guidelines
Mini crème brûlée cheesecakes last about five days in the fridge. To keep them fresh, store them in airtight containers. This prevents them from absorbing other odors. Make sure to let them cool completely before sealing.
Freezing Instructions
You can freeze mini cheesecakes for up to two months. First, let them cool fully. Then, wrap each cheesecake in plastic wrap and place them in a freezer-safe bag. To serve, thaw them overnight in the fridge. Enjoy them cool or let them sit at room temperature for a few minutes.
Reheating Tips
You should not reheat mini cheesecakes. They taste best cold. If you have leftovers, enjoy them as they are. You can also top them with fresh berries for a tasty treat.
FAQs
Can I use a different type of cheese?
Yes, you can. Cream cheese adds a rich and creamy texture. You can try mascarpone for a smoother flavor. Ricotta works too, but it may change the texture. Just make sure the cheese is soft and smooth to mix well.
What do I do if I don’t have a kitchen torch?
If you lack a kitchen torch, use your oven’s broiler. Sprinkle brown sugar on top of the cheesecakes. Place them under the broiler for a few minutes. Watch closely to prevent burning. You want that nice golden color without charring.
How can I make this recipe ahead of time?
You can prepare the mini cheesecakes a day in advance. After baking, let them cool. Then, chill them in the fridge for at least two hours. Just wait to caramelize the sugar until right before serving. This keeps the topping crispy.
What if I don’t have mini cupcake liners?
If you don’t have mini cupcake liners, grease the muffin tin well. This helps the cheesecakes come out easily. You can also use silicone molds if you have them. They work great and are easy to clean.
Can I make these gluten-free?
Yes, this recipe is naturally gluten-free. Just make sure your ingredients, like sugar and cornstarch, are gluten-free. Enjoy these tasty treats without any worries!
How should I store the leftovers?
Keep leftovers in an airtight container in the fridge. They last for about three days. If you want, you can freeze them too. Just wrap them well and store them in the freezer for up to a month.
This blog post covered how to create delicious mini cheesecakes, from ingredients to storage tips. We explored flavor options and how to get the perfect texture. Remember to store them right for the best taste.
With these steps, you can impress anyone with your baking skills. Get creative with your flavors and enjoy every bite of these tasty treats!