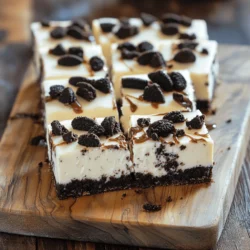
No-Bake Oreo Cheesecake Bars
Make dessert a breeze with these delicious No-Bake Oreo Cheesecake Bars! This easy recipe features a creamy filling made with cream cheese, whipped cream, and crushed Oreos, all resting on a buttery Oreo crust. Perfect for any occasion, they require only 20 minutes of prep and are guaranteed to impress your guests!