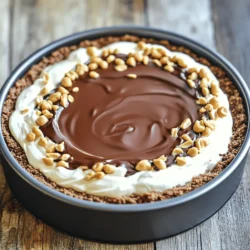
No-Bake Chocolate Peanut Butter Cheesecake
Indulge in the rich flavors of a No-Bake Chocolate Peanut Butter Cheesecake that is easy to make and utterly delicious! With a creamy peanut butter filling and a chocolate graham cracker crust, this dessert is perfect for any occasion. Learn how to create this delightful treat with simple ingredients and straightforward steps. Click to discover the full recipe and impress your friends and family with this irresistible cheesecake!