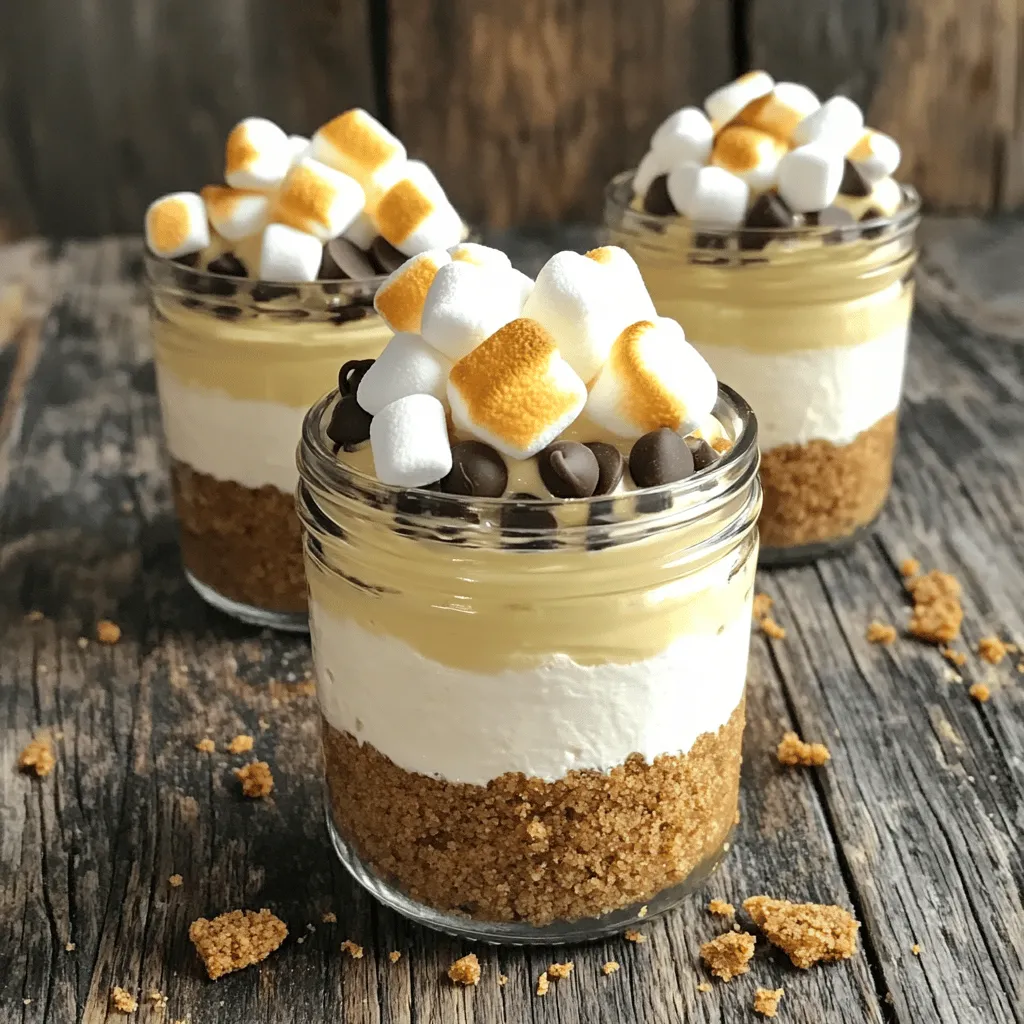
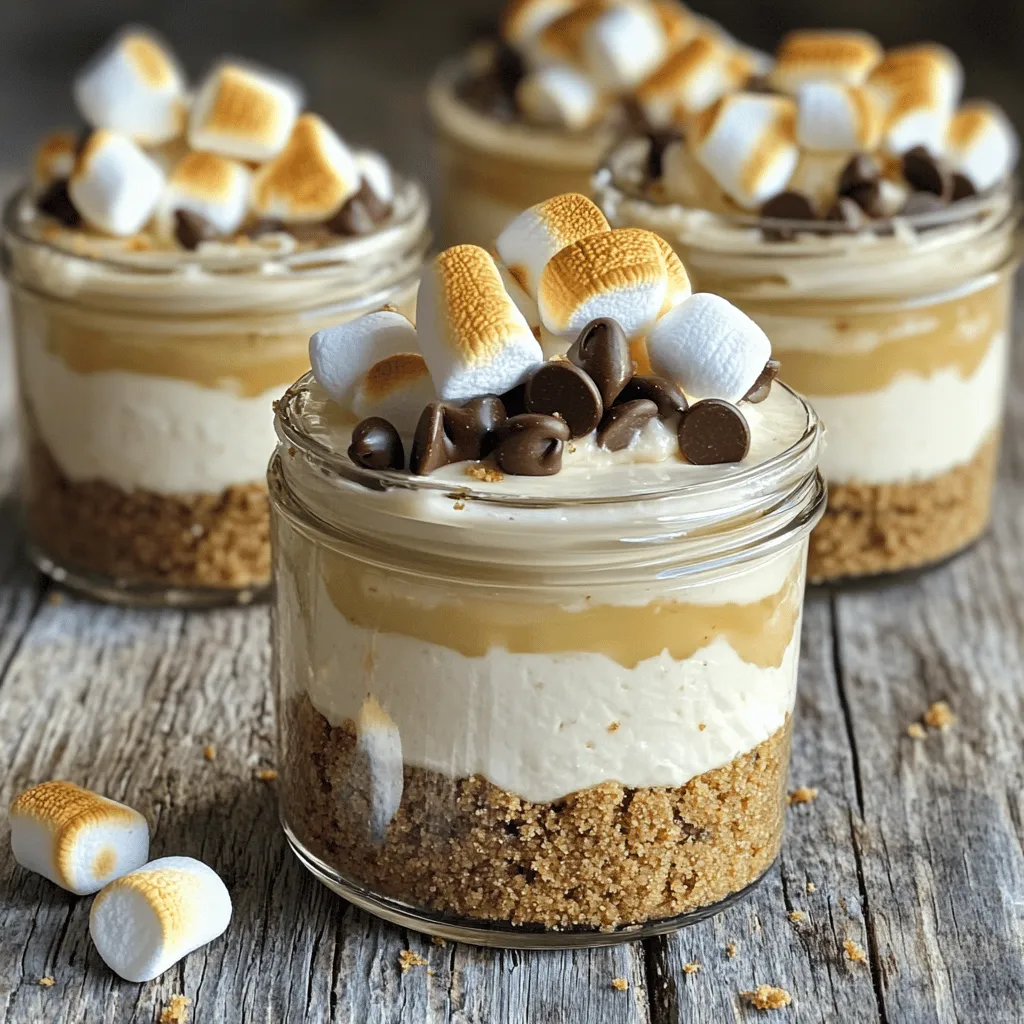
If you crave a sweet treat that’s simple and delicious, you’ll love these No Bake S’mores Cheesecake Jars. This easy dessert combines creamy cheesecake, crunchy graham crackers, and gooey marshmallows, all in a fun jar! No baking is needed, making it perfect for all skill levels. Follow me as I guide you through each step to create this delightful dessert that will impress your friends and family. Let’s dive in!
Ingredients
You need fresh ingredients to make the No Bake S’mores Cheesecake Jars. Here’s what you’ll need:
– 1 cup graham cracker crumbs
– 4 tablespoons unsalted butter, melted
– 2 cups cream cheese, softened
– 1 cup powdered sugar
– 1 teaspoon vanilla extract
– 1 cup heavy whipping cream
– 1 cup mini marshmallows
– 1 cup chocolate chips (semi-sweet or milk chocolate)
– Extra graham cracker pieces for topping
– Toasted marshmallows for garnish (optional)
Each ingredient plays a key role in creating that rich, s’mores flavor. The graham cracker crumbs make a perfect, crumbly base. The cream cheese adds creaminess, while powdered sugar gives it sweetness. Vanilla extract enhances the taste, and heavy whipping cream adds a light, fluffy texture.
Mini marshmallows and chocolate chips bring the classic s’mores elements. Extra graham cracker pieces on top give a nice crunch. If you want, toasted marshmallows add a fun touch. Remember, quality ingredients make all the difference.
Step-by-Step Instructions
Preparing the Crust
First, mix 1 cup of graham cracker crumbs with 4 tablespoons of melted unsalted butter. Stir this well until it looks like wet sand. Next, divide this mixture among your jars. Press it down firmly to form a solid base.
Making the Cheesecake Filling
Now, grab a large bowl. Beat 2 cups of softened cream cheese and 1 cup of powdered sugar together. Keep mixing until it becomes smooth and creamy. Then, add 1 teaspoon of vanilla extract and blend it in well.
Whipping the Cream
In another bowl, pour 1 cup of heavy whipping cream. Whip it until you see stiff peaks form. This step is key for a light texture. Gently fold this whipped cream into the cheesecake mixture. Be careful not to deflate it too much.
Layering the Cheesecake
Start layering! Spoon a layer of the cheesecake filling over your crust in each jar. Then, add a layer of 1 cup of mini marshmallows and a layer of 1 cup of chocolate chips. Repeat this until you reach the top, finishing with cheesecake and marshmallows.
Chilling the Jars
Cover each jar tightly with lids or plastic wrap. Place them in the fridge for at least 4 hours, but overnight is best. This time helps the flavors mix and the cheesecake to set.
Garnishing and Serving
Once set, take the jars out. Top each one with extra graham cracker pieces and a few mini marshmallows. For a fun touch, you can toast the marshmallows using a kitchen torch. This adds that classic s’mores flavor and looks great!
Tips & Tricks
Ensuring Cream Cheese Smoothness
Use softened cream cheese for the best results. Cold cream cheese will lump and not blend well. To soften it, leave it at room temperature for about 30 minutes. If you are in a hurry, cut it into small cubes. Microwave it for about 10 seconds at a time until smooth. This step makes your cheesecake filling creamy and rich.
Ideal Whipping Cream Techniques
Whipping cream is key to a light texture. To achieve stiff peaks, start with cold heavy cream. Use a chilled bowl and beaters to help. Whip on medium speed until you see peaks forming. This usually takes about 3 to 5 minutes. Stop when the peaks stand straight up and do not fall. Gently fold this whipped cream into your cheesecake mixture. Be careful not to deflate it!
Presentation Tips
Make your dessert look as good as it tastes! Use clear jars to show off the layers. Top each jar with a sprinkle of graham cracker pieces and mini marshmallows. For a fun touch, toast some marshmallows with a kitchen torch. This adds a smoky flavor and a nice look. Serve these jars chilled for a refreshing treat.
Variations
Flavor Variations
You can mix up the flavors in your no bake s’mores cheesecake jars. Try using dark chocolate instead of semi-sweet or milk chocolate for a richer taste. You can even experiment with flavored chocolate, like caramel or hazelnut.
Adding fruit layers is another fun idea. Try layering in fresh strawberries or bananas. These fruits add a nice sweet and tangy contrast to the rich cheesecake.
Gluten-Free Options
If you need a gluten-free dessert, use gluten-free graham crackers. They provide the same great crust without any gluten. Simply crush them and mix with melted butter just like you would with regular graham crackers.
Vegan Alternatives
For a vegan version, you can swap out dairy and eggs. Use vegan cream cheese and coconut cream instead of heavy whipping cream. This keeps the texture creamy while being plant-based. You can also use maple syrup in place of powdered sugar for natural sweetness.
Storage Info
Proper Storage Techniques
To keep your no bake s’mores cheesecake jars fresh, follow these steps:
– Cover each jar tightly with a lid or plastic wrap.
– Store them in the refrigerator.
– Keep them in the back of the fridge, where it is coldest.
Avoid opening the jars often. This keeps the air out and the flavor in.
Shelf Life
These cheesecake jars last for about 5 days in the fridge. The flavors will deepen as they sit. However, for the best taste, enjoy them within the first 3 days. After that, the marshmallows may get a bit chewy.
Freezing Information
You can freeze these jars, but there are some tips:
– Freeze them before adding the marshmallow garnish.
– Use freezer-safe jars or containers.
– When ready to eat, let them thaw in the fridge overnight.
This way, you keep the texture just right.
FAQs
Can I make these jars ahead of time?
Yes, you can prepare these jars a day in advance. This lets the flavors blend well. Just follow these tips for best results:
– Chill time: Refrigerate the jars for at least four hours. Overnight is even better.
– Cover well: Use lids or plastic wrap to keep them fresh.
– Add toppings later: Wait to add the graham cracker pieces and marshmallows until just before serving. This keeps them crispy.
How do I prevent the layers from mixing?
To keep the layers neat, follow these steps:
– Layer gently: When adding each layer, spoon it in slowly.
– Use a piping bag: For more control, use a piping bag to add the cheesecake layer.
– Chill between layers: If you’re worried, chill the jars for 30 minutes after each layer. This helps them set before adding the next one.
Can I substitute ingredients?
You can! Here are some great swaps:
– Cream cheese: Use Greek yogurt for a lighter option.
– Graham crackers: Try crushed cookies or gluten-free options.
– Marshmallows: Use mini chocolate-covered marshmallows for a twist.
– Chocolate chips: Dark chocolate or white chocolate can change the flavor.
What if I don’t have jars?
If you don’t have jars, try these serving ideas:
– Bowls: Use small bowls for a casual look.
– Glasses: Clear glasses can showcase the layers nicely.
– Plates: Layer on a plate for a fun dessert display. Just be careful when serving!
This blog post covered all the steps to make delicious cheesecake jars. You learned about the ingredients, from graham cracker crumbs to mini marshmallows. I shared tips for a smooth filling and a beautiful presentation. Explore variations to make these jars your own, whether you want vegan options or fruity twists. Remember to store them properly to keep them fresh. Enjoy making and sharing this fun treat. It’s easy and sure to impress everyone!