No-Bake Peanut Butter Oat Bars with Chocolate Delight

WANT TO SAVE THIS RECIPE?

Craving a sweet treat that’s easy to make and good for you? Look no further! My No-Bake Peanut Butter Oat Bars with Chocolate Delight are a simple, tasty snack that you can whip up in no time. With just a few healthy ingredients, you’ll enjoy layers of rich peanut butter combined with oats and chocolate. Join me as we explore this fun recipe that your family will love!

Ingredients

Main Ingredients

  • 1 cup rolled oats
  • 1 cup natural creamy peanut butter
  • 1/2 cup honey or maple syrup

Optional Ingredients

  • 1/4 cup chia seeds
  • 1/2 teaspoon vanilla extract
  • Pinch of salt

Toppings

  • 1/2 cup chocolate chips (dark or semi-sweet)

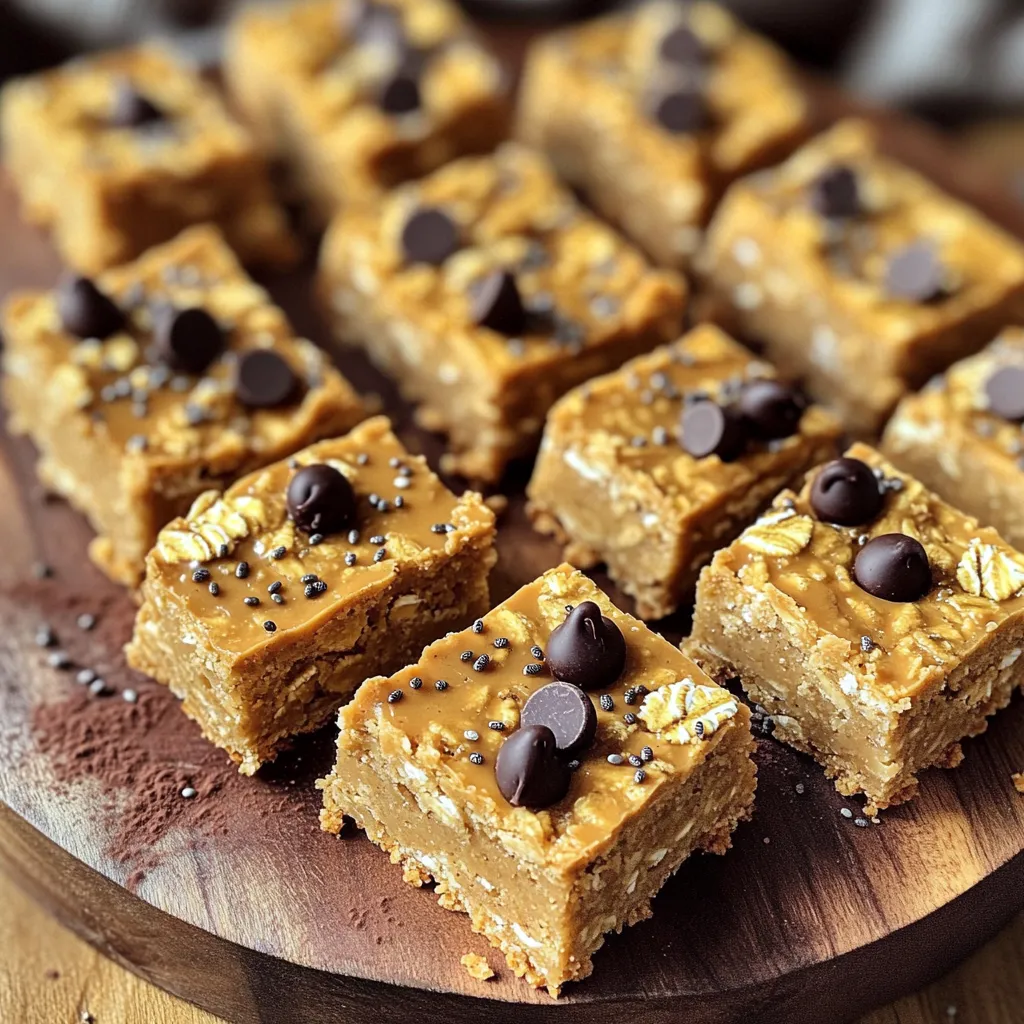
The no-bake peanut butter oat bars come together with just a few simple ingredients. First, I use rolled oats. They form the base of the bars. Next, I add natural creamy peanut butter. It gives the bars a rich, nutty flavor. For sweetness, I choose either honey or maple syrup. Both work well and add moisture.

I sometimes add chia seeds for extra nutrition. They boost fiber and omega-3s. A bit of vanilla extract enhances the taste. A pinch of salt balances all the flavors.

For the topping, I sprinkle chocolate chips on top. Dark or semi-sweet chips add a delightful touch. They melt slightly, creating a smooth, chocolaty layer.

These ingredients blend together to make a tasty and healthy treat. You can mix and match them to suit your taste. The bars are easy to make and perfect for snacking.

Step-by-Step Instructions

Preparation Steps

1. In a large mixing bowl, combine 1 cup of rolled oats, 1/4 cup of chia seeds, and a pinch of salt. Mix well. This helps all the dry ingredients blend together.

2. In a separate microwave-safe bowl, add 1 cup of natural creamy peanut butter and 1/2 cup of honey (or maple syrup). Microwave this mixture on high for 30 seconds to 1 minute. It should be warm and easy to stir.

Cooking Steps

1. After removing the bowl from the microwave, stir in 1/2 teaspoon of vanilla extract. Mix until it is fully combined.

2. Pour the warm peanut butter mixture over the dry ingredients. Use a spatula or wooden spoon to mix everything until well combined. The oats should be evenly coated.

3. Next, gently fold in 1/2 cup of chocolate chips. You can save a few for topping later if you like.

Setting Steps

1. Line an 8×8-inch baking dish with parchment paper. Leave some overhang on the sides to help with removal later.

2. Transfer the oat mixture into the lined baking dish. Press the mixture firmly and evenly into the pan. Make sure it is packed tightly for the best texture.

3. If you saved some chocolate chips, sprinkle them on top. Press them gently into the mixture.

4. Place the dish in the refrigerator for 1-2 hours. This will let the bars set properly.

After this time, you can cut the bars into squares or rectangles. Enjoy your tasty no-bake peanut butter oat bars!

Tips & Tricks

Storage Tips

To keep your no-bake peanut butter oat bars fresh, store them in an airtight container. This helps prevent them from drying out. You can also wrap each bar in parchment paper. This makes them easy to grab on the go.

When choosing a container, opt for glass or plastic. A glass container works well for keeping the bars fresh longer.

Texture and Consistency

Achieving the perfect bar texture is key. Make sure to press the mixture firmly into the baking dish. This helps the bars hold together well. If your bars feel too crumbly, add a bit more peanut butter or honey. This will bind the ingredients better.

If the mixture is too sticky, try adding a bit more oats. Mix it well until you reach the right consistency. The goal is a firm bar that holds its shape but is also soft enough to enjoy.
Variations

Flavor Variations

You can make your no-bake peanut butter oat bars even better! Here are some fun ideas:

  • Add-ins: Try mixing in nuts, dried fruits, or seeds. Chopped almonds or walnuts add nice crunch. Dried cranberries or apricots bring sweetness. You can also add sunflower seeds for a nut-free option.
  • Swapping nut butters: If you want a new taste, switch peanut butter for almond or cashew butter. Almond butter adds a rich flavor, while cashew butter is smooth and creamy.

Dietary Adjustments

You can adapt this recipe to fit your needs. Here are some easy tweaks:

  • Vegan option: Use maple syrup instead of honey. This keeps your bars sweet and plant-based. Maple syrup has a nice flavor that pairs well with peanut butter.
  • Gluten-free alternatives: If you need a gluten-free option, choose gluten-free oats. They provide the same great texture and taste without gluten. Look for oats labeled as gluten-free to be safe.

Feel free to mix and match these ideas! Each change can make your bars unique and delicious.

Storage Info

Best Ways to Store

To keep your no-bake peanut butter oat bars fresh, use an airtight container. This will help keep them from drying out. Store the bars in the fridge. They stay good for about one week. If you want to keep them longer, freezing is a great option.

Freezing Tips

To freeze your oat bars, cut them into squares first. Then, wrap each square in plastic wrap. Place the wrapped bars in a freezer-safe bag or container. This keeps them safe from freezer burn. They can last up to three months in the freezer.

When you’re ready to eat them, take the bars out of the freezer. Let them sit at room temperature for about 15 minutes to thaw. If you’re in a hurry, you can also microwave them for 10-15 seconds. Enjoy your tasty treat anytime!

FAQs

Common Questions

Can I use natural peanut butter?

Yes, you can use natural peanut butter. It adds great flavor. Make sure it is creamy for best results. Stir it well before using. Natural peanut butter can separate, so mix until smooth.

How long do these bars last?

These bars last about one week in the fridge. Keep them in an airtight container. If you freeze them, they can last up to three months. Just thaw them in the fridge when you’re ready to eat.

Troubleshooting

What if my bars are too crumbly?

If your bars are too crumbly, they may need more binding. You can add a bit more peanut butter or honey. Mix it in well to help hold the bars together. Press the mixture more firmly into the pan next time.

Can I replace honey with agave syrup?

Yes, you can use agave syrup instead of honey. The taste will be a bit different but still sweet. Agave syrup is a great vegan option. Use the same amount as honey for best results.

You now have a simple and fun recipe for no-bake energy bars. We covered the main and optional ingredients. We also discussed easy steps to prepare, cook, and set these bars. Remember to follow storage tips for freshness and texture. You can add nuts, fruits, or swap nut butters to create your favorite flavor. These bars are versatile and great for on-the-go snacks. Enjoy making your energy bars, and don’t hesitate to experiment with new ideas!
- 1 cup rolled oats - 1 cup natural creamy peanut butter - 1/2 cup honey or maple syrup - 1/4 cup chia seeds - 1/2 teaspoon vanilla extract - Pinch of salt - 1/2 cup chocolate chips (dark or semi-sweet) The no-bake peanut butter oat bars come together with just a few simple ingredients. First, I use rolled oats. They form the base of the bars. Next, I add natural creamy peanut butter. It gives the bars a rich, nutty flavor. For sweetness, I choose either honey or maple syrup. Both work well and add moisture. I sometimes add chia seeds for extra nutrition. They boost fiber and omega-3s. A bit of vanilla extract enhances the taste. A pinch of salt balances all the flavors. For the topping, I sprinkle chocolate chips on top. Dark or semi-sweet chips add a delightful touch. They melt slightly, creating a smooth, chocolaty layer. These ingredients blend together to make a tasty and healthy treat. You can mix and match them to suit your taste. The bars are easy to make and perfect for snacking. 1. In a large mixing bowl, combine 1 cup of rolled oats, 1/4 cup of chia seeds, and a pinch of salt. Mix well. This helps all the dry ingredients blend together. 2. In a separate microwave-safe bowl, add 1 cup of natural creamy peanut butter and 1/2 cup of honey (or maple syrup). Microwave this mixture on high for 30 seconds to 1 minute. It should be warm and easy to stir. 1. After removing the bowl from the microwave, stir in 1/2 teaspoon of vanilla extract. Mix until it is fully combined. 2. Pour the warm peanut butter mixture over the dry ingredients. Use a spatula or wooden spoon to mix everything until well combined. The oats should be evenly coated. 3. Next, gently fold in 1/2 cup of chocolate chips. You can save a few for topping later if you like. 1. Line an 8x8-inch baking dish with parchment paper. Leave some overhang on the sides to help with removal later. 2. Transfer the oat mixture into the lined baking dish. Press the mixture firmly and evenly into the pan. Make sure it is packed tightly for the best texture. 3. If you saved some chocolate chips, sprinkle them on top. Press them gently into the mixture. 4. Place the dish in the refrigerator for 1-2 hours. This will let the bars set properly. After this time, you can cut the bars into squares or rectangles. Enjoy your tasty no-bake peanut butter oat bars! To keep your no-bake peanut butter oat bars fresh, store them in an airtight container. This helps prevent them from drying out. You can also wrap each bar in parchment paper. This makes them easy to grab on the go. When choosing a container, opt for glass or plastic. A glass container works well for keeping the bars fresh longer. Achieving the perfect bar texture is key. Make sure to press the mixture firmly into the baking dish. This helps the bars hold together well. If your bars feel too crumbly, add a bit more peanut butter or honey. This will bind the ingredients better. If the mixture is too sticky, try adding a bit more oats. Mix it well until you reach the right consistency. The goal is a firm bar that holds its shape but is also soft enough to enjoy. {{image_2}} You can make your no-bake peanut butter oat bars even better! Here are some fun ideas: - Add-ins: Try mixing in nuts, dried fruits, or seeds. Chopped almonds or walnuts add nice crunch. Dried cranberries or apricots bring sweetness. You can also add sunflower seeds for a nut-free option. - Swapping nut butters: If you want a new taste, switch peanut butter for almond or cashew butter. Almond butter adds a rich flavor, while cashew butter is smooth and creamy. You can adapt this recipe to fit your needs. Here are some easy tweaks: - Vegan option: Use maple syrup instead of honey. This keeps your bars sweet and plant-based. Maple syrup has a nice flavor that pairs well with peanut butter. - Gluten-free alternatives: If you need a gluten-free option, choose gluten-free oats. They provide the same great texture and taste without gluten. Look for oats labeled as gluten-free to be safe. Feel free to mix and match these ideas! Each change can make your bars unique and delicious. To keep your no-bake peanut butter oat bars fresh, use an airtight container. This will help keep them from drying out. Store the bars in the fridge. They stay good for about one week. If you want to keep them longer, freezing is a great option. To freeze your oat bars, cut them into squares first. Then, wrap each square in plastic wrap. Place the wrapped bars in a freezer-safe bag or container. This keeps them safe from freezer burn. They can last up to three months in the freezer. When you're ready to eat them, take the bars out of the freezer. Let them sit at room temperature for about 15 minutes to thaw. If you're in a hurry, you can also microwave them for 10-15 seconds. Enjoy your tasty treat anytime! Can I use natural peanut butter? Yes, you can use natural peanut butter. It adds great flavor. Make sure it is creamy for best results. Stir it well before using. Natural peanut butter can separate, so mix until smooth. How long do these bars last? These bars last about one week in the fridge. Keep them in an airtight container. If you freeze them, they can last up to three months. Just thaw them in the fridge when you're ready to eat. What if my bars are too crumbly? If your bars are too crumbly, they may need more binding. You can add a bit more peanut butter or honey. Mix it in well to help hold the bars together. Press the mixture more firmly into the pan next time. Can I replace honey with agave syrup? Yes, you can use agave syrup instead of honey. The taste will be a bit different but still sweet. Agave syrup is a great vegan option. Use the same amount as honey for best results. You now have a simple and fun recipe for no-bake energy bars. We covered the main and optional ingredients. We also discussed easy steps to prepare, cook, and set these bars. Remember to follow storage tips for freshness and texture. You can add nuts, fruits, or swap nut butters to create your favorite flavor. These bars are versatile and great for on-the-go snacks. Enjoy making your energy bars, and don’t hesitate to experiment with new ideas!
No-Bake Peanut Butter Oat Bars with Chocolate

Indulge in these delicious no-bake peanut butter oat bars with chocolate that are perfect for any snack craving! Made with wholesome ingredients like rolled oats, creamy peanut butter, and a touch of sweetness, these bars are not only easy to make but also satisfying. Get the full recipe now and treat yourself to a chocolatey, nutty delight that everyone will love. Click to explore and start your no-bake adventure today!

Ingredients
  

1 cup rolled oats

1 cup natural creamy peanut butter

1/2 cup honey or maple syrup

1/2 cup chocolate chips (dark or semi-sweet)

1/4 cup chia seeds (optional)

1/2 teaspoon vanilla extract

Pinch of salt

Instructions
 

In a large mixing bowl, combine the rolled oats, chia seeds, and a pinch of salt. Mix well to evenly distribute the dry ingredients.

    In a separate microwave-safe bowl, combine the peanut butter and honey (or maple syrup). Microwave on high for 30 seconds to 1 minute until the mixture is warm and easy to stir.

      Remove the bowl from the microwave and stir in the vanilla extract until fully incorporated.

        Pour the warm peanut butter mixture over the dry ingredients. Using a spatula or wooden spoon, mix until everything is thoroughly combined and the oats are evenly coated.

          Once the mixture is well combined, gently fold in the chocolate chips, reserving a few for topping, if desired.

            Line an 8x8-inch baking dish with parchment paper, leaving some overhang for easy removal later.

              Transfer the oat mixture into the lined baking dish. Using a spatula or your hands, press the mixture down firmly and evenly into the pan. Ensure it's packed tightly for the best texture.

                Sprinkle the reserved chocolate chips on top, pressing them slightly into the mixture.

                  Place the dish in the refrigerator for at least 1-2 hours to allow the bars to set properly.

                    Once set, remove the bars from the baking dish using the parchment paper overhang. Cut into squares or rectangles, as preferred.

                      Prep Time: 15 minutes | Total Time: 2 hours 15 minutes | Servings: 12 bars

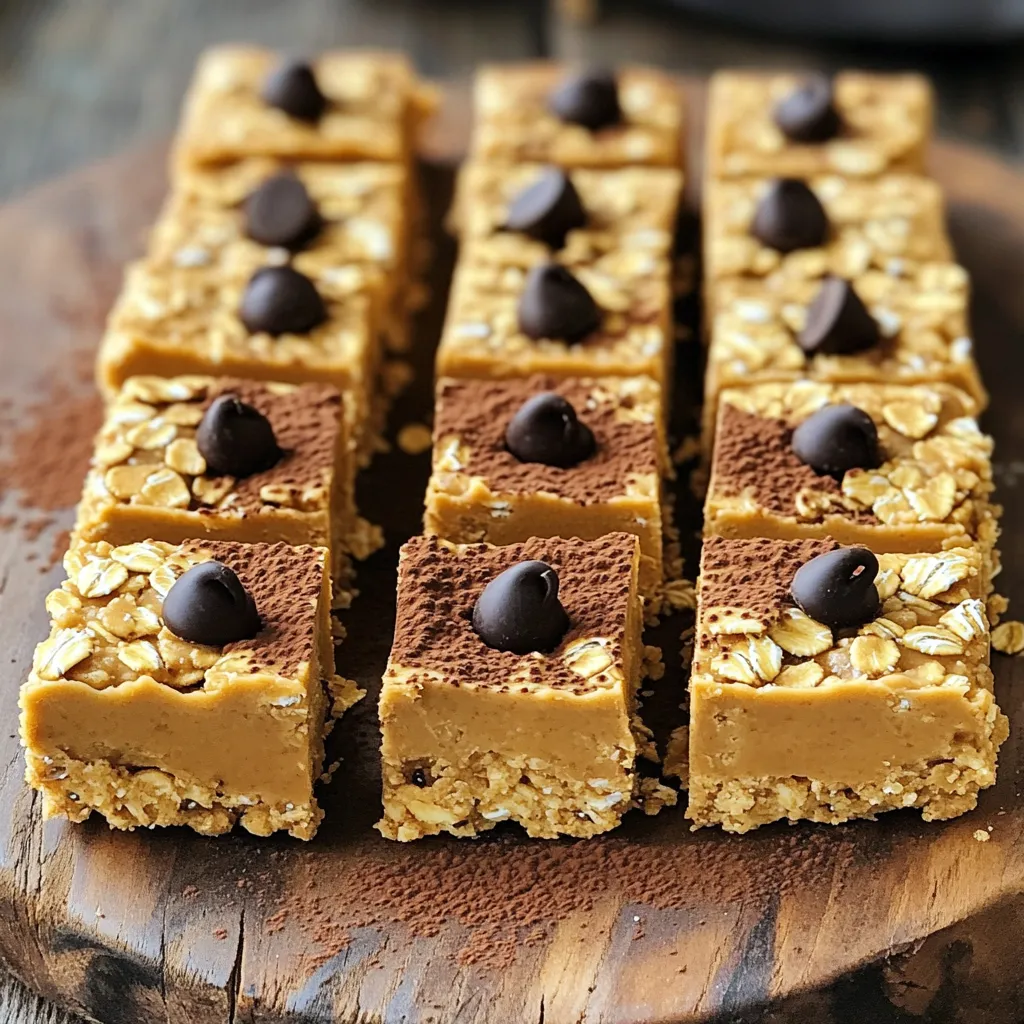
                        - Presentation Tips: For an attractive serving, stack the bars neatly on a wooden platter and dust with a light sprinkle of cacao powder or extra chia seeds for added flair. Enjoy!

                          WANT TO SAVE THIS RECIPE?

                          Leave a Comment

                          Recipe Rating