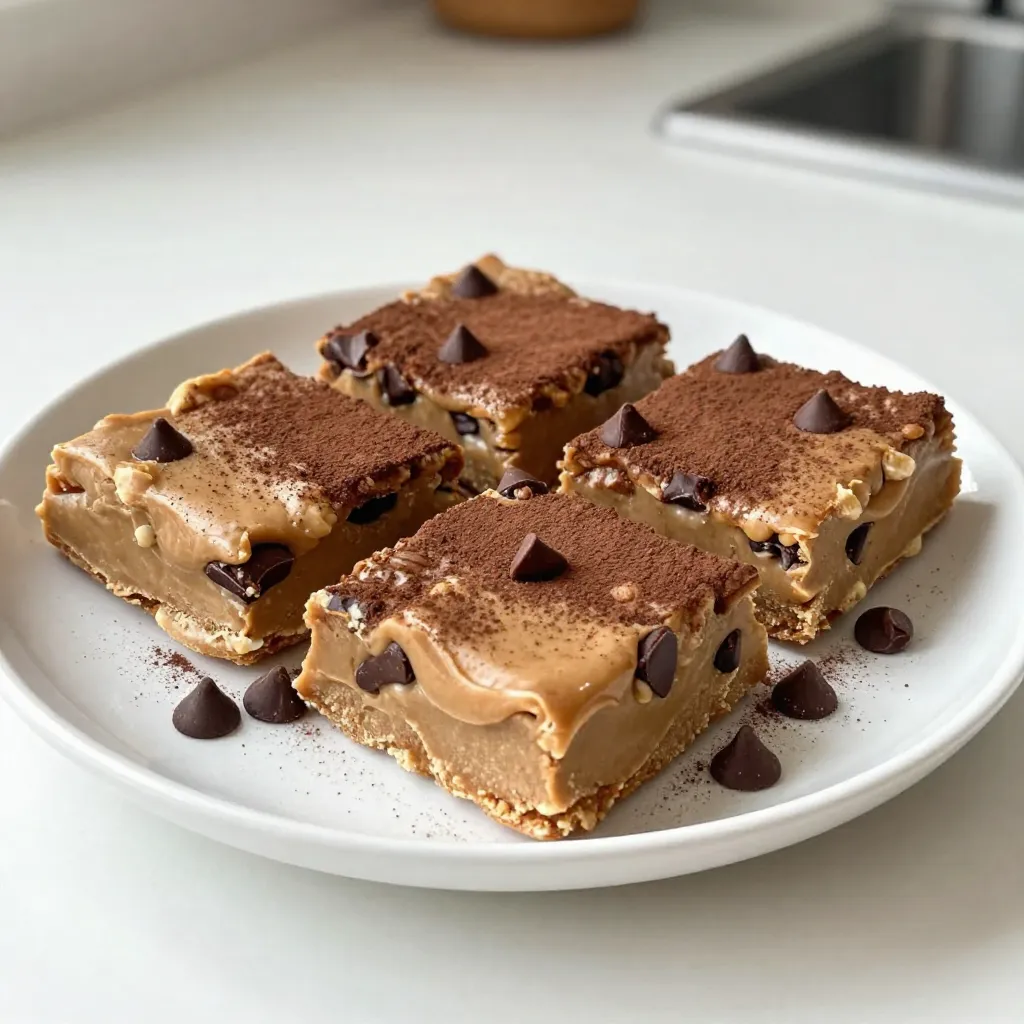
Looking for a quick and tasty treat? These No-Bake Peanut Butter Bars are your answer! With just eight simple ingredients, they whip up in no time and satisfy your sweet tooth. You can customize them to fit your tastes or dietary needs. Join me as we explore this easy recipe that’s perfect for anyone who loves a delicious, homemade snack. Let’s dive in and get started!
Why I Love This Recipe
- Quick and Easy Preparation: This recipe takes just 10 minutes of prep time, making it perfect for a last-minute treat or snack.
- Healthy Ingredients: With wholesome ingredients like oats, peanut butter, and maple syrup, these bars are a nutritious option for satisfying your sweet cravings.
- No Baking Required: Skip the oven! These bars are set in the refrigerator, which means less hassle and cleanup.
- Customizable: You can easily modify this recipe by adding nuts, seeds, or using different types of chocolate to suit your taste preferences.
Ingredients
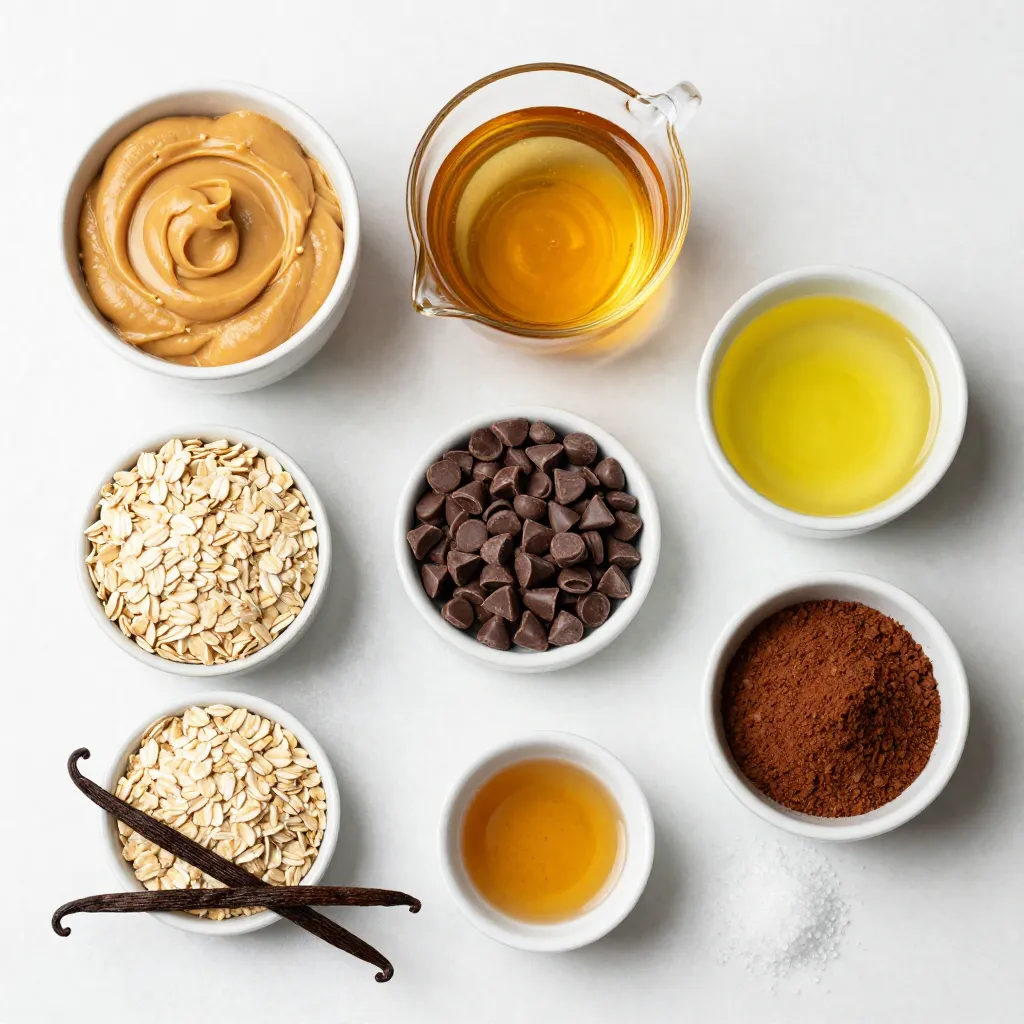
List of Ingredients
– 1 cup creamy peanut butter
– 1/2 cup maple syrup
– 1/4 cup melted coconut oil
– 2 cups rolled oats
– 1/2 cup chocolate chips (dairy-free if desired)
– 1/4 cup unsweetened cocoa powder
– 1/2 teaspoon vanilla extract
– Pinch of sea salt
For this recipe, I use creamy peanut butter. It helps create a smooth texture. You can swap it for any nut butter you love. Maple syrup adds sweetness, but honey works too if you prefer. Melted coconut oil keeps the bars firm and tasty.
Rolled oats make the base hearty. I love the chewiness they add. Chocolate chips bring extra flavor. Use dairy-free chips if you like. Cocoa powder gives a rich chocolate taste. A splash of vanilla enhances the flavor. The pinch of sea salt balances the sweetness.
Optional Ingredients for Customization
– Variety of nut butters
– Different types of sweeteners
– Add-ins like nuts or dried fruits
Feel free to get creative! You can use almond or cashew butter instead of peanut butter. Swap the maple syrup for agave or brown sugar for a new twist. Adding chopped nuts or dried fruits can give your bars extra texture and flavor.
Ingredient Substitutions
– Coconut oil alternatives
– Maple syrup substitutes
If you don’t have coconut oil, try using butter or another oil like canola. For maple syrup, honey or agave syrup can work well too. Just remember, each swap can change the taste a bit, so adjust to your liking!
Step-by-Step Instructions
Preparing the Base Mixture
In a large bowl, combine 1 cup of creamy peanut butter, 1/2 cup of maple syrup, and 1/4 cup of melted coconut oil. Mix these ingredients until they are smooth and creamy. This base will be the heart of your bars.
Mixing Dry Ingredients
Next, add 2 cups of rolled oats and 1/4 cup of cocoa powder to the peanut butter mix. Sprinkle in a pinch of sea salt for flavor. Stir well until the oats are fully coated. This step helps bind the bars and adds a nice chocolate taste.
Finalizing the Mixture
Now, gently fold in 1/2 cup of chocolate chips. Make sure they are evenly spread throughout the mixture. This adds a sweet surprise in every bite. Line an 8×8 inch baking pan with parchment paper. Pour the mixture into the pan and press it down firmly. Smooth the top with a spatula or the back of a spoon.
Chilling Process
Put the pan in the refrigerator and chill for at least 1 hour. You can check if they are firm by gently pressing the top. If it holds its shape, they are ready. Once set, lift the bars out using the parchment paper and cut them into squares or rectangles. Enjoy your delicious no-bake peanut butter bars!
Tips & Tricks
Best Practices for No-Bake Bars
– Press the mixture firmly into the pan. This step helps create a great texture. If you skip this, your bars may crumble when you cut them.
– Always use parchment paper in your pan. This makes removing the bars easy. You can lift them out without breaking.
Serving Suggestions
– To serve, arrange the bars on a nice platter. You can sprinkle extra chocolate chips on top for a fun look.
– These bars pair well with cold almond milk or coffee. You can also enjoy them with fresh fruit for a tasty treat.
Common Mistakes to Avoid
– One mistake is overmixing the ingredients. This can make your bars too tough. Mix just until everything is combined.
– Another mistake is skipping the chilling step. If you don’t chill the bars, they won’t hold their shape. Make sure to let them set in the fridge for at least an hour.
Pro Tips
- Tip Title: Use Natural Peanut Butter: For the best flavor and texture, opt for natural peanut butter without added sugars or oils. This will keep your bars healthier and enhance the peanut flavor.
- Tip Title: Chill Before Cutting: Allow the bars to chill for the full hour, or longer if you prefer a firmer texture. This helps them hold together better when cutting.
- Tip Title: Add Extras: Feel free to customize your bars by adding nuts, seeds, or dried fruits. This not only enhances flavor but also adds nutritional value.
- Tip Title: Store Properly: Keep the bars in an airtight container in the refrigerator for up to a week, or freeze for longer storage. Just make sure to separate layers with parchment paper to prevent sticking.
Variations
Flavor Variations
You can switch up the flavors to make these no-bake peanut butter bars even better. Try using almond butter instead of peanut butter. It adds a nice twist. You can also add spices like cinnamon or nutmeg for extra warmth. Just a dash can change the whole flavor profile.
Dietary Adjustments
If you want a vegan option, use maple syrup and dairy-free chocolate chips. This keeps the bars tasty while meeting dietary needs. For gluten-free adjustments, ensure you use gluten-free rolled oats. This way, everyone can enjoy these bars without worry.
Creative Mix-Ins
Get creative with mix-ins to customize these bars. You can add seeds like chia or flax for added crunch and nutrients. Dried fruits like cranberries or raisins can bring in a sweet chew. You can also layer these bars with yogurt or ice cream for a fun dessert twist. This makes them feel like a treat, perfect for any occasion.
Storage Info
Best Storage Practices
To keep your no-bake peanut butter bars fresh, use an airtight container. This keeps them safe from moisture and air. If you want to store them at room temperature, make sure it’s cool and dry. You can also refrigerate them for a longer shelf life.
Shelf Life
These bars last about one week when stored properly. If you see any change in color or a strong smell, they might be spoiled. Always check for signs like mold or an off taste before eating.
Freezing Instructions
For longer storage, these bars freeze well. Wrap each bar in plastic wrap and place them in a freezer-safe bag. When you’re ready to eat, take out a bar and let it thaw at room temperature. This usually takes about 30 minutes. Enjoy them fresh from the fridge or freezer!
FAQs
How long does it take to make no-bake peanut butter bars?
It takes about 10 minutes to prep no-bake peanut butter bars. After mixing, you chill them for at least 1 hour. So, in total, you spend about 1 hour and 10 minutes from start to finish. This quick timeline makes these bars perfect for a last-minute treat.
Can I use crunchy peanut butter instead of creamy?
Yes, you can use crunchy peanut butter. It will give your bars a fun texture. You’ll have little crunchy bits in every bite. This change does not affect the overall taste much. It makes the bars a bit more exciting.
Are these bars gluten-free?
Yes, these bars are gluten-free. The main ingredient, rolled oats, is naturally gluten-free. Just make sure to use certified gluten-free oats. Some oats can have cross-contact with gluten. Always check the label if you need to avoid gluten.
What can I use instead of maple syrup?
You can use honey or agave nectar instead of maple syrup. Each of these sweeteners will add a unique flavor. Honey is sweeter, and agave has a mild taste. Just keep in mind, the texture may change slightly, but the bars will still taste great.
Can I cut the bars into shapes?
Absolutely! You can cut these bars into fun shapes. Use cookie cutters for stars or hearts. This is a great way to make them special for parties or kids. Just make sure your bars are firm before cutting for the best results.
You now have the recipe for tasty no-bake peanut butter bars. We’ve covered the key ingredients, step-by-step instructions, and helpful tips to make this treat easy and fun. Remember, you can customize the bars with your favorite flavors and mix-ins. Don’t skip the chilling step for a firm texture. Store them right, and they’ll last a while. Enjoy experimenting with your own variations. Make these bars your go-to snack and impress family and friends with your tasty creation