No-Bake Oreo Delight Easy and Decadent Dessert

WANT TO SAVE THIS RECIPE?

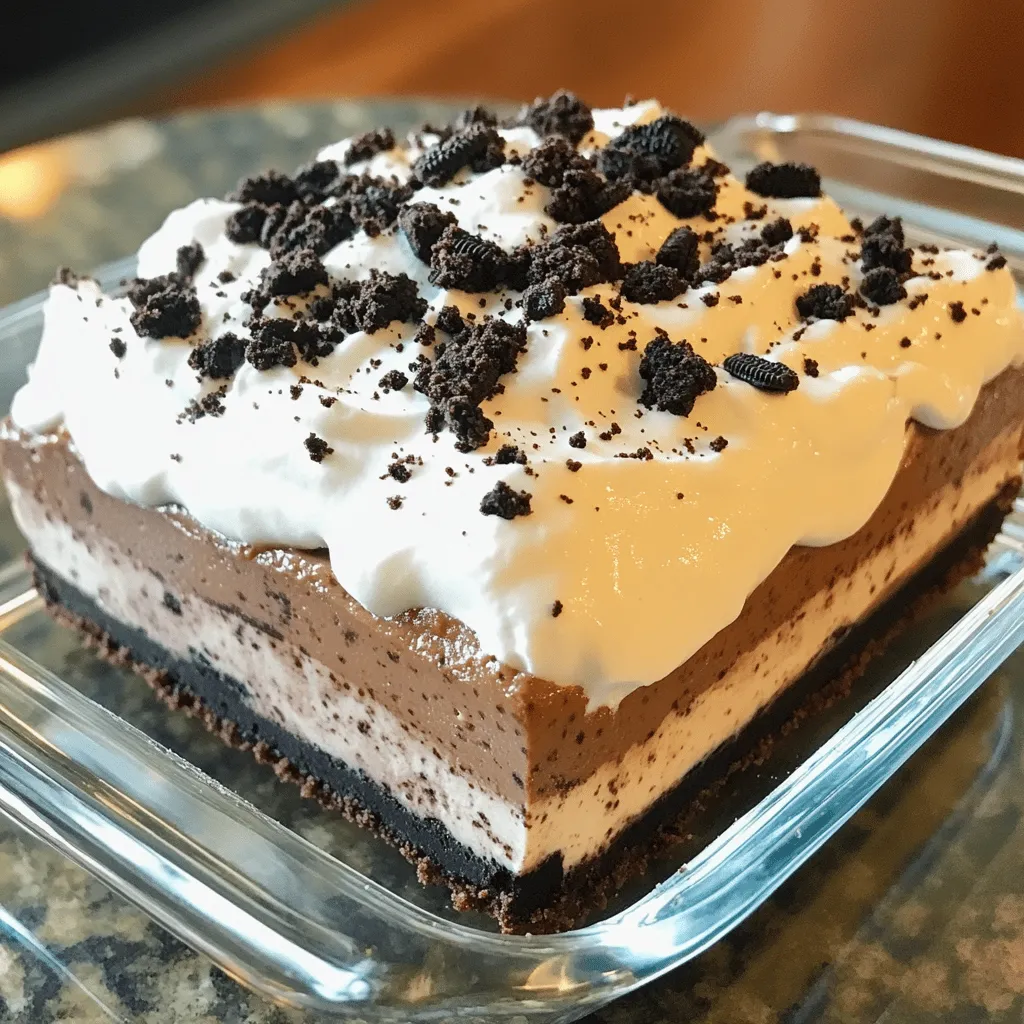
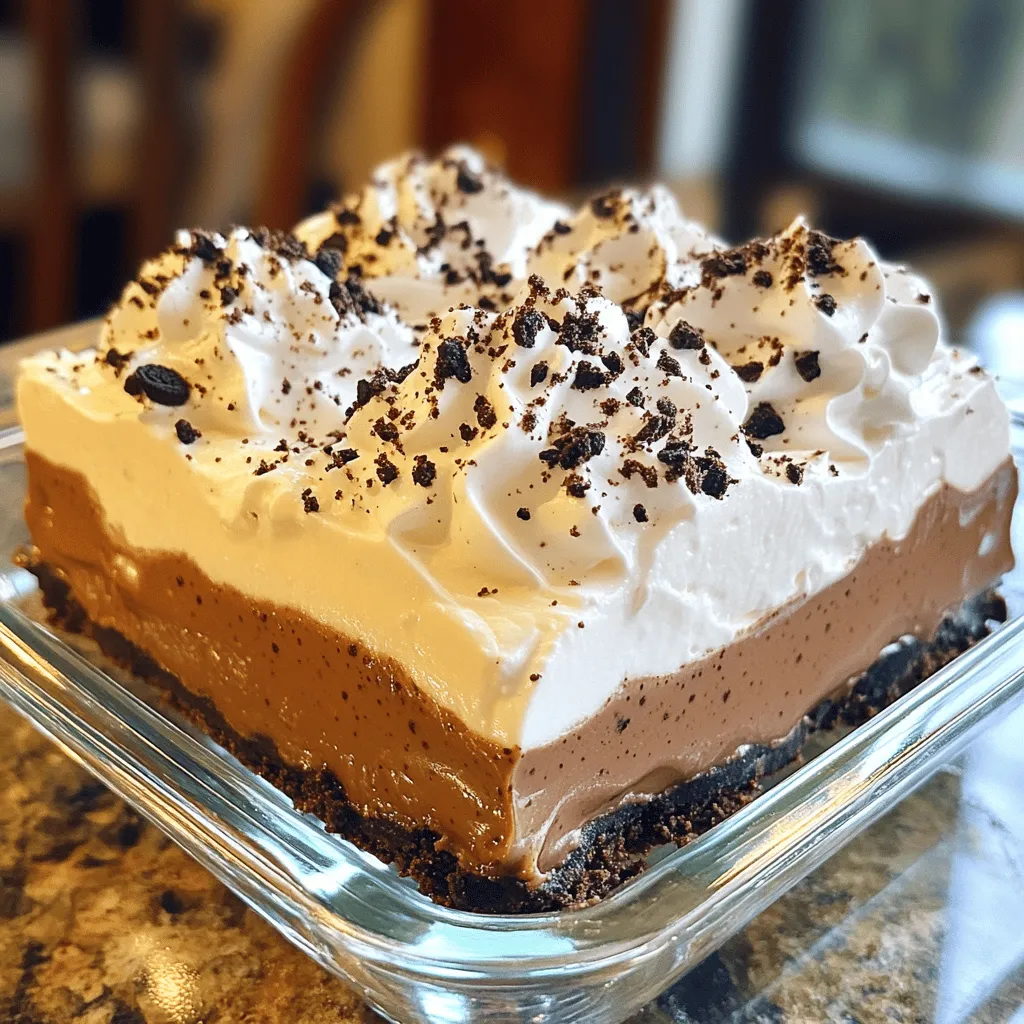
Satisfy your sweet tooth with my No-Bake Oreo Delight, an easy and decadent dessert! This recipe combines creamy layers with crunchy Oreo goodness in a delightful treat you can whip up in no time. Forget the oven; just gather your ingredients and get ready to impress your friends and family. Let’s dive into the world of delicious flavors and simple steps to create your new favorite dessert!

Ingredients

List of Ingredients

  • 24 Oreo cookies (regular or double-stuffed)
  • ½ cup unsalted butter, melted
  • 1 cup cream cheese, softened
  • 1 cup powdered sugar
  • 2 cups whipped topping (like Cool Whip)
  • 1½ cups chocolate pudding (instant or homemade)
  • 2 cups whole milk (for pudding)
  • Extra crushed Oreo cookies for garnish

Quality Ingredients Tips

Choosing the right type of Oreo is key. Regular Oreos work great, but double-stuffed gives more cream. The cream cheese should be full-fat for the best taste. I recommend brands like Philadelphia for cream cheese. For whipped topping, use Cool Whip or a similar brand. These will make your layers smooth and tasty. Quality ingredients really shine in this dessert.

Step-by-Step Instructions

Preparation of the Crust

To start, take 24 Oreo cookies. You can use regular or double-stuffed. Place them in a food processor. Crush the cookies into fine crumbs. It should look like dirt or sand.

Next, take a medium bowl. Mix the crushed Oreos with ½ cup of melted butter. Stir until combined well. This mixture will form the crust.

Making the Cheesecake Layer

Now, let’s make the cheesecake layer. Grab a large mixing bowl. Add 1 cup of softened cream cheese. Beat it with an electric mixer until smooth.

Slowly add 1 cup of powdered sugar. Mix until it is all combined. Carefully fold in 2 cups of whipped topping. This makes it light and fluffy.

Assembling the Layers

It’s time to assemble! Take the crust from the fridge. Spread the cheesecake mixture evenly over the crust. Smooth it out gently with a spatula.

Next, make the chocolate pudding. In another bowl, whisk together 1½ cups of chocolate pudding mix and 2 cups of whole milk. Whisk until it thickens, about two minutes.

Spread the chocolate pudding evenly over the cheesecake layer.

Final Touches

Now, let’s add the final touches. Spread the remaining whipped topping over the pudding layer. Make sure it is smooth and even.

Finally, place the dessert in the fridge. Chill it for at least 4 hours. For best results, chill overnight. This will help all the layers set nicely.

Tips & Tricks

Perfecting Each Layer

To ensure a smooth cheesecake layer, start with room temperature cream cheese. This helps it mix better. Beat it well until it is creamy and free of lumps. Gradually add powdered sugar. Mix until fully blended. Gently fold in the whipped topping. This keeps it light and fluffy.

For the pudding, stir the mix into the milk slowly. Whisk it for about two minutes until it thickens. If you see lumps, keep whisking. You want a creamy texture with no clumps.

Serving Suggestions

For a pretty presentation, cut the dessert into neat squares. Place each square on a dessert plate. Drizzle some chocolate syrup around the plate for flair. You can also sprinkle extra crushed Oreos on top for added crunch. This gives it a nice finish and extra taste.

Troubleshooting Common Issues

If your pudding is too runny, try adding a bit more pudding mix. Whisk it in and let it sit a few more minutes. This will help it thicken.

If you notice layer separation, ensure that each layer is fully set before adding the next. Chill the dessert long enough. It should be firm before serving.

Variations

Flavor Variations

You can easily change the flavor of your No-Bake Oreo Delight. Try using different pudding flavors. Vanilla, butterscotch, or even strawberry can work well. Each choice adds a unique taste to the dessert. You can also add fresh fruit. Sliced strawberries or bananas on top can add a nice touch. Drizzle some chocolate or caramel sauce for extra sweetness.

Dietary Modifications

If you need gluten-free options, choose gluten-free Oreo cookies. They taste just as good and keep the dessert intact. For vegan options, swap the cream cheese for a plant-based cream cheese. Use coconut whipped cream instead of regular whipped topping. You can also find vegan chocolate pudding mixes in stores.

Creative Twists

Get creative with your layers! You can add crushed candies or nuts between the layers. Chopped Snickers or crushed peanuts can add a fun crunch. If you love peanut butter, mix it into the cream cheese layer. For a sweeter twist, drizzle caramel sauce in the layers. These ideas can make your dessert even more special.

Storage Info

Best Practices for Storing

Store your No-Bake Oreo Delight in the fridge. Use an airtight container to keep it fresh. You can also cover it with plastic wrap. This dessert is best served cold.

If you want to freeze it, cut it into squares first. Wrap each piece in plastic wrap. Then, place them in a freezer-safe bag. This makes it easy to enjoy later. Just thaw it in the fridge before serving.

Shelf Life

In the fridge, No-Bake Oreo Delight lasts about 3 to 5 days. Keep an eye on it to enjoy it at its best.

Look for signs of spoilage, like an off smell or a change in texture. If it seems watery or has mold, it’s time to toss it. Always trust your senses!

FAQs

Can I make No-Bake Oreo Delight ahead of time?

Yes, you can make No-Bake Oreo Delight ahead of time. This dessert actually tastes better after chilling. I suggest making it the night before. Store it in the fridge. Cover it well with plastic wrap or a lid. It will stay fresh and delicious for up to three days.

What if I don’t have whipped topping?

If you don’t have whipped topping, don’t worry! You can use homemade whipped cream instead. Just whip heavy cream until it forms soft peaks. You can also use Greek yogurt for a tangy twist. Keep in mind, this will change the taste slightly.

How do I serve No-Bake Oreo Delight?

Serve No-Bake Oreo Delight in squares for easy sharing. Use a sharp knife to slice it. Place each piece on a dessert plate for a nice touch. Drizzle chocolate syrup around the plate for flair. Garnish with extra crushed Oreos on top for added crunch. Your guests will love it!

Can I use different cookies instead of Oreos?

Yes, you can use different cookies! Try using chocolate sandwich cookies or even graham crackers. These will give your dessert a new flavor. For a fun twist, use peanut butter cookies for the crust. Each choice will create a unique Oreo Delight experience!

This blog post shared a fun recipe for No-Bake Oreo Delight. You learned about the key ingredients, like Oreo cookies and cream cheese. I provided easy steps to create each layer, from the crust to the rich filling. Tips ensured smooth layers, while variations allowed for creativity. Finally, I covered storage to keep your dessert fresh.

Try this dessert for your next gathering. You’ll impress everyone without much effort!

- 24 Oreo cookies (regular or double-stuffed) - ½ cup unsalted butter, melted - 1 cup cream cheese, softened - 1 cup powdered sugar - 2 cups whipped topping (like Cool Whip) - 1½ cups chocolate pudding (instant or homemade) - 2 cups whole milk (for pudding) - Extra crushed Oreo cookies for garnish Choosing the right type of Oreo is key. Regular Oreos work great, but double-stuffed gives more cream. The cream cheese should be full-fat for the best taste. I recommend brands like Philadelphia for cream cheese. For whipped topping, use Cool Whip or a similar brand. These will make your layers smooth and tasty. Quality ingredients really shine in this dessert. To start, take 24 Oreo cookies. You can use regular or double-stuffed. Place them in a food processor. Crush the cookies into fine crumbs. It should look like dirt or sand. Next, take a medium bowl. Mix the crushed Oreos with ½ cup of melted butter. Stir until combined well. This mixture will form the crust. Now, let’s make the cheesecake layer. Grab a large mixing bowl. Add 1 cup of softened cream cheese. Beat it with an electric mixer until smooth. Slowly add 1 cup of powdered sugar. Mix until it is all combined. Carefully fold in 2 cups of whipped topping. This makes it light and fluffy. It’s time to assemble! Take the crust from the fridge. Spread the cheesecake mixture evenly over the crust. Smooth it out gently with a spatula. Next, make the chocolate pudding. In another bowl, whisk together 1½ cups of chocolate pudding mix and 2 cups of whole milk. Whisk until it thickens, about two minutes. Spread the chocolate pudding evenly over the cheesecake layer. Now, let’s add the final touches. Spread the remaining whipped topping over the pudding layer. Make sure it is smooth and even. Finally, place the dessert in the fridge. Chill it for at least 4 hours. For best results, chill overnight. This will help all the layers set nicely. To ensure a smooth cheesecake layer, start with room temperature cream cheese. This helps it mix better. Beat it well until it is creamy and free of lumps. Gradually add powdered sugar. Mix until fully blended. Gently fold in the whipped topping. This keeps it light and fluffy. For the pudding, stir the mix into the milk slowly. Whisk it for about two minutes until it thickens. If you see lumps, keep whisking. You want a creamy texture with no clumps. For a pretty presentation, cut the dessert into neat squares. Place each square on a dessert plate. Drizzle some chocolate syrup around the plate for flair. You can also sprinkle extra crushed Oreos on top for added crunch. This gives it a nice finish and extra taste. If your pudding is too runny, try adding a bit more pudding mix. Whisk it in and let it sit a few more minutes. This will help it thicken. If you notice layer separation, ensure that each layer is fully set before adding the next. Chill the dessert long enough. It should be firm before serving. {{image_2}} You can easily change the flavor of your No-Bake Oreo Delight. Try using different pudding flavors. Vanilla, butterscotch, or even strawberry can work well. Each choice adds a unique taste to the dessert. You can also add fresh fruit. Sliced strawberries or bananas on top can add a nice touch. Drizzle some chocolate or caramel sauce for extra sweetness. If you need gluten-free options, choose gluten-free Oreo cookies. They taste just as good and keep the dessert intact. For vegan options, swap the cream cheese for a plant-based cream cheese. Use coconut whipped cream instead of regular whipped topping. You can also find vegan chocolate pudding mixes in stores. Get creative with your layers! You can add crushed candies or nuts between the layers. Chopped Snickers or crushed peanuts can add a fun crunch. If you love peanut butter, mix it into the cream cheese layer. For a sweeter twist, drizzle caramel sauce in the layers. These ideas can make your dessert even more special. Store your No-Bake Oreo Delight in the fridge. Use an airtight container to keep it fresh. You can also cover it with plastic wrap. This dessert is best served cold. If you want to freeze it, cut it into squares first. Wrap each piece in plastic wrap. Then, place them in a freezer-safe bag. This makes it easy to enjoy later. Just thaw it in the fridge before serving. In the fridge, No-Bake Oreo Delight lasts about 3 to 5 days. Keep an eye on it to enjoy it at its best. Look for signs of spoilage, like an off smell or a change in texture. If it seems watery or has mold, it’s time to toss it. Always trust your senses! Yes, you can make No-Bake Oreo Delight ahead of time. This dessert actually tastes better after chilling. I suggest making it the night before. Store it in the fridge. Cover it well with plastic wrap or a lid. It will stay fresh and delicious for up to three days. If you don’t have whipped topping, don’t worry! You can use homemade whipped cream instead. Just whip heavy cream until it forms soft peaks. You can also use Greek yogurt for a tangy twist. Keep in mind, this will change the taste slightly. Serve No-Bake Oreo Delight in squares for easy sharing. Use a sharp knife to slice it. Place each piece on a dessert plate for a nice touch. Drizzle chocolate syrup around the plate for flair. Garnish with extra crushed Oreos on top for added crunch. Your guests will love it! Yes, you can use different cookies! Try using chocolate sandwich cookies or even graham crackers. These will give your dessert a new flavor. For a fun twist, use peanut butter cookies for the crust. Each choice will create a unique Oreo Delight experience! This blog post shared a fun recipe for No-Bake Oreo Delight. You learned about the key ingredients, like Oreo cookies and cream cheese. I provided easy steps to create each layer, from the crust to the rich filling. Tips ensured smooth layers, while variations allowed for creativity. Finally, I covered storage to keep your dessert fresh. Try this dessert for your next gathering. You'll impress everyone without much effort!

No-Bake Oreo Delight

Indulge in the ultimate Oreo Chocolate Cloud dessert, a delightful treat that combines creamy layers of cheesecake, chocolate pudding, and crunchy Oreo goodness. This easy recipe requires just a few ingredients and is perfect for impressing guests or satisfying your sweet tooth. Discover how to create this delicious dessert that’s sure to be a crowd-pleaser. Click through to explore the full recipe and make your dessert dreams a reality!

Ingredients
  

24 Oreo cookies (regular or double-stuffed)

½ cup unsalted butter, melted

1 cup cream cheese, softened

1 cup powdered sugar

2 cups whipped topping (like Cool Whip)

1½ cups chocolate pudding (instant or homemade)

2 cups whole milk (for pudding)

Extra crushed Oreo cookies for garnish

Instructions
 

Prepare the Crust: In a food processor, crush the 24 Oreo cookies into fine crumbs. In a medium bowl, mix the crushed Oreos with melted butter until combined.

    Form the Base: Press the Oreo crumb mixture into the bottom of a 9x13 inch dish to form an even crust. Place in the refrigerator while you prepare the filling.

      Make the Cheesecake Layer: In a large mixing bowl, beat the softened cream cheese with an electric mixer until smooth. Gradually add the powdered sugar and mix until combined. Gently fold in 1 cup of whipped topping until fully incorporated.

        Spread the Cheesecake Layer: Spread the cream cheese mixture over the chilled Oreo crust, smoothing it out to cover evenly.

          Prepare the Chocolate Pudding: In another bowl, whisk together the chocolate pudding mix and milk until creamy and thickened (about 2 minutes).

            Layer the Pudding: Spread the chocolate pudding evenly over the cheesecake layer.

              Add the Whipped Topping: Spread the remaining whipped topping over the pudding layer, smoothing it out to create an even surface.

                Chill: Refrigerate for at least 4 hours, or overnight, to allow the layers to set properly.

                  Serve: Before serving, garnish with extra crushed Oreo cookies on top for added crunch and visual appeal.

                    Prep Time: 20 minutes | Total Time: 4 hours 20 minutes | Servings: 12

                      - Presentation Tips: Cut into squares for serving and place on dessert plates. You can also drizzle chocolate syrup around the plate for added flair. Enjoy!

                        WANT TO SAVE THIS RECIPE?

                        Leave a Comment

                        Recipe Rating