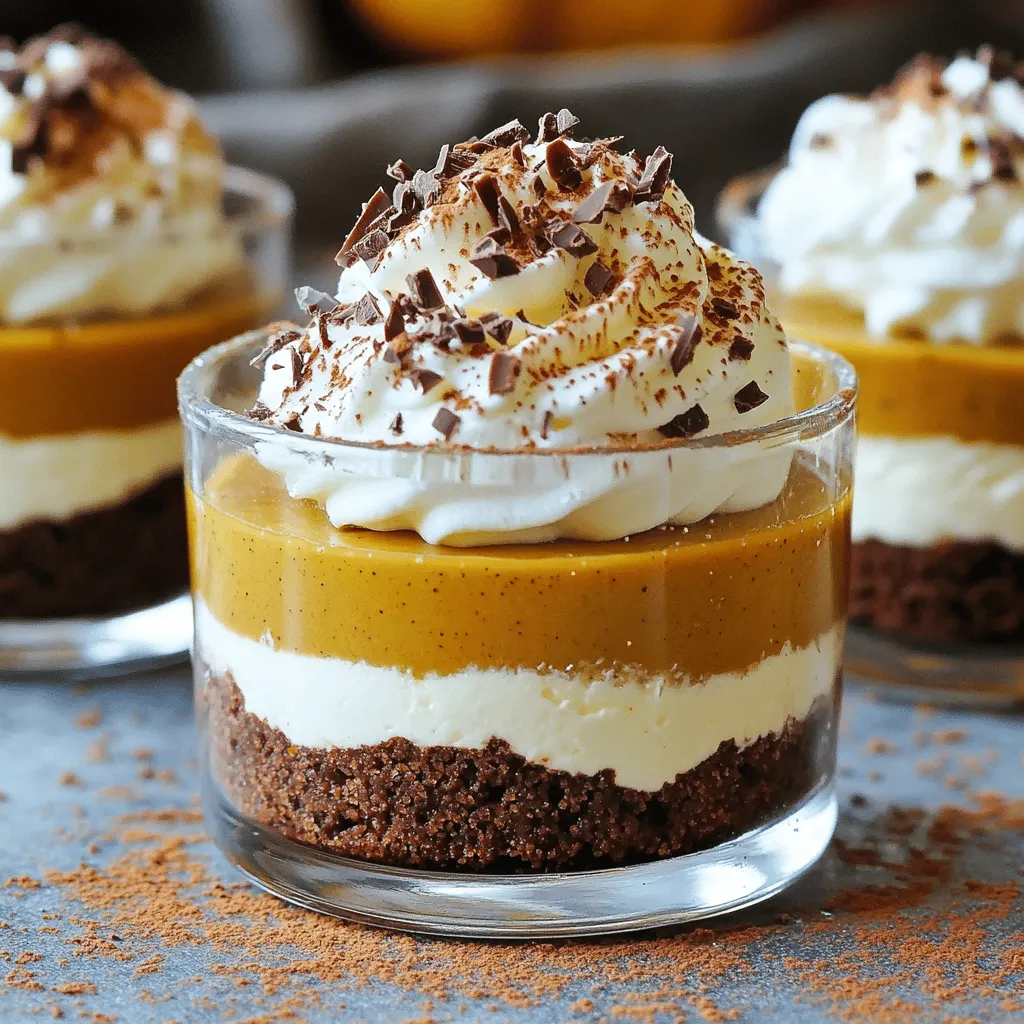
Get ready to indulge in a delightful treat with my No Bake Chocolate Pumpkin Cheesecake Cups! These easy and delicious cups combine rich chocolate with creamy pumpkin, perfect for any occasion. Whether you’re hosting friends or just need a sweet fix, this recipe packs in flavor without any fuss. Let’s dive into the ingredients and steps to create these irresistible bites that will impress everyone!
Ingredients
List of Ingredients
– 1 cup graham cracker crumbs
– 1/4 cup unsweetened cocoa powder
– 1/2 cup melted butter
– 8 oz cream cheese, softened
– 1 cup pumpkin puree
– 1/2 cup powdered sugar
– 1 teaspoon vanilla extract
– 1 teaspoon pumpkin pie spice
– 1 cup whipped cream
– Chocolate shavings for garnish
– Extra pumpkin spice for dusting
Substitution Options
You can swap graham cracker crumbs for crushed cookies. Oreos or digestive biscuits work well. If you want a gluten-free option, use gluten-free graham crackers. For cocoa powder, you can use carob powder for a different flavor. Instead of cream cheese, try vegan cream cheese or silken tofu for a dairy-free twist. If you don’t have whipped cream, use whipped coconut cream. You can also use agave or maple syrup instead of powdered sugar for a more natural sweetener.
Tips for Selecting Quality Ingredients
Choose high-quality cream cheese for the best texture. Look for brands that have a rich, creamy taste. When selecting pumpkin puree, check that it is pure pumpkin and not pumpkin pie filling. This ensures no extra sugars or spices that might alter the taste. For cocoa powder, a dark, unsweetened variety gives a richer chocolate flavor. Always pick fresh spices for enhanced aroma and taste. Finally, use real vanilla extract instead of imitation for a deeper flavor.
Step-by-Step Instructions
Preparing the Crust
To start, gather your ingredients for the crust. You need graham cracker crumbs, cocoa powder, and melted butter. In a bowl, mix the graham cracker crumbs with cocoa powder. Add the melted butter next. Stir until the crumbs are well coated. The mix should look like wet sand.
Now, grab your cups or small jars. Spoon the crust mixture into each cup. Press it down firmly at the bottom. This makes a nice, even layer. Place the cups in the fridge while you make the filling.
Making the Pumpkin Cheesecake Filling
Next, let’s create the filling. In a large bowl, add softened cream cheese. Use a hand mixer to beat it until smooth. This step is key for a creamy texture.
Now, add pumpkin puree, powdered sugar, vanilla extract, and pumpkin pie spice. Mix well until everything is smooth and combined. The pumpkin will give a lovely flavor and color.
After mixing, gently fold in the whipped cream. This keeps the filling light and airy. Be careful not to overmix; you want to maintain that fluffiness.
Assembling the Cups
Now comes the fun part: assembling the cups! Take the crust from the fridge. Carefully spoon the pumpkin cheesecake filling on top of the crust layer. Fill each cup almost to the top but leave a bit of space.
Once filled, cover the cups with plastic wrap. Refrigerate them for at least four hours. This helps the cups set nicely. Before serving, add chocolate shavings on top. A light dusting of extra pumpkin spice makes it even better. Enjoy your delicious no-bake chocolate pumpkin cheesecake cups!
Tips & Tricks
How to Achieve the Perfect Texture
To get a smooth and creamy texture, start with softened cream cheese. Cold cream cheese makes it hard to blend. Beat the cheese well before adding other ingredients. Mix in the pumpkin puree slowly to keep it light. When you fold in the whipped cream, do it gently. This keeps the mixture airy and fluffy.
Common Mistakes to Avoid
One common mistake is rushing the chilling time. These cups need at least four hours to set. If you skip this step, they won’t hold their shape. Another mistake is overmixing the filling. This can make the texture dense and heavy. Lastly, ensure your crust is packed tightly. A loose crust can crumble when you serve.
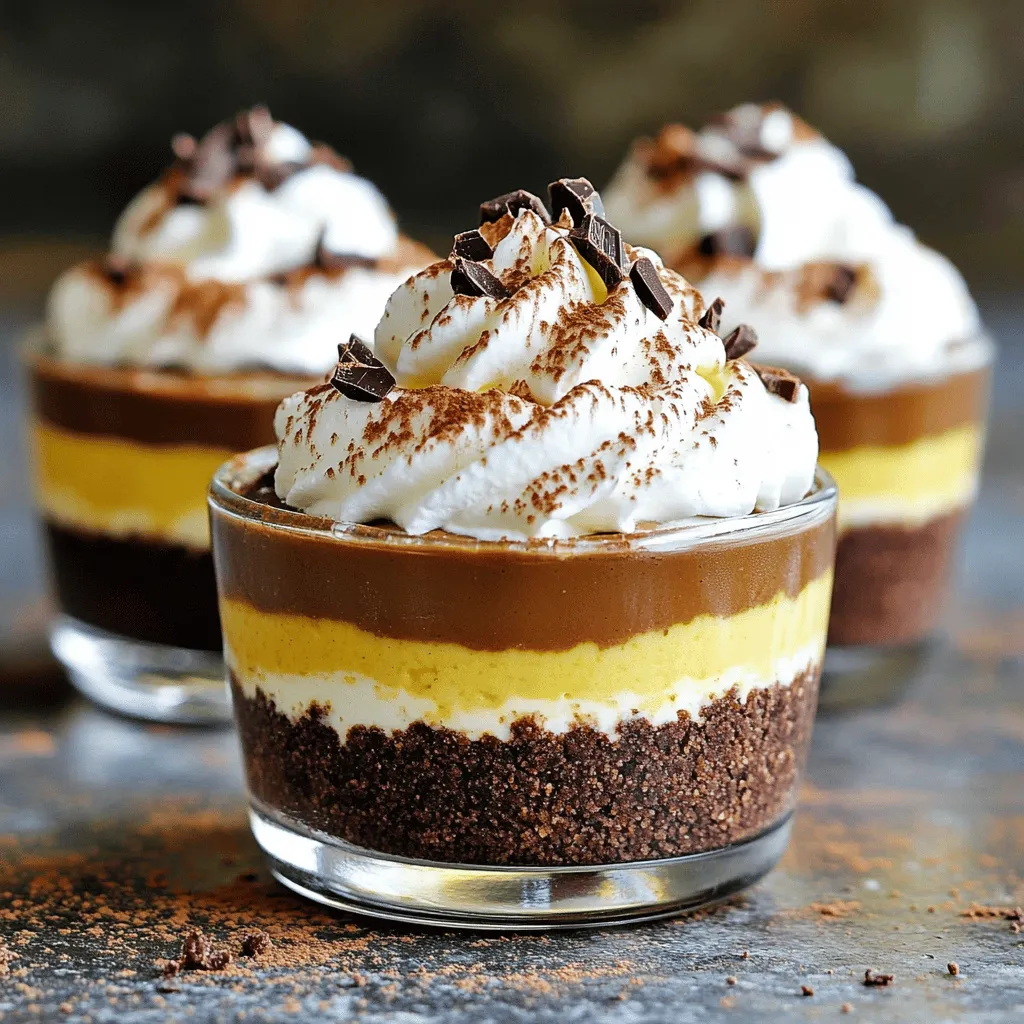
Serving Suggestions
These cheesecake cups look great when served in clear jars. You can top them with chocolate shavings for a nice touch. A sprinkle of extra pumpkin spice adds flavor and color. For a festive look, add a small piece of chocolate on top. These cups pair well with coffee or tea, making them a perfect dessert for gatherings.
Variations
Adding Different Toppings
You can change the look and taste with toppings. Try adding fruit like berries or bananas. Crushed nuts add crunch and flavor. You can also drizzle caramel or chocolate sauce on top. For a festive touch, use whipped cream and sprinkle cinnamon or nutmeg. Each topping gives a new twist to the cheesecake cups.
Swapping Flavors: Alternative Cheesecake Bases
Feel free to swap the crust. Instead of graham crackers, use crushed cookies or nuts. Chocolate cookies make a rich base. For a gluten-free option, try almond flour or gluten-free cookies. You can also change the filling. Use sweet potato puree or another favorite pie filling. Each option brings its own charm.
Dairy-Free and Vegan Options
You can make this dessert dairy-free or vegan. Use plant-based cream cheese and whipped cream. Swap the butter for coconut oil or vegan butter. For the filling, you can use silken tofu blended until smooth. This will give you a creamy texture without dairy. Each of these options still tastes great and keeps the spirit of the dish.
Storage Info
Best Practices for Storing
To keep your No Bake Chocolate Pumpkin Cheesecake Cups fresh, store them in the fridge. Use an airtight container to prevent any odors from other foods. If you can, place parchment paper between layers. This way, they will stay nice and neat.
How Long Can They Be Stored?
These cheesecake cups last well in the fridge for up to five days. If you want to enjoy them later, consider freezing them. Just be sure to cover them tightly to avoid freezer burn.
Freezing Instructions
To freeze the cheesecake cups, first let them set in the fridge. Once firm, wrap each cup in plastic wrap. Then, place them in a freezer-safe bag or container. They can stay in the freezer for up to three months. When ready to eat, let them thaw in the fridge overnight. Enjoy the flavors just as if they were fresh!
FAQs
Can I use a different type of crust?
Yes, you can switch up the crust. You can try using crushed Oreos or almond flour. Both options add a unique taste. If you want a gluten-free version, almond flour works great. Just make sure to mix it with melted butter like in the original recipe.
How do I know when the cheesecake cups are set?
You can tell the cups are set when they feel firm to the touch. After chilling for at least four hours, gently press the top. If it holds its shape, it’s ready. The filling should not be jiggly.
Can I prepare these cups in advance?
Yes, you can make these cups a day ahead. They store well in the fridge. Just cover them tightly with plastic wrap. This helps keep them fresh and tasty. It also gives the flavors more time to blend!
In this blog post, we covered how to make delicious pumpkin cheesecake cups. You learned about the key ingredients, tips for choosing quality items, and ways to avoid common mistakes. We also explored various serving suggestions and storage options, ensuring you can enjoy these treats longer.
Pumpkin cheesecake cups are fun and easy to customize. Enjoy making them your way and share with friends!