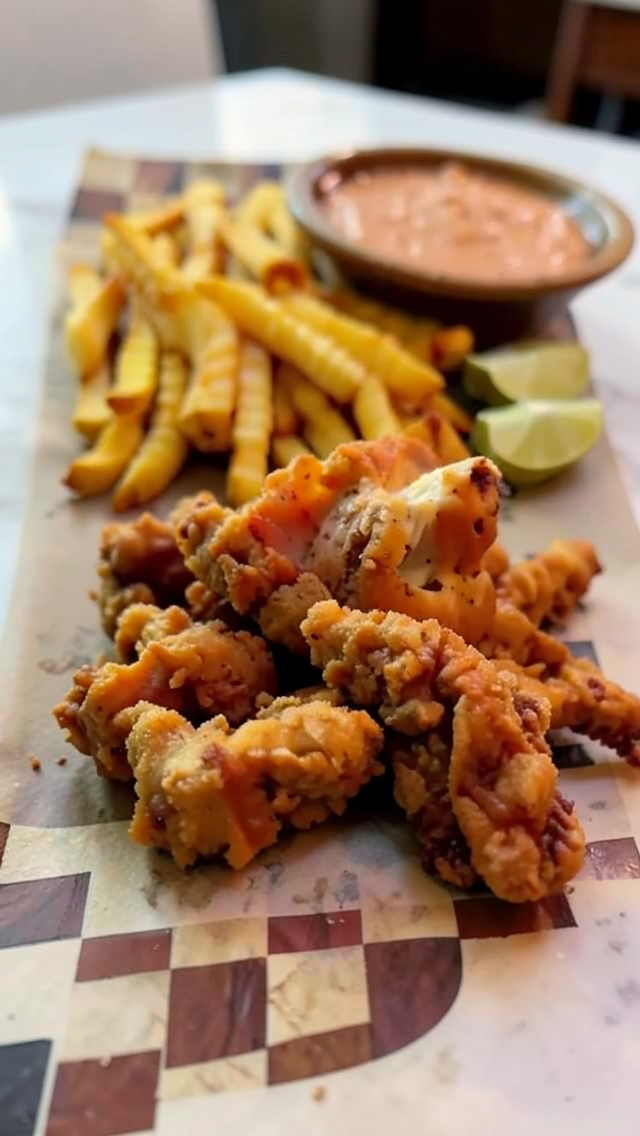
Discover the Joy of Homemade Raising Cane's Chicken Fingers
Imagine biting into a perfectly crispy, golden-brown chicken finger, its savory aroma mingling with the tang of a creamy, flavorful dipping sauce. Now, imagine that this delightful experience happens right in your own kitchen. Welcome to the world of Homemade Raising Cane's Chicken Fingers! If you've ever craved the comforting taste of Raising Cane's, but wished you could enjoy it without leaving home, this recipe is for you.
There's something truly magical about recreating a beloved restaurant dish at home. Not only do you get to savor the flavors you love, but you also enjoy the satisfaction of crafting them yourself. With this recipe, you're not just making chicken fingers; you're creating a meal that brings people together, evokes smiles, and turns any meal into a special occasion. Every bite is a testament to the joys of homemade cooking, a culinary adventure that promises to delight your taste buds.
Whether you're hosting a casual dinner with friends, looking for a family-friendly meal, or simply indulging in a comfort food craving, these chicken fingers are sure to become a favorite. With just a few simple ingredients and a little bit of love, you can whip up a dish that's crispy on the outside, juicy on the inside, and absolutely irresistible. Ready to get started? Let's dive into what makes this recipe so special.
Why You'll Love These Homemade Raising Cane's Chicken Fingers
These chicken fingers are more than just a meal; they're an experience. The secret to their irresistible taste lies in the buttermilk marinade, which infuses the chicken with a rich, tangy flavor and ensures it stays moist and tender. This step is essential, setting the stage for the deliciousness to come. But it's not just the marinade that makes these chicken fingers stand out.
The combination of garlic powder, onion powder, black pepper, and smoked paprika in the coating adds a depth of flavor that's both familiar and exciting. The smoked paprika lends a subtle smoky note that elevates the dish, while the double coating ensures maximum crunch with every bite. Paired with a creamy, zesty dipping sauce, these chicken fingers are a perfect harmony of textures and flavors.
Whether you're a seasoned home cook or a beginner in the kitchen, this recipe is approachable and rewarding. It allows you to enjoy the taste of restaurant-quality chicken fingers while customizing it to suit your taste. Plus, with a total prep and cook time of just 25 minutes, it's perfect for busy weeknights or spontaneous gatherings.
What You'll Need: Key Ingredients and Substitutions
Creating the perfect homemade Raising Cane's Chicken Fingers starts with a few key ingredients. Here's what you'll need and some substitutions you can consider:
- Chicken Breast: Opt for boneless, skinless chicken breasts, cut into strips. If you prefer, chicken tenders or thighs can be used for a juicier texture.
- Buttermilk: This is essential for tenderizing the chicken. If you don't have buttermilk on hand, you can make a substitute by mixing 1 tablespoon of lemon juice or vinegar with 1 cup of milk. Let it sit for a few minutes before using.
- Garlic and Onion Powder: These spices add depth and flavor. You can adjust the quantities to your taste or try adding a pinch of cayenne pepper for extra heat.
- Smoked Paprika: This gives the chicken a subtle smoky flavor. Regular paprika can be used if smoked paprika is unavailable.
- Flour and Cornstarch: The combination of these two creates the perfect crispy coating. For a gluten-free version, use a gluten-free flour blend.
- Mayonnaise, Ketchup, Worcestershire Sauce: These form the base of the dipping sauce. Feel free to tweak the proportions to suit your preferences.
- Oil for Frying: Use a neutral oil with a high smoke point, like canola or vegetable oil, for the best results.
Tips for Perfect Homemade Raising Cane's Chicken Fingers
To ensure your chicken fingers turn out perfectly every time, keep these tips in mind:
- Marinate Properly: Let the chicken marinate for at least 2 hours, or overnight if possible. This step is crucial for tender, flavorful chicken.
- Double Coat for Crispiness: Dredge the chicken in the flour mixture, dip it back into the marinade, and then coat it again. This double coating adds extra crunch.
- Maintain Oil Temperature: Keep the oil at a consistent 350°F (175°C) while frying. This ensures even cooking and prevents the coating from becoming greasy.
- Avoid Overcrowding the Pan: Fry the chicken in batches to maintain the oil temperature and achieve a crispy finish.
- Rest Before Serving: Let the fried chicken rest on a wire rack for a few minutes before serving. This helps the coating set and stay crispy.
Easy Variations to Try
While the classic recipe is delicious as is, here are some variations you can try to mix things up:
- Spicy Chicken Fingers: Add cayenne pepper or hot sauce to the marinade for a spicy kick.
- Herb-Infused: Mix dried herbs like thyme or rosemary into the flour mixture for an aromatic twist.
- Cheesy Coating: Add grated Parmesan cheese to the flour mixture for a cheesy, savory flavor.
- Asian-Inspired: Replace the smoked paprika with five-spice powder and add a splash of soy sauce to the marinade.
How to Serve
Serving these homemade Raising Cane's Chicken Fingers is an opportunity to get creative. Here are some ideas to make your meal memorable:
- Classic Combo: Serve the chicken fingers with crinkle-cut fries and lemon wedges for that authentic Raising Cane's experience.
- Salad Topper: Slice the chicken fingers and use them to top a fresh salad for a light, satisfying meal.
- Sandwich Style: Place the chicken fingers in a toasted bun with lettuce, tomato, and your favorite condiments for a hearty sandwich.
- Party Platter: Arrange the chicken fingers on a platter with various dipping sauces for a crowd-pleasing appetizer.
Storage & Leftovers
If you have leftovers, storing them properly is key to maintaining their quality:
- Refrigeration: Store leftover chicken fingers in an airtight container in the refrigerator for up to 3 days.
- Freezing: To freeze, place cooled chicken fingers on a baking sheet and freeze until solid. Transfer them to a freezer-safe bag for up to 2 months.
- Reheating: Reheat in a preheated oven at 350°F (175°C) for about 10 minutes, or until heated through and crispy.
Frequently Asked Questions
Can I make these chicken fingers in an air fryer?
Yes! Preheat your air fryer to 400°F (200°C) and cook the coated chicken fingers for 10-12 minutes, flipping halfway through, until they're golden and cooked through.
What can I use instead of buttermilk?
If you don't have buttermilk, mix 1 tablespoon of lemon juice or vinegar with 1 cup of milk. Let it sit for a few minutes, and you've got a great substitute!
How do I know when the chicken is cooked?
The chicken should reach an internal temperature of 165°F (74°C). If you're unsure, use a meat thermometer to check doneness.
Can I bake these chicken fingers instead of frying?
Absolutely! Bake at 400°F (200°C) on a greased baking sheet for 20-25 minutes, flipping halfway through, until crispy and golden brown.
What dipping sauces go well with these chicken fingers?
While the creamy sauce in the recipe is a classic choice, you can also try honey mustard, ranch, or barbecue sauce for variety.