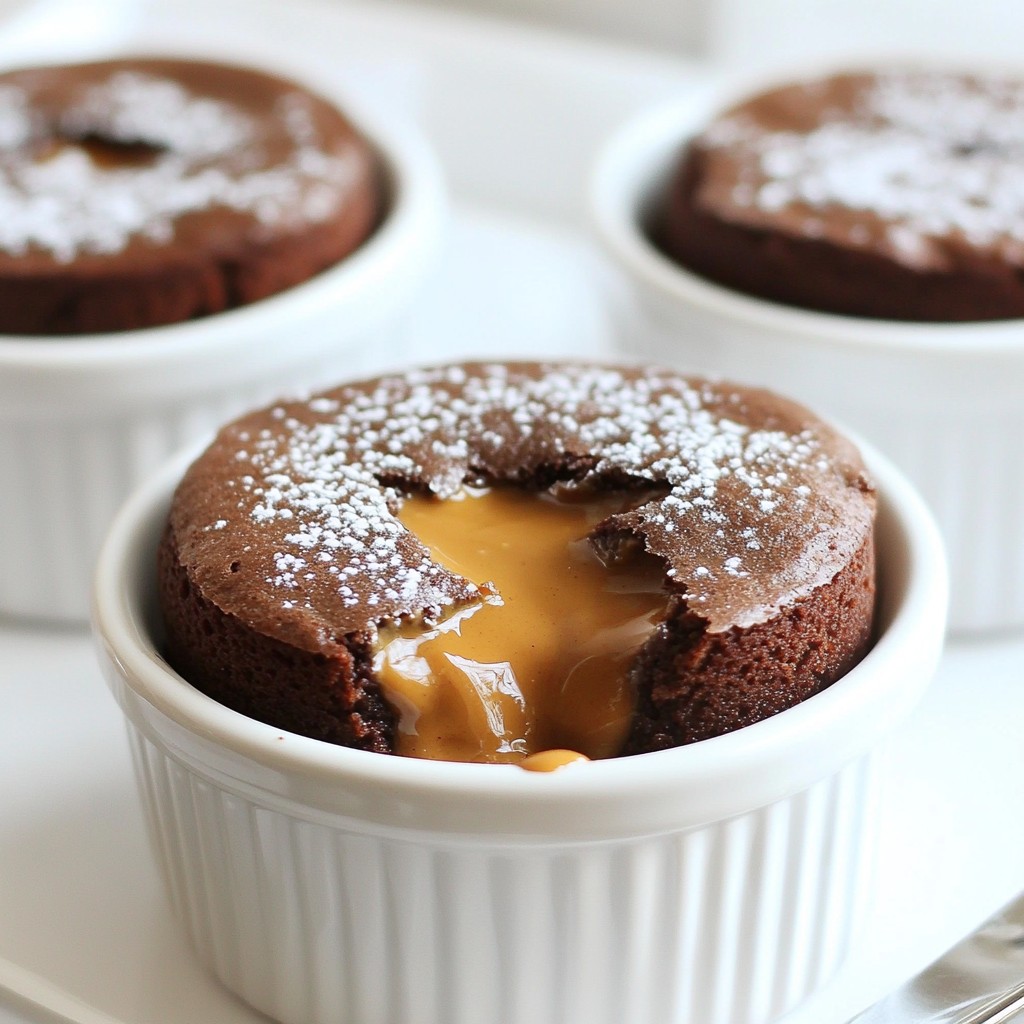
If you're craving a rich dessert, this Decadent Chocolate Peanut Butter Lava Cake is a must-try! Imagine the molten chocolate and creamy peanut butter oozing from a warm cake. In this post, I’ll guide you through each step, from choosing the right ingredients to perfecting the texture. Whether for a special occasion or just a treat for yourself, this recipe will satisfy your sweet tooth. Let’s dive into the delicious details!
Why I Love This Recipe
- Decadent Flavor: This cake combines rich chocolate and creamy peanut butter for an irresistible dessert experience.
- Molten Center: The gooey, melty center creates a delightful surprise when you cut into it, making it perfect for special occasions.
- Quick to Prepare: With just 15 minutes of prep time, you can whip up an impressive dessert for your guests in no time.
- Versatile Presentation: Pair it with ice cream or berries to elevate the dish and add a pop of color to your presentation.
Ingredients
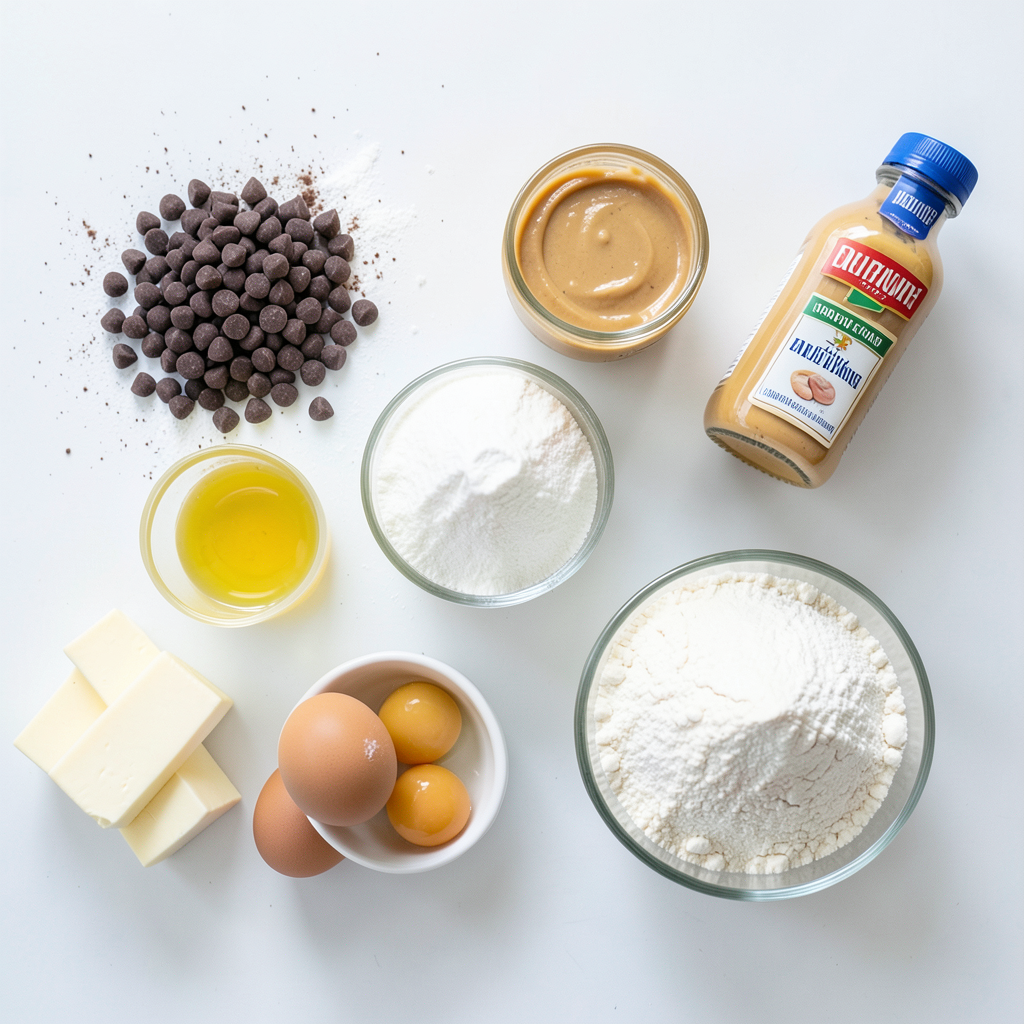
Complete Ingredient List
- 1 cup semisweet chocolate chips
- ½ cup unsalted butter
- 1 cup powdered sugar
- 2 large eggs
- 2 large egg yolks
- 1 teaspoon vanilla extract
- ½ cup all-purpose flour
- ½ teaspoon salt
- ¼ cup creamy peanut butter
- Cooking spray or butter for greasing ramekins
Key Ingredients Explained
The semisweet chocolate chips give the cake a rich, chocolate flavor. I prefer using high-quality chocolate for the best results. Unsalted butter adds creaminess and helps in melting the chocolate smoothly. Powdered sugar sweetens the batter and makes it light. The eggs and egg yolks create a nice texture and help the cake rise. Vanilla extract adds depth to the taste, balancing the chocolate and peanut butter. All-purpose flour gives structure, while salt enhances all the flavors. Finally, creamy peanut butter provides that delicious, gooey center.
Substitutions for Common Ingredients
If you need to make changes, here are a few ideas:
- Use dark chocolate chips for a richer taste.
- Swap unsalted butter for coconut oil for a dairy-free option.
- If you don’t have powdered sugar, blend granulated sugar until fine.
- You can use egg substitutes like applesauce or flaxseed meal for a vegan option.
- For a gluten-free version, try almond flour or a gluten-free flour mix.
Feel free to get creative with these swaps!
Step-by-Step Instructions
Prepping Your Ramekins
Start with four ramekins. Grease each one with cooking spray or butter. This step helps the cakes come out easily later. Place the greased ramekins on a baking sheet. This makes moving them in and out of the oven simple.
Melting the Chocolate and Butter
Grab a microwave-safe bowl. Add one cup of semisweet chocolate chips and half a cup of unsalted butter. Microwave them in 30-second bursts. Stir after each round. Keep going until the mixture is smooth and shiny. This process combines flavors and creates a rich base.
Mixing the Batter
Pour one cup of powdered sugar into the melted chocolate mix. Whisk it together until smooth. Next, add two large eggs and two egg yolks. Mix well after each egg. This helps create the right texture. Stir in one teaspoon of vanilla extract for added flavor.
Now, gently fold in half a cup of all-purpose flour and half a teaspoon of salt. Mix carefully to avoid overmixing. This step is key to keeping the cakes light. Once the batter is ready, divide it evenly among your ramekins, filling them halfway.
Add one tablespoon of creamy peanut butter into the center of each ramekin. Spoon the remaining batter over the peanut butter to cover it. This hidden treat will create the gooey center.
Now, you’re ready to bake! Place the baking sheet in your preheated oven at 425°F (220°C). Bake for 12 to 14 minutes. The edges should be firm, while the center remains soft.
Once baked, let the cakes cool for one minute. Carefully flip them onto plates. Be cautious; the center will be molten and ooze out. Enjoy your delicious chocolate peanut butter lava cakes!
Tips & Tricks
Perfecting the Lava Texture
To get the best lava texture, bake the cakes for just the right time. You want the edges firm, but the center soft. Bake for 12-14 minutes. If you bake too long, the center will set. Keep an eye on them. The perfect lava will ooze out when you cut into it.
Serving Suggestions
Serving your lava cakes right is key. I love to add a scoop of vanilla ice cream. It melts slightly on the warm cake. You can also add a dollop of whipped cream for extra creaminess. Fresh berries add a bright color and balance the rich flavors. It makes your plate look beautiful and inviting.
Make-Ahead Tips
You can prepare the batter in advance. Just fill the ramekins and store them in the fridge for up to 24 hours. When you’re ready to bake, just pop them in the oven. They may need an extra minute or two to cook through. This way, you can enjoy fresh lava cake without the rush!
Pro Tips
- Use High-Quality Chocolate: The flavor of your lava cake heavily depends on the quality of the chocolate. Choose a good brand of semisweet chocolate chips for a rich taste.
- Don’t Overbake: Keep a close eye on the cakes while baking. The key to a perfect lava cake is a gooey center, so bake just until the edges are set.
- Let Them Rest: Allow the cakes to cool for a minute before inverting them. This helps to maintain the molten center and makes for an easier release from the ramekins.
- Experiment with Fillings: While peanut butter is delicious, feel free to try other fillings like Nutella or caramel for a different flavor profile in your lava cake.
Variations
Different Nut Butters
You can switch the peanut butter for other nut butters. Try almond or cashew butter for a new taste. Each nut butter brings its flavor, so feel free to experiment. Almond butter adds a sweet note, while cashew butter is creamy and mild. Just make sure to use a similar amount as the peanut butter. This keeps the cake’s texture just right.
Flavor Additions
You can add fun flavors to your cake. A little mint extract can give a fresh twist. Just use half a teaspoon to start; you can add more if you like it strong. Coffee is another great choice. Adding a tablespoon of brewed coffee to the batter gives a rich depth. You can also mix in chocolate chips or nuts for extra texture.
Baking in Different Formats
You don’t have to use ramekins if you want to bake differently. A muffin tin works well and creates individual cakes. Just adjust the baking time to about 10-12 minutes. You can also bake in a cake pan for a single cake. If you do this, bake for 20-25 minutes. Just ensure the center remains soft for that famous lava flow!
Storage Info
How to Store Leftovers
To store your chocolate peanut butter lava cake, let it cool first. Place it in an airtight container. You can keep it in the fridge for up to three days. If you want to enjoy it later, use a clean plate to wrap the cake tightly with plastic wrap. This helps prevent it from drying out. Always store it in the fridge to keep it fresh.
Reheating Instructions
When it's time to enjoy your leftovers, you can reheat them easily. Preheat your oven to 350°F (175°C). Place the lava cake on a baking sheet. Heat it for about 8-10 minutes. Check it often to avoid overcooking. This method keeps the center gooey. You can also use a microwave. Heat each piece for 20-30 seconds. This method is quicker but might not keep the texture as nice.
Freezing Options
If you want to save your lava cakes for later, freezing is a great option. First, let the cakes cool completely. Wrap each one in plastic wrap tightly. Then, place them in a freezer-safe bag or container. They can last up to three months in the freezer. When ready to eat, thaw them in the fridge overnight. Once thawed, reheat them as mentioned above for the best results.
FAQs
What is a lava cake?
A lava cake is a small chocolate cake with a gooey center. This center flows out like lava when you cut it. It is a fun dessert that impresses everyone. The outer part is firm, while the inside is soft and warm. Chocolate peanut butter lava cake adds creamy peanut butter to this mix, making it richer.
How do I know when my lava cake is done?
You can tell if your lava cake is done by checking the edges. The edges should be set and firm. The center will look soft and slightly jiggly. If you insert a toothpick, it should come out mostly clean, but with some batter on it. Remember, the key is to underbake just a bit for that molten center.
Can I make chocolate peanut butter lava cake ahead of time?
Yes, you can prepare the batter ahead of time. Just fill the ramekins, then cover and chill them. When you are ready to bake, take them out of the fridge. Bake them as usual, adding a minute or two to the cooking time. This way, you can enjoy a warm dessert without all the fuss!
This article covered all you need to know about making chocolate peanut butter lava cake. You learned about the essential ingredients, step-by-step instructions, and tips for perfect results. We explored variations to add fun flavors and how to store leftovers properly.
Remember, practice makes perfect. Your lava cake can impress family and friends. Enjoy baking and sharing this sweet treat!