Do you crave a dessert that oozes with gooey chocolate goodness? Look no further! This Chocolate Lava Cake is simple, elegant, and utterly delightful. In this recipe, I’ll guide you through each step to create that perfect molten center. With easy ingredient swaps and tips from my baking experience, you’ll impress everyone with this sweet treat. Let’s dive in and create chocolate magic together!
Ingredients
List of Required Ingredients
To make a great chocolate lava cake, you need the following:
– 1/2 cup unsalted butter
– 1 cup dark chocolate chips (70% cocoa or more)
– 2 large eggs
– 2 large egg yolks
– 1/3 cup granulated sugar
– 1/4 cup all-purpose flour
– 1 teaspoon vanilla extract
– Pinch of salt
– Cocoa powder (for dusting the ramekins)
Ingredient Substitutions
If you need alternatives for any of these ingredients, here are some good options:
– Use semi-sweet chocolate chips instead of dark chocolate.
– Replace eggs with 1/4 cup of unsweetened applesauce or mashed banana.
– For gluten-free lava cake, swap all-purpose flour with almond flour or gluten-free flour blend.
Importance of High-Quality Ingredients
Using high-quality ingredients makes a big difference in taste. Dark chocolate gives a rich flavor. It melts beautifully, creating that gooey center we love. Fresh eggs help the cake rise and create a soft texture. When eggs are fresh, they whip up better. This makes your cake light and fluffy. Overall, the quality of your ingredients can change the entire experience. You will taste the difference!
Step-by-Step Instructions
Prepping for Baking
Start by preheating your oven to 425°F (220°C). This step is crucial for baking. While the oven heats, grab four ramekins. Grease each ramekin with unsalted butter. Next, dust them with cocoa powder. This helps the cakes come out easily. Tapping out any excess cocoa powder is important.
Now let’s prepare the batter. In a microwave-safe bowl, we will melt chocolate and butter together.
Melting Chocolate and Butter
For melting chocolate, the microwave works best. Combine 1/2 cup of unsalted butter and 1 cup of dark chocolate chips in a bowl. Heat them in the microwave. Use 30-second intervals and stir in between. This method makes sure the chocolate melts evenly. You want a smooth mixture, not burnt chocolate.
Combines & Folds
Once your chocolate is melted, let it cool a bit. In a separate bowl, whisk together two large eggs, two large egg yolks, and 1/3 cup of granulated sugar. Keep whisking until the mix is pale and thick. Now pour in the melted chocolate while whisking. This helps blend the mixtures well.
Next, gently fold in 1/4 cup of all-purpose flour, a teaspoon of vanilla extract, and a pinch of salt. Be careful not to overmix. Overmixing can make the cake tough. You want a smooth, thick batter.
Baking and Serving
Now it’s time to bake! Divide the batter evenly among the prepared ramekins. Place them in the oven and bake for 12-14 minutes. The edges should be firm while the center jiggles slightly. This indicates they are done.
After baking, let the cakes cool for 1 minute. Carefully invert each ramekin onto a plate. Lift gently to release the cake. Allow them to settle for another 30 seconds before serving.
Presentation Tips
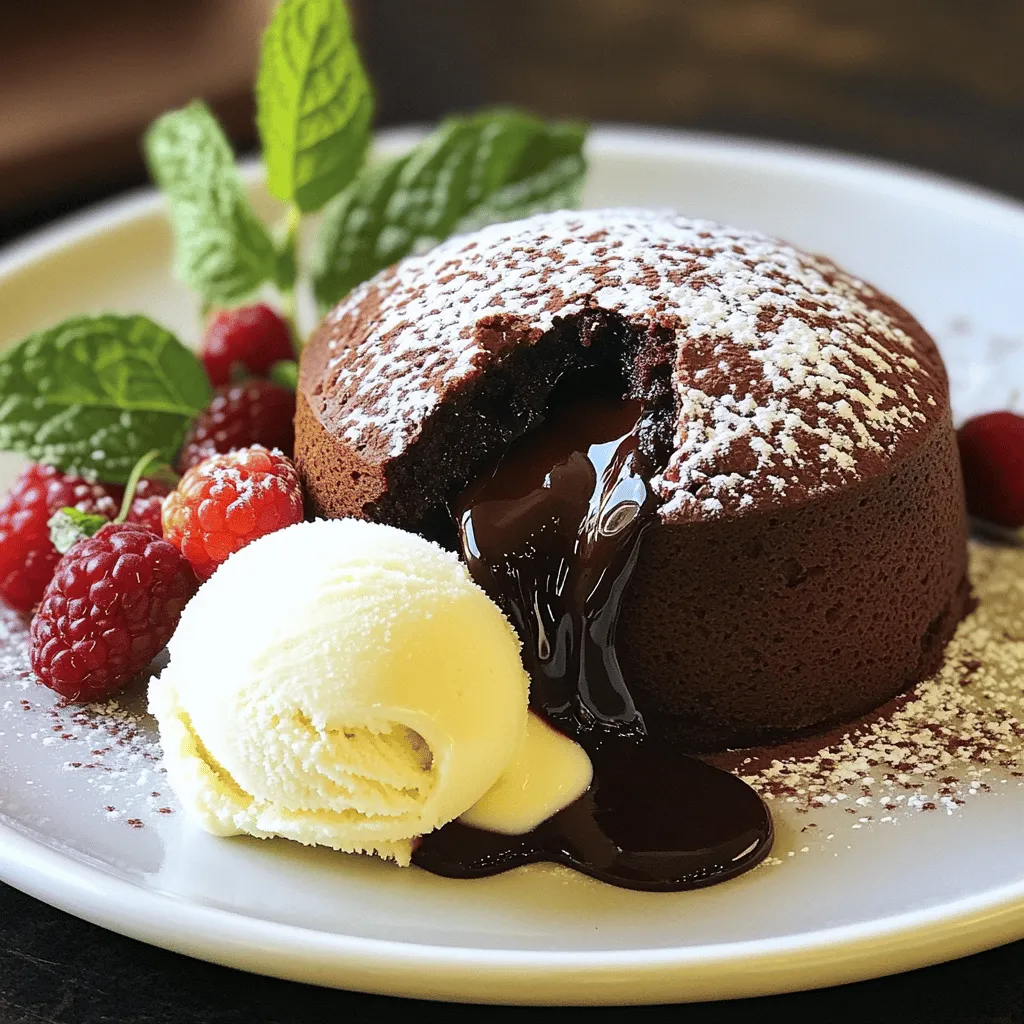
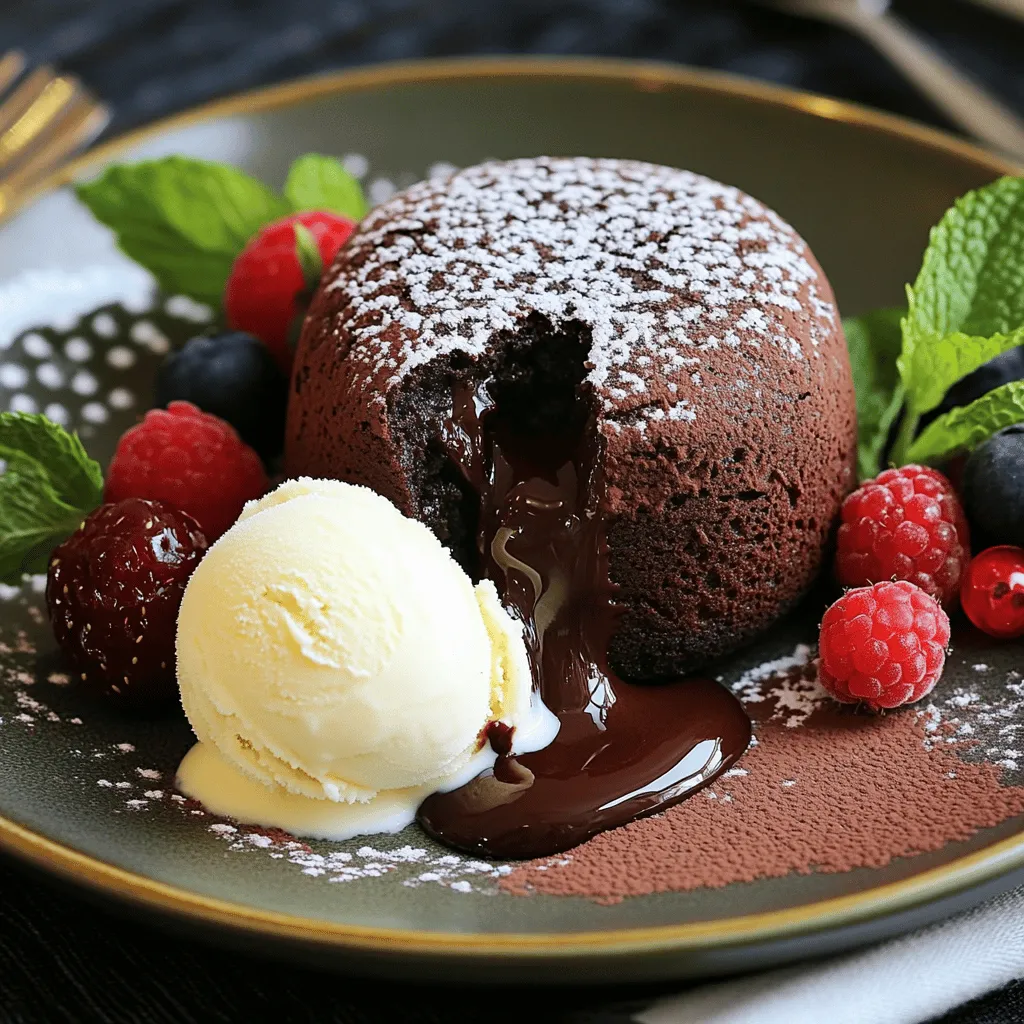
Serve the lava cakes warm. Dust with powdered sugar and add a scoop of vanilla ice cream or whipped cream on top. Garnish with fresh berries or a sprig of mint for color. This makes your dessert look even more inviting.
Tips & Tricks
Achieving the Perfect Molten Center
To get that lovely lava flow, follow these key pointers:
– Baking time is crucial. Bake for 12-14 minutes. The edges should be firm, but the center must jiggle.
– Use the right ramekins. Choose 6-ounce ramekins for the best results.
– Cool before serving. Let the cakes sit for one minute. This helps them keep their shape.
– Don’t skip the dusting. Cocoa powder helps the cakes release easily from the ramekins.
Common Mistakes to Avoid
Avoid these common issues for the best chocolate lava cake:
– Overbaking. If you bake too long, the center won’t flow. Stop when it still jiggles.
– Underbaking. If it’s too runny, you won’t get the right texture. Stick to the time.
– Wrong ingredient ratios. Measure carefully. Too much flour can make the cake dense.
Expert Recommendations
Here are some insights from pros to perfect your cake:
– Use high-quality chocolate. A rich chocolate gives a better flavor.
– Whisk well. Ensure eggs and sugar mix until thick. This adds air for a lighter cake.
– Experiment with flavors. Try adding a splash of espresso or orange zest for a twist.Enjoy your baking journey!
Variations
Flavor Enhancements
You can give your chocolate lava cake a twist. Try adding espresso to the batter. This will deepen the chocolate flavor. You can also mix in some orange zest for a fresh taste. If you want a little kick, consider using liqueurs like Grand Marnier or Kahlua. Each of these additions brings a new layer of flavor. Experiment with amounts and find what you like best.
Alternative Presentations
Serving your lava cakes can be fun. Try drizzling chocolate sauce or caramel over the top. This adds a rich layer of sweetness. You can also dust with powdered sugar for a snowy look. Want something fruity? Fresh berries complement the chocolate well. A scoop of vanilla ice cream makes it even better. Get creative with how you present your dessert!
Dietary Variations
You can make chocolate lava cake for different diets. For a vegan option, replace eggs with flax eggs. Mix one tablespoon of ground flaxseed with three tablespoons of water. Let it sit until it thickens. Use a plant-based butter for a dairy-free version. If you’re gluten-free, swap all-purpose flour for almond flour or a gluten-free blend. These changes keep the taste rich and delicious. Enjoy your personalized lava cake!
Storage Info
Best Practices for Storing Lava Cakes
Store leftover chocolate lava cakes in the fridge. Use an airtight container to keep them fresh. If you leave them out, they can dry out quickly. Enjoy them within two days for the best taste.
Reheating Instructions
To reheat chocolate lava cakes, place them in the oven. Set the temperature to 350°F (175°C). Heat for about 8 to 10 minutes. This method warms the cake without cooking the center. You want that gooey chocolate to flow when you cut in!
Freezing Tips
Yes, you can freeze chocolate lava cakes! First, let them cool completely. Wrap each cake in plastic wrap. Then place them in a freezer bag. They will last up to three months. When you’re ready to eat, thaw in the fridge overnight, then reheat as described above.
FAQs
How do I know when my chocolate lava cake is done?
Your cake is done when the edges look firm. The center should jiggle a bit. You can also insert a toothpick. If it comes out with some batter, it’s perfect. Keep an eye on the time; it usually takes 12-14 minutes. This is key to getting that gooey center.
Can I make this recipe ahead of time?
Yes, you can prep the batter ahead of time. Store it in the fridge for up to 24 hours. Just be sure to cover the ramekins with plastic wrap. When ready, take them out and bake them fresh. This makes your dessert easy for parties or special meals.
What can I serve with chocolate lava cake?
Ice cream is a great choice! Vanilla or mint chocolate chip pairs well. You can also drizzle chocolate sauce or caramel on top. Fresh berries add a nice touch, too. For a fancy look, try whipped cream or a sprinkle of powdered sugar.
Is it possible to make a larger lava cake instead of individual portions?
Absolutely! You can use a larger baking dish. Just adjust the baking time. A larger cake may need 20-25 minutes. Keep checking for the same visual cues. The edges should be firm, and the center should jiggle slightly.
What is the difference between molten cake and lava cake?
Molten cake and lava cake are very similar. Both have a gooey center. Some say molten cakes are richer. Others believe lava cakes are more about the flow of chocolate. Ultimately, they both deliver that delicious chocolate experience.
In this article, we explored the key ingredients needed for chocolate lava cake. We also discussed ingredient substitutions, the importance of quality, and detailed step-by-step instructions. I shared tips to achieve a perfect molten center and common mistakes to avoid. Lastly, we looked at storage best practices and answered frequently asked questions on the topic.
Using these insights, you can create a delicious dessert that impresses everyone. Enjoy your baking journey and savor your chocolate lava cake!