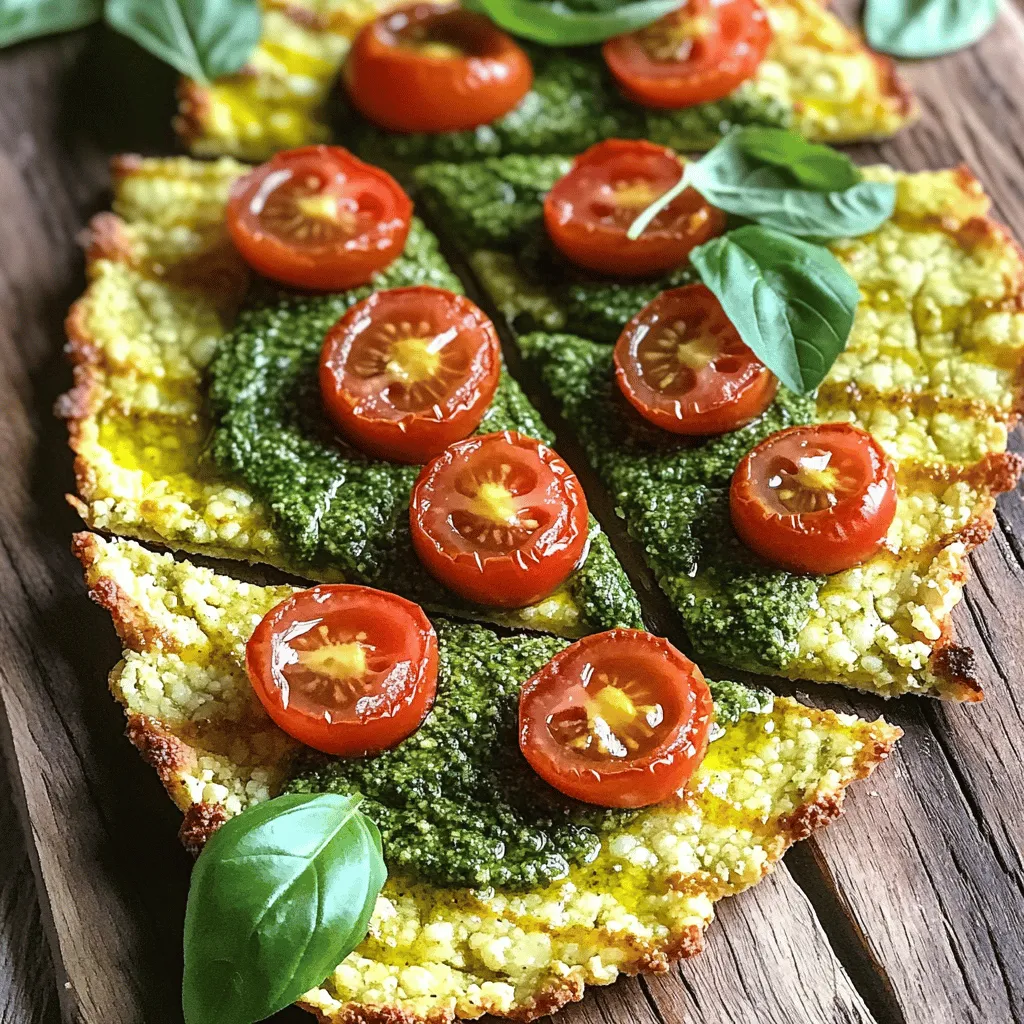
Are you ready to enjoy a tasty twist on traditional flatbreads? My Cauliflower Crust Pesto Flatbreads offer a delicious, healthy option that’s fun to make. With a crunchy, golden crust made from grated cauliflower, you won’t miss regular dough. Top it with fresh pesto, cherry tomatoes, and basil, and you’ve got a meal that’s bursting with flavor. Let’s dive into this simple recipe that elevates your snack game!
Ingredients
List of Ingredients
– Grated cauliflower
– Shredded mozzarella cheese
– Grated Parmesan cheese
– Large eggs
Additional Seasonings
– Garlic powder
– Dried oregano
– Salt and pepper to taste
Toppings and Garnishes
– Basil pesto
– Cherry tomatoes
– Fresh basil leaves
– Olive oil
Making cauliflower crust pesto flatbreads is simple. You need a few key ingredients. The main star is grated cauliflower. It gives the flatbread its unique base. You will also need shredded mozzarella cheese and grated Parmesan cheese for a cheesy flavor. Two large eggs help hold everything together.
Next, you will want some seasonings. Garlic powder and dried oregano add depth to the crust. Don’t forget salt and pepper to taste, which enhance all the flavors.
For the top, basil pesto is essential. It adds a burst of freshness. Halved cherry tomatoes bring a touch of sweetness. Fresh basil leaves make a lovely garnish. A drizzle of olive oil completes the dish and adds richness.These ingredients come together to create a flavorful delight that everyone will enjoy.
Step-by-Step Instructions
Preparation Steps
1. Preheating the oven: Start by preheating your oven to 425°F (220°C). This heat is key for a golden crust.
2. Grating and processing cauliflower: Take a small head of cauliflower and grate it. Use a food processor to pulse the grated cauliflower until it looks like small grains or rice. This texture helps create the crust.
3. Squeezing out moisture: This step is very important. Place the processed cauliflower in a clean kitchen towel. Squeeze out as much moisture as you can. Less moisture means a crispier flatbread.
Mixing Ingredients
1. Combining cauliflower with cheeses and seasonings: In a big bowl, mix the dry cauliflower with shredded mozzarella cheese, grated Parmesan cheese, and two eggs. Add garlic powder, dried oregano, salt, and pepper to taste. Make sure everything is well mixed.
2. Forming the flatbread shape: Spread the cauliflower mixture on a lined baking sheet. Shape it into a flatbread about 1/4 inch thick. Keep it even for a nice bake.
Baking Process
1. First baking phase: Bake the flatbread in your preheated oven for about 20-25 minutes. You want the edges to turn golden brown. The flatbread should feel firm to the touch.
2. Adding toppings and final baking: Once baked, take it out and spread a layer of basil pesto over the top. Add halved cherry tomatoes for a bright flavor. Return the flatbread to the oven and bake for another 5-7 minutes. You want the tomatoes to soften a bit.
Now, enjoy your delicious creation!
Tips & Tricks
Achieving the Perfect Crust
To get the best crust for your cauliflower flatbreads, moisture removal is key. After grating the cauliflower, use a clean towel. Wrap the cauliflower in the towel and squeeze hard. This step is crucial. Too much moisture will make your crust soggy, not crisp.
Baking tips can help too. Spread the cauliflower mix thinly on the baking sheet. Aim for about 1/4 inch thick. Bake at 425°F for 20-25 minutes. Look for golden edges to know when it’s ready. The crispier the base, the better the flatbread.
Pesto Variations
You can use homemade or store-bought pesto for these flatbreads. Homemade pesto often has fresher flavors. It’s easy to make with basil, garlic, and nuts. Store-bought options are quick and still tasty.
You can also change up the flavors in your pesto. Try adding sun-dried tomatoes or nuts like walnuts. A sprinkle of lemon juice adds a nice zing too. Mix it up based on your taste.
Serving Suggestions
Pair your flatbreads with light sides and drinks. A simple salad with greens works great. You could also serve it with a glass of sparkling water or lemonade.
Presentation matters. Use a nice cutting board to serve your flatbreads. Drizzle olive oil on top for a shiny finish. Add fresh basil leaves for a pop of color. This makes your dish look as great as it tastes.
Variations
Gluten-Free Options
You can easily make this dish gluten-free. The main ingredient, cauliflower, is naturally gluten-free. For the cheese, use a gluten-free blend. You can also swap in nut-based cheeses if you like. They add a unique flavor and texture.
Flavor Add-Ins
Adding more veggies can boost taste and nutrition. Think about spinach, bell peppers, or zucchini. They mix well with the cauliflower. You can also try fresh herbs like thyme or rosemary. Spices like red pepper flakes or smoked paprika can add a nice kick. Don’t be afraid to experiment!
Snack and Meal Ideas
These flatbreads make great snacks or meals. Serve them as an appetizer at parties. They are easy to share! For a complete meal, pair them with proteins like grilled chicken or chickpeas. Top them with a salad for a nice crunch. The options are endless!
Storage Info
Storing Leftovers
After enjoying your cauliflower crust pesto flatbreads, store any leftovers in the fridge. Place them in an airtight container. This helps keep the flatbreads fresh for up to three days. If you want to keep them longer, consider freezing them. Wrap each flatbread in plastic wrap. Then place them in a freezer-safe bag. They can last in the freezer for about a month.
Reheating Techniques
When it’s time to enjoy your leftovers, you have a choice: oven or microwave. The oven gives you a crispier crust. Preheat it to 350°F (175°C). Place the flatbread on a baking sheet. Heat for about 10-15 minutes, checking for warmth.
Using the microwave is faster but makes the crust softer. If you choose this method, heat it for 30 seconds to one minute. To keep some crispness, try placing a paper towel under the flatbread. This helps absorb moisture while it heats.
FAQs
How do I make cauliflower crust crispy?
To make a crispy cauliflower crust, moisture removal is key. Start by grating your cauliflower. Then, pulse it in a food processor until it looks like rice. After that, place the grated cauliflower in a clean kitchen towel. Squeeze out as much moisture as you can. This step is crucial. If you skip it, your crust will be soggy.
You can also bake the cauliflower for a few minutes before mixing it with other ingredients. This extra step helps drive out more moisture.
Can I use frozen cauliflower?
Yes, you can use frozen cauliflower. However, it may change the texture and flavor. Frozen cauliflower is often more watery. Thaw it first and drain any excess liquid. Then, squeeze it in a towel, just like fresh cauliflower. This helps improve the crust’s texture.
Keep in mind that frozen cauliflower may not have the same fresh taste. If you want a stronger flavor, fresh cauliflower is better.
What can I substitute for the eggs?
If you need an egg substitute, there are several good options. You can use flaxseed meal or chia seeds. Mix 1 tablespoon of either with 2.5 tablespoons of water. Let it sit for a few minutes until it becomes gel-like.
Applesauce is another option. Use 1/4 cup of unsweetened applesauce for each egg. Mashed bananas also work. Use 1/4 cup of mashed banana as a substitute.
These options help bind the ingredients, just like eggs do, and keep your flatbread together.
This blog post covers how to make a tasty cauliflower crust. We discussed the key ingredients, like grated cauliflower and cheeses, and seasonings to enhance flavor. You learned step-by-step instructions for preparation and baking, along with tips for a perfect crust. We also explored variations, storage tips, and answered common questions.
Overall, making cauliflower crust is simple and fun. Experimenting with toppings lets you create your favorite versions. Enjoy your healthy meals!