Skip to content
DisclaimerTerms Of UseGDPR PolicyCookie Policy

Chelles Recipes

  • Home
  • Drinks
  • Appetizers
  • Dinner
  • Dessert
  • About
  • Contact
  • Privacy Policy
DisclaimerTerms Of UseGDPR PolicyCookie Policy

Rosie

To make tasty baked pumpkin donuts, you need simple ingredients. Here’s what you will need: - 1 cup canned pumpkin puree - 1/2 cup granulated sugar - 1/2 cup brown sugar, packed - 1/4 cup vegetable oil - 2 large eggs - 1 teaspoon vanilla extract - 1 1/2 cups all-purpose flour - 1 teaspoon baking powder - 1 teaspoon baking soda - 1 teaspoon ground cinnamon - 1/2 teaspoon ground nutmeg - 1/2 teaspoon ground ginger - 1/4 teaspoon salt - 1/4 teaspoon ground cloves Each ingredient adds flavor and texture to the donuts. Canned pumpkin puree gives them a rich taste. The sugars sweeten the batter and help it rise. Vegetable oil keeps the donuts moist. Eggs act as a binder and add fluffiness. Vanilla extract provides a warm, sweet note. Flour makes up the base, while baking powder and baking soda help them rise. The ground spices create that perfect fall flavor. Salt balances the sweetness and enhances all the tastes. For the full recipe, check the details above. Enjoy making these delicious donuts! Preheating the Oven Start by preheating your oven to 350°F (175°C). This step is key for even baking. While the oven warms, lightly grease your donut pan. This helps the donuts pop out easily after baking. Combining Wet Ingredients In a large bowl, add the canned pumpkin puree, granulated sugar, brown sugar, vegetable oil, eggs, and vanilla extract. Whisk these ingredients together until smooth. This mix will give your donuts that rich pumpkin flavor. Mixing Dry Ingredients In another bowl, mix the all-purpose flour, baking powder, baking soda, ground cinnamon, ground nutmeg, ground ginger, salt, and ground cloves. Stir these dry ingredients together well. This mix adds the spice and structure to your donuts. Incorporating Dry into Wet Ingredients Gradually add the dry mix to the wet mix. Stir gently until just combined. Be careful not to overmix. A few lumps are fine. This helps keep your donuts light and fluffy. Filling the Donut Pan Spoon the batter into the prepared donut pan. Fill each cavity about 2/3 full. This allows room for the donuts to rise without spilling over. Baking Time and Temperature Place the donut pan in your preheated oven. Bake for 12 to 15 minutes. To check if they are done, insert a toothpick into the center. If it comes out clean, your donuts are ready. Cooling Instructions Let the donuts cool in the pan for about 5 minutes. Then, transfer them to a wire rack. Let them cool completely. This step ensures they maintain their shape and texture. For more details, refer to the Full Recipe for Baked Pumpkin Spice Donuts. To keep your donuts moist, mixing the batter correctly is key. Mix just until the flour is combined with the wet ingredients. Overmixing can lead to tough donuts. Aim for a smooth batter with small lumps. Baking time can vary based on your oven. Start checking for doneness at 12 minutes. If a toothpick comes out clean, your donuts are ready. If not, give them a few more minutes. Toppings can elevate your pumpkin donuts. I love rolling them in a mix of cinnamon and sugar while they’re still warm. It adds a sweet crust that complements the spices. You might also try a simple glaze made from powdered sugar and milk. Adjusting spices can help you find your perfect flavor. If you like a stronger taste, add more cinnamon or nutmeg. For a kick, consider a pinch of ground cloves. Taste the batter before baking to see if you need more spice. Using the right kitchen tools makes baking easier. A good donut pan is essential. Look for one made from non-stick material for easy release. Silicone pans can work great too, as they help prevent sticking. A whisk and mixing bowls are also important. Make sure you have a good set of measuring cups and spoons. Accurate measurements ensure your donuts turn out perfectly every time. For the full recipe, check out the Baked Pumpkin Spice Donuts section. {{image_2}} You can change the flavor of baked pumpkin donuts easily. Here are two fun ideas: - Chocolate Chip Pumpkin Donuts: Add 1 cup of chocolate chips to your batter. This mix makes the donuts sweet and rich. The chocolate pairs well with the pumpkin spice. - Maple Glazed Pumpkin Donuts: For a sweet twist, top your donuts with maple glaze. Mix 1 cup of powdered sugar with 2 tablespoons of maple syrup and 1 tablespoon of milk. Drizzle this over the cooled donuts for a sweet finish. Making these donuts for special diets is simple. Here are two tasty options: - Gluten-Free Pumpkin Donuts: Swap the all-purpose flour for 1 ½ cups of gluten-free flour. Check that your baking powder is also gluten-free. The donuts will still be soft and delicious. - Vegan Pumpkin Donuts: Replace the eggs with ½ cup of unsweetened applesauce. Use a plant-based milk instead of regular milk if you glaze them. These donuts will be just as yummy without any animal products. Serving these donuts can be fun and creative. Here are some ideas: - Pairing Ideas with Coffee or Tea: Enjoy your donuts with a warm cup of coffee or tea. The spices in the donuts taste great with a simple black coffee or a cozy chai tea. - Creative Serving Styles: Arrange the donuts on a colorful plate. You can stack them or make a donut tower. Add some fall leaves or small pumpkins around the plate for a festive look. For the full recipe, check out the steps above to bake these delicious treats! To keep your baked pumpkin donuts fresh, I suggest storing them at room temperature. Place them in a sealed container or a zip-top bag. This keeps them moist for a few days. If you want to refrigerate them, wrap each donut in plastic wrap. Then place them in an airtight container. This helps prevent them from drying out. If you have more donuts than you can eat in a few days, freezing is a great option. To freeze baked pumpkin donuts, first, let them cool completely. Then, place them in a single layer on a baking sheet. Freeze for about an hour. After that, transfer them to a freezer-safe bag or container. This method keeps them from sticking together. For reheating, just take a donut out of the freezer. Thaw it in the fridge or microwave. Heat it in the microwave for about 10-15 seconds. This makes them warm and tasty again. Baked pumpkin donuts last about 3-4 days at room temperature. In the fridge, they stay fresh for about a week. If you freeze them, they can last up to three months. Just remember to check for any signs of freezer burn when you take them out. Enjoy these delicious treats whenever you like! For the full recipe, check out the details above. You can check if your donuts are done by using a toothpick. Simply insert a toothpick into the center of a donut. If it comes out clean, your donuts are ready. If the toothpick has batter on it, bake them a bit longer. This simple test helps ensure your donuts are baked just right. Yes, you can make the batter ahead of time. Mix the wet and dry ingredients separately. Keep the wet mix in the fridge for up to two days. When you are ready to bake, combine the two mixtures and fill the donut pan. This makes it easy for busy mornings or last-minute gatherings. If you lack a donut pan, don’t worry! You can use a muffin tin instead. Just pour the batter into the muffin cups. Bake them for about 15 to 18 minutes. They will not have a hole, but they will be just as tasty. You can also shape the donuts by hand and bake them on a baking sheet. Enjoy your delicious baked pumpkin donuts, no matter the shape! This blog post covered how to make delicious pumpkin donuts from scratch. We explored essential ingredients, detailed steps for preparing and baking the donuts, useful tips, fun variations, and storage methods. In summary, these donuts are easy to make and perfect for any occasion. Don’t shy away from trying new flavors or tweaking the recipe. Enjoy your baking and treat yourself to these tasty delights!

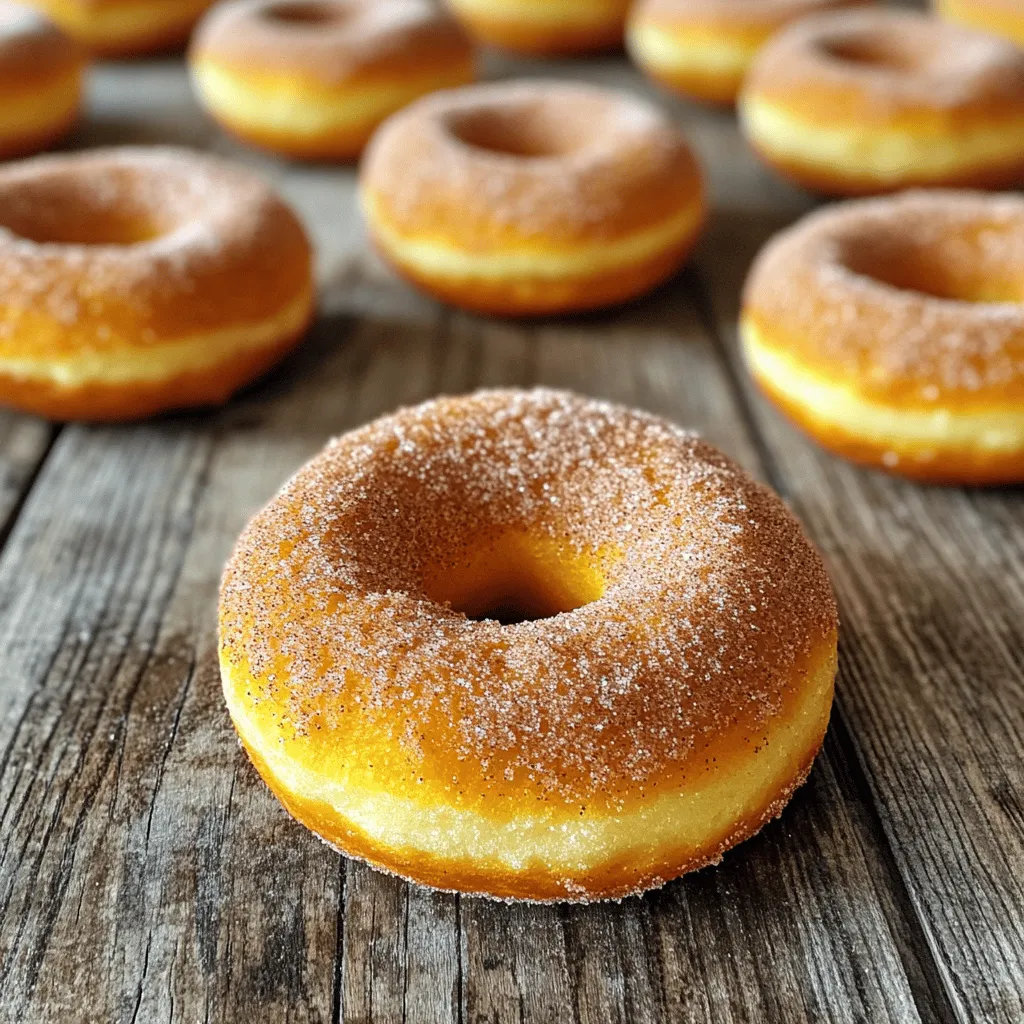
Baked Pumpkin Donuts Deliciously Spiced Treat

Pumpkin season is here, and that means it’s time for baked pumpkin donuts! These deliciously spiced treats are packed with

- 1 lb white fish fillets (like cod or tilapia) - 1 cup fresh cilantro, chopped - 8 small corn tortillas - 1 teaspoon chili powder - 1 teaspoon cumin - 1 teaspoon garlic powder - 1 teaspoon onion powder - Salt and pepper to taste - 1 cup shredded red cabbage - 1 avocado, sliced - ½ cup diced tomatoes - ¼ cup sour cream or Greek yogurt For these cilantro lime fish tacos, the ingredients shine through in every bite. The white fish provides a nice, mild flavor that works well with the vibrant cilantro and zesty lime. I often choose cod or tilapia because they cook quickly and flake beautifully. The seasonings transform the fish into a tasty delight. Chili powder adds warmth, while cumin gives a cozy earthiness. Garlic and onion powders enhance the overall flavor without overpowering the dish. Toppings are where the fun begins! Shredded red cabbage adds crunch and color. Sliced avocado brings creaminess, balancing the fish's texture. Diced tomatoes add freshness, and a drizzle of sour cream or Greek yogurt adds a tangy finish. You can mix and match these ingredients based on your taste. Want more crunch? Add more cabbage. Prefer heat? Toss in jalapeños. These tacos are all about personal taste and creativity. For the complete guide, don’t forget to check out the Full Recipe. To start, gather your spices. In a bowl, mix together: - 1 teaspoon chili powder - 1 teaspoon cumin - 1 teaspoon garlic powder - 1 teaspoon onion powder - Salt and pepper to taste This mix adds a great flavor to the fish. Now, take your fish fillets, about 1 lb of white fish like cod or tilapia. Rub the spice mixture evenly over the fish fillets. Make sure each piece is covered well. This step is key to making your fish tasty. Next, heat 2 tablespoons of olive oil in a skillet over medium-high heat. Once the oil is hot, carefully add the seasoned fish fillets. Cook the fish for about 3-4 minutes on each side. You want the fish to be flaky and cooked through. Squeeze half of the lime juice over the fish while it cooks. This adds a zesty kick! After cooking, take the fish off the heat and let it rest for a minute. This helps keep it juicy. While the fish rests, warm your tortillas. In a separate pan, heat the corn tortillas one at a time. Cook them for about 30 seconds on each side until they are soft and pliable. Now, it’s time to assemble the tacos! Flake the cooked fish into large pieces. Place the flaked fish onto the warm tortillas. Top with your choice of toppings like: - 1 cup shredded red cabbage - 1 avocado, sliced - ½ cup diced tomatoes - 1 cup fresh cilantro, chopped Finish by drizzling the remaining lime juice over the tacos. If you want, add a dollop of sour cream or Greek yogurt for creaminess. Enjoy your crispy and flavorful Cilantro Lime Fish Tacos! For the full recipe, check the detailed instructions above. To enhance the flavor of your cilantro lime fish tacos, consider adjusting the spices. If you like heat, add more chili powder or even some cayenne pepper. For a milder taste, reduce the amount of chili powder. Always use fresh lime juice; it brightens the dish and adds a zesty kick. Bottled lime juice lacks the freshness that makes the tacos shine. Make sure the fish is cooked through and flaky. Cook it for about 3-4 minutes on each side. You’ll know it’s ready when it easily flakes with a fork. For warming tortillas, use a dry pan over medium heat. Warm each tortilla for about 30 seconds on each side until they are soft and pliable. This step ensures the tortillas hold all the delicious fillings without tearing. Pair your tacos with fresh sides like a light salad or corn salsa. These sides add color and crunch, making your meal more vibrant. For garnishing, sprinkle extra cilantro on top. You can also add lime wedges for that perfect squeeze of citrus just before you take a bite. For a complete guide, check out the Full Recipe for more details on these tasty tacos! {{image_2}} You can switch up the fish for your tacos. Salmon and mahi-mahi are great choices. Salmon adds richness, while mahi-mahi has a firm texture. Both will soak up the cilantro lime flavor well. You can even use shrimp or scallops for a fun twist. Just remember to adjust cooking times based on the fish you choose. If you need gluten-free options, use corn tortillas. They have a wonderful flavor and hold up well. For a vegan version, swap the fish for grilled mushrooms or jackfruit. You can also replace sour cream with avocado or cashew cream. These swaps keep the dish tasty and fresh. Want to add some heat? Slice up jalapeños and toss them on top. A dash of hot sauce can also spice things up. Don't stop there! Try using different herbs like dill or parsley to change the flavor. Each herb brings its own unique twist to your tacos. Mix and match to find your favorite combination! To store cooked fish tacos, let them cool first. Place the fish, tortillas, and toppings in separate airtight containers. This keeps each component fresh. Store them in the fridge for up to three days. When you're ready to eat, you can mix and match the toppings to your liking. When reheating, you want to keep the fish crispy and tasty. The best way is to use a skillet. Heat it over medium heat. Add the fish and warm it for about two to three minutes on each side. You can warm the tortillas at the same time in another pan. This way, you'll enjoy a fresh taste without losing texture. Yes, you can freeze the fish! Place cooked fish in a freezer-safe bag. This will keep it good for up to three months. For the tortillas, wrap them in foil and freeze them separately. Toppings like cabbage and avocado do not freeze well. Instead, prepare those fresh when you’re ready to eat. This way, your tacos will taste great! For the full recipe, check the link provided. For the best flavor, I like to use white fish. Cod and tilapia are top choices. They cook fast and are mild. You can also try mahi-mahi or flounder for a different taste. Each of these options gives a nice flaky texture, perfect for tacos. Yes, you can prep some ingredients in advance. You can marinate the fish with spices the night before. Just keep it in the fridge. You can also chop the cilantro, cabbage, and tomatoes ahead. This way, when you’re ready to cook, it will be quick and easy. If you like heat, try adding sliced jalapeños. You can mix them into the toppings or add them right on the fish. Another option is to use a spicier chili powder. You can also drizzle some hot sauce over each taco before serving. This will give you that extra kick! For the complete instructions, check out the full cilantro lime fish tacos recipe. This article shared how to make delicious cilantro lime fish tacos. You learned about key ingredients, cooking steps, and options for toppings. Tips on flavor and serving were also included. Now, you’re ready to create your own tasty tacos. Try different fish varieties and adjust spices to your liking. Enjoy experimenting with toppings and finding your favorite combinations. Cooking should be fun, so make it your own. Happy cooking!

Cilantro Lime Fish Tacos Crispy and Flavorful Delight

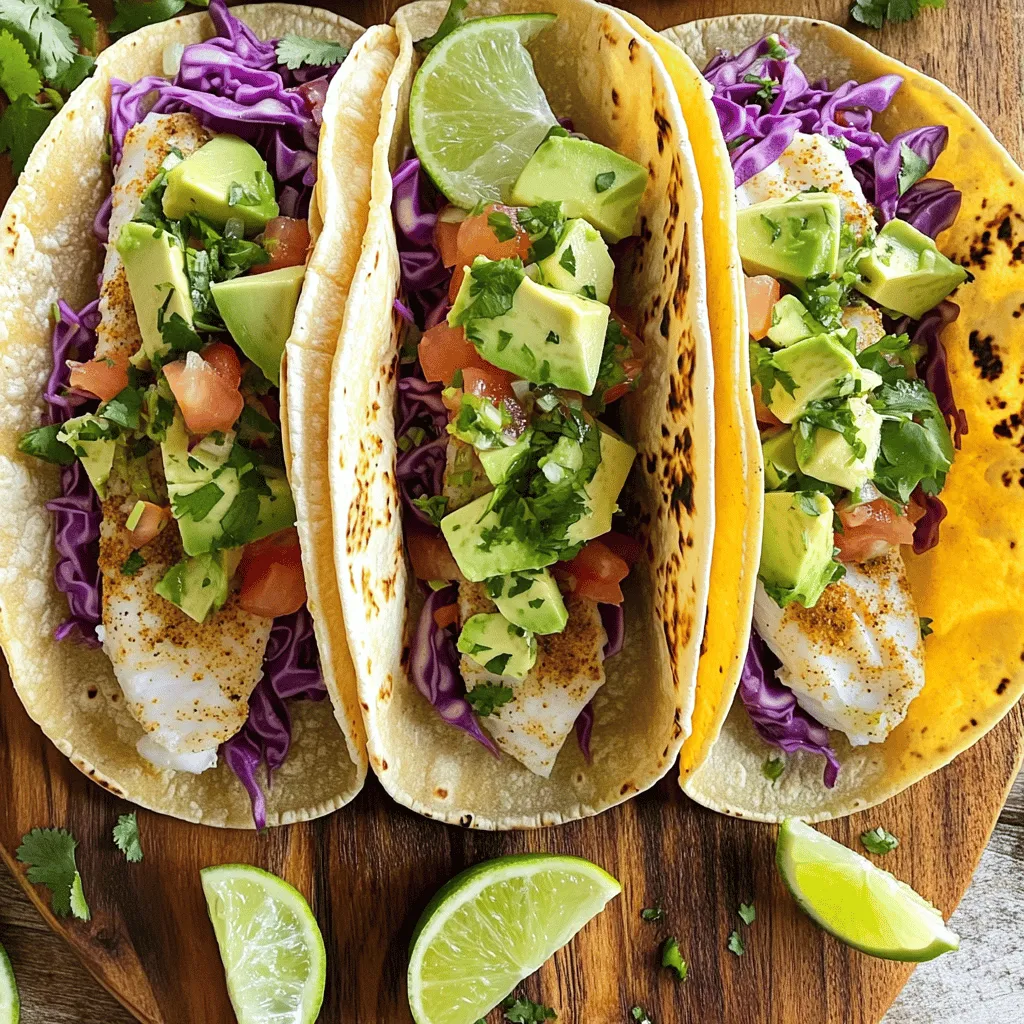
Dive into a world of flavor with my Cilantro Lime Fish Tacos! These crispy delights combine fresh ingredients and zesty

- 1 cup cooked chicken, shredded - 1 cup pumpkin puree - 1 cup all-purpose flour - 1/2 cup water (plus extra as needed) - 1 tablespoon olive oil - 1 teaspoon garlic powder - 1 teaspoon ginger powder - 1/2 teaspoon salt - 1/2 teaspoon black pepper - 1/4 cup green onions, finely chopped - 1 tablespoon soy sauce - Optional: Sesame seeds for garnish The first step in making Chicken Pumpkin Dumplings is gathering all the ingredients. Using cooked chicken saves time. You can use leftover chicken or rotisserie chicken. For the pumpkin, I prefer pumpkin puree for its smooth texture and rich flavor. It blends well with the chicken. Next, you need all-purpose flour to create the dumpling dough. This flour gives the dumplings the right texture. You will also need water to bind everything together. Start with 1/2 cup of water. You can add more if the dough feels too dry. Now let’s talk seasonings. Olive oil adds a nice richness to the filling. Garlic powder and ginger powder bring warmth and depth of flavor. Salt and black pepper enhance the overall taste. Green onions add a fresh crunch and color. Lastly, soy sauce gives the filling a delicious umami kick. If you want to make your dumplings pop, sprinkle some sesame seeds on top before serving. This adds a nice touch and a bit of crunch. With these ingredients ready, you can dive into the full recipe to make these delightful dumplings! - Combine chicken, pumpkin, and seasonings in a bowl. - Mix until fully combined. Start by shredding your cooked chicken. Use a fork or your hands. Then, scoop one cup of pumpkin puree into a big mixing bowl. Add the shredded chicken to the bowl. Next, sprinkle in garlic powder, ginger powder, salt, black pepper, and chopped green onions. Pour in the soy sauce too. Now, mix everything together until it’s all one color. You want to see no dry spots. This filling is the heart of your dumpling. - Gradually add flour and water to form dough. - Resting and kneading the dough. Now, let’s make the dough. Take one cup of all-purpose flour and add it to the bowl slowly. You can add the water half a cup at a time. Stir it with a spoon as you add the flour and water. Keep mixing until your dough holds together. Once it’s formed, cover the bowl with a damp cloth. Let it rest for 15 minutes. This helps make it soft. After resting, sprinkle some flour on a surface. Knead the dough for a few minutes until it feels smooth. - Rolling out the dough. - Filling and sealing the dumplings. Next, divide your dough into small balls. They should be about the size of a golf ball. Take one ball and roll it out into a flat disc, about 3-4 inches wide. Place a spoonful of your chicken and pumpkin filling in the center. Fold the dough over the filling to make a half-moon shape. Pinch the edges tightly to seal them. Make sure no air gets inside. Repeat this with each ball until you have all your dumplings ready. - Steaming instructions. - Cooking time and indicators for doneness. To cook your dumplings, you need a steamer. If you don’t have one, you can use a pot with a lid. Fill it with water and bring it to a boil. Place the dumplings in the steamer basket without letting them touch. Cover the steamer and steam for about 15-20 minutes. You’ll know they are done when they look shiny and feel soft. Once cooked, carefully take them out and place them on a serving platter. Enjoy your delicious Chicken Pumpkin Dumplings! For a complete guide, check the Full Recipe. To make great dumplings, the dough's texture matters. Aim for a soft, smooth feel. The dough should not stick to your hands. If it does, add a little flour. If it's too dry, add a bit more water. This balance is key. Knead the dough gently but well. Let it rest for 15 minutes under a damp cloth. This helps the gluten relax, making it easier to roll out. You can switch up the filling if you want. Try using ground turkey or tofu for a different taste. You can also add minced veggies like carrots or spinach. For extra flavor, mix in herbs like cilantro or basil. A splash of lime juice or a sprinkle of chili flakes can make it pop. Get creative and make it your own! Dumplings taste great with dips. Soy sauce or a spicy chili sauce pairs well. You can also make a tangy dipping sauce with vinegar and sesame oil. For sides, try a fresh salad or steamed veggies. They add color and nutrition to your meal. Enjoy your Chicken Pumpkin Dumplings with these tasty options. For more detailed steps, check out the Full Recipe for guidance. {{image_2}} You can play with flavors in your chicken pumpkin dumplings. One option is to make sweet pumpkin dumplings. Just add a bit of brown sugar and cinnamon to the pumpkin puree. This gives the dumplings a delightful sweet twist. You can enjoy them with a drizzle of honey or a dollop of whipped cream. For a savory option, try herb-infused dumplings. Mix fresh herbs like thyme or rosemary into the dough. These herbs add depth to your dumplings. They pair well with the chicken and pumpkin flavors. If you need gluten-free options, swap the all-purpose flour with a gluten-free blend. Many brands offer these blends that work well in dumpling recipes. You may need to adjust the water slightly to get the right dough texture. For vegan adaptations, use shredded jackfruit or tofu in place of chicken. Blend them with pumpkin and spices for a tasty filling. You can also use a plant-based flour for the dough. This way, everyone can enjoy the dish! Try traditional Asian methods for cooking dumplings. You can pan-fry or boil them instead of steaming. This adds a crispy texture that many people love. For a Southern-style variation, consider adding spices like cayenne or paprika to the filling. You can also serve the dumplings with a spicy dipping sauce. This gives a nice kick and enhances the flavors. These variations make chicken pumpkin dumplings a fun dish to explore. With so many options, you can keep this recipe fresh and exciting! Check out the Full Recipe for all the details to get started. To store leftover dumplings, let them cool first. Place them in an airtight container. You can keep them in the fridge for about 3 days. Be sure to check for any signs of spoilage before eating. For freezing, arrange the dumplings on a baking sheet. Make sure they don’t touch each other. Freeze them for about 1 hour. Then, transfer the dumplings to a freezer bag. They can stay frozen for up to 3 months. When ready to eat, steam them straight from the freezer for about 20-25 minutes. If you want to make dumplings in advance, prepare the filling and dough ahead of time. Store the dough in the fridge for up to 2 days. For longer storage, freeze the dough before shaping. Use parchment paper between layers to avoid sticking. This way, you can enjoy fresh dumplings anytime! For more detailed steps, check the Full Recipe. Yes, you can use fresh pumpkin. Fresh pumpkin gives a bright flavor. However, it takes more work. You need to roast or steam it first. After cooking, mash it well. Canned pumpkin is smoother and easier to use. It saves time and is still tasty. Both options work, but pick what fits your cooking style. Chicken pumpkin dumplings pair well with many sides. Try a simple salad with greens. A light soy sauce dip works great too. You can serve them with steamed vegetables like broccoli or carrots. Rice or noodles also complement the dish nicely. These sides add color and flavor to your meal. Dumplings are done when they are soft and firm. They should not feel doughy. You can cut one open to check. The filling should be hot and fully cooked. Another sign is that they will float a bit when steaming. Trust your senses to guide you. Yes, you can make the dough in advance. Wrap it tightly in plastic wrap. Store it in the fridge for a day or two. When you are ready to use it, let it warm up. Knead it lightly before rolling out. This saves time when you want to enjoy your dumplings. For the full recipe, check out the main article. You’ve learned how to make Chicken Pumpkin Dumplings with clear steps and helpful tips. We covered the right ingredients, preparation, cooking methods, and storage ideas. Remember, you can customize the filling and try different flavors. These dumplings are not just easy; they’re tasty too. Now, gather your ingredients and start cooking. Enjoy sharing these unique dumplings with family and friends. Your kitchen adventure awaits!

Chicken Pumpkin Dumplings Simple and Flavorful Recipe

Are you ready to delight your taste buds with something new? This Chicken Pumpkin Dumplings recipe blends savory chicken and

Let’s dive into the fun part: the ingredients! This recipe for Apple Pumpkin Streusel Muffins blends flavors perfectly. Each component adds to the taste and texture. Here’s a detailed list for you: - 1 cup pumpkin puree (canned or homemade) - 1 medium apple (peeled and diced, preferably Granny Smith) - 2 large eggs - ½ cup vegetable oil - 1 cup brown sugar (packed) - 1 teaspoon vanilla extract - 1 ½ cups all-purpose flour - 1 teaspoon baking soda - ½ teaspoon baking powder - ½ teaspoon salt - 1 teaspoon ground cinnamon - ½ teaspoon ground nutmeg - ½ cup chopped walnuts or pecans (optional) For the streusel topping: - ½ cup all-purpose flour - ½ cup rolled oats - ½ cup brown sugar (packed) - ½ teaspoon ground cinnamon - 4 tablespoons cold butter (cubed) Feel free to customize! You can swap the apple for pears or add chocolate chips. The nuts are optional, but they give a nice crunch. This recipe is all about making it your own. Check out the Full Recipe for complete details! 1. Preheat the Oven: Start by preheating your oven to 350°F (175°C). This step helps the muffins bake evenly. You can line a muffin tin with paper liners or lightly grease each cup. 2. Mix Wet Ingredients: In a large bowl, combine 1 cup of pumpkin puree, 1 diced apple, 2 eggs, ½ cup vegetable oil, 1 cup packed brown sugar, and 1 teaspoon vanilla extract. Whisk everything together until smooth. 3. Mix Dry Ingredients: In another bowl, whisk together 1 ½ cups of all-purpose flour, 1 teaspoon baking soda, ½ teaspoon baking powder, ½ teaspoon salt, 1 teaspoon ground cinnamon, and ½ teaspoon ground nutmeg. Mixing these well ensures even flavor and texture. 4. Combine the Mixtures: Gradually add the dry mix to the wet ingredients. Stir gently until just combined. Avoid over-mixing; you want fluffy muffins. If you like, fold in ½ cup of chopped walnuts or pecans for added crunch. 1. Fill the Muffin Cups: Use a spoon or scoop to divide the batter evenly into the prepared muffin cups. Fill each cup about 2/3 full. This allows room for the muffins to rise without spilling. 2. Add the Streusel Topping: In a small bowl, mix ½ cup of flour, ½ cup of rolled oats, ½ cup of packed brown sugar, and ½ teaspoon of cinnamon. Cut in 4 tablespoons of cold butter until it looks crumbly. Then, sprinkle this topping generously over each muffin. 3. Bake: Place the muffin tin in the oven. Bake for 18-22 minutes. Check for doneness by inserting a toothpick in the center. If it comes out clean, your muffins are done. Follow these steps for tasty Apple Pumpkin Streusel Muffins. You can find the Full Recipe for more details! To bake great muffins, avoid common pitfalls. First, do not overmix your batter. Stir just until you see no dry flour. Overmixing can make muffins tough. Next, pay attention to ingredient temperature. For the best muffins, use room-temperature eggs and oil. Cold ingredients may not mix well, which affects the rise. Measuring flour is key for the perfect texture. Spoon the flour into your measuring cup and level it off. Do not pack it down. Too much flour makes muffins dry. Storing muffins correctly keeps them fresh. Once cooled, place them in an airtight container. They can last up to three days at room temperature. If you want to save muffins for later, freezing is a great option. Wrap each muffin in plastic wrap and then place them in a freezer bag. They freeze well for up to three months. To reheat muffins, take them out of the freezer. Let them thaw in the fridge overnight. Then, warm them in the oven at 350°F for about 5-10 minutes. This keeps them fluffy and tasty. For the complete recipe, check the Full Recipe link. {{image_2}} You can easily change up the fruits and nuts in this recipe. Instead of apples, try pears or cranberries. Both add a lovely tangy taste. For nuts, swap walnuts or pecans with almonds or hazelnuts. They bring a different crunch and flavor. If you need gluten-free muffins, use a gluten-free flour blend in place of regular flour. It works well and keeps the muffins fluffy. You can also use oat flour or almond flour for a unique taste. Just remember to adjust the liquid in your recipe, as these flours can absorb more moisture. To amp up the flavor, consider adding spices. A pinch of allspice or ginger can add warmth. You can also mix in some cloves for a nice kick. These spices enhance the fall flavors of pumpkin and apple. Want to make your muffins even more special? Add chocolate chips or caramel bits. Stir in about half a cup into the batter. They melt while baking and create delightful pockets of sweetness. You can also drizzle caramel sauce over the muffins once they cool for an extra treat. For the full recipe, check out the details above. Each muffin offers a tasty balance of nutrients. Here’s a quick breakdown per serving: - Calories: 180 - Protein: 3g - Fat: 8g - Carbohydrates: 27g - Fiber: 1g - Sugar: 10g Pumpkin brings many benefits. It is rich in vitamins A and C. It also may help with eye health. Apples add fiber and antioxidants. They can support gut health and digestion. Together, these ingredients make a healthy snack option. Some may have allergies to ingredients in this recipe. The muffins contain eggs and nuts. You can skip the nuts or use seeds instead. For a vegan option, replace the eggs with flaxseed meal. Mix one tablespoon of flaxseed with three tablespoons of water for each egg. You can also use a plant-based oil instead of vegetable oil. If you are on a keto diet, try using almond flour instead of all-purpose flour. This change cuts down on carbs and keeps the muffins tasty. Enjoy these muffins while considering your dietary needs! How to ensure the muffins are moist? To keep your muffins moist, use pumpkin puree. This adds moisture and flavor. Don’t overmix the batter; mix until just combined. Also, bake them until a toothpick comes out clean, but don’t overbake. Can I use fresh pumpkin instead of canned? Yes, you can use fresh pumpkin! Just cook and puree it first. Make sure it is smooth and not too watery. This will give your muffins a fresh taste. What other toppings can I use besides streusel? You can try nuts, seeds, or even a glaze. Chopped apples or chocolate chips also add great flavor. Mix it up to find your favorite! Many people love this recipe! One user suggests adding a pinch of salt to enhance the flavor. Another recommends serving the muffins warm with butter or cream cheese. They pair well with coffee or tea for a cozy treat. For your convenience, here is the [Printable Full Recipe](#) for Apple Pumpkin Streusel Muffins. Enjoy making these delicious treats! Now you have all the tools to make perfect muffins. We covered each ingredient, the steps, and even tips to avoid mistakes. You learned about variations and how to store your muffins for later. Remember, small changes can make a big difference. Enjoy experimenting with flavors and ingredients to find your best muffin. Happy baking!

Apple Pumpkin Streusel Muffins Fluffy and Flavorful Treat

Are you ready to bake the ultimate fall treat? My Apple Pumpkin Streusel Muffins are soft, fluffy, and packed with

To make delicious apple cider whoopie pies, you'll need: - 2 cups apple cider - 1 cup all-purpose flour - 1 ½ cups whole wheat flour - 1 teaspoon baking powder - 1 teaspoon baking soda - 1 teaspoon cinnamon - ½ teaspoon nutmeg - ½ teaspoon salt - ½ cup unsalted butter, softened - 1 cup brown sugar, packed - 1 large egg - 1 teaspoon vanilla extract - 1 cup apple butter (for filling) - Optional: powdered sugar for dusting These ingredients work together to create soft and tasty pies. The apple cider gives them a unique flavor and moistness. You can enhance your whoopie pies with a few optional items: - Add chopped walnuts or pecans for crunch. - Mix in a pinch of ginger for a spicy kick. - Use maple syrup instead of brown sugar for a richer taste. These additions let you play with flavors and make the recipe your own. Don't have all the ingredients? No problem! Here are some swaps: - Use coconut oil instead of butter for dairy-free pies. - Substitute gluten-free flour for whole wheat flour if needed. - Applesauce can replace the egg for a vegan option. These substitutions help you adapt the recipe to suit your needs. You can still enjoy these tasty treats! For the complete recipe, check [Full Recipe]. First, we need to make the apple cider. Pour 2 cups of apple cider into a saucepan. Heat it over medium heat. Let it simmer until it reduces to about 1 cup. This will take about 15 to 20 minutes. Once it thickens, set it aside to cool. This reduction gives our whoopie pies a deep apple flavor. Next, grab a medium bowl. Combine the all-purpose flour and whole wheat flour here. Add baking powder, baking soda, cinnamon, nutmeg, and salt. Whisk everything together until it's well mixed. This mix is key to our whoopie pies' texture. Now, take a large mixing bowl and cream the softened butter and brown sugar together. Mix until the mixture is light and fluffy. Then, add one large egg and 1 teaspoon of vanilla extract. Mix until smooth. Slowly pour in the cooled apple cider. Stir until just combined. After that, gradually add the dry ingredients. Mix until no flour is visible, but don’t overmix. Preheat your oven to 350°F (175°C). Line two baking sheets with parchment paper. Using a cookie scoop or tablespoon, drop rounded tablespoons of dough onto the sheets. Make sure to space them about 2 inches apart. Bake for 12 to 15 minutes. The edges should turn lightly golden. Let the pies cool on the baking sheets for about 5 minutes. Then, transfer them to wire racks to cool completely. Once the cookies are cool, take one and spread about a tablespoon of apple butter on the flat side. Sandwich it with another cookie. Repeat this with the rest of the cookies. If you like, dust the whoopie pies with powdered sugar before serving. Enjoy your delicious treat! For the complete recipe, refer to the Full Recipe section. To get the best texture, start with room temperature butter. This helps create a light and fluffy mix. Be careful not to overmix the dough. Overmixing can make the pies tough. Aim for a smooth batter, but some lumps are okay. Let them bake until the edges are golden. This gives a nice contrast to the soft center. To keep your whoopie pies fresh, store them in an airtight container. This keeps them soft and moist. Place parchment paper between layers to avoid sticking. You can keep them at room temperature for up to three days. For longer storage, put them in the fridge for a week. You can freeze them too! Just wrap each pie in plastic wrap, then in foil. They last up to three months. These whoopie pies shine when served warm. They pair well with a scoop of vanilla ice cream. A drizzle of caramel sauce adds a nice touch. For a fun twist, try a cup of hot apple cider on the side. You can find the full recipe linked above. Enjoy your delicious creations! {{image_2}} While apple butter makes a great filling, you can switch things up. Try using cream cheese frosting for a tangy twist. You can also use caramel sauce for a sweet and gooey bite. Another fun idea is to mix in some cinnamon whipped cream. This adds a lovely lightness and flavor. Experiment with different fillings to find your favorite. To enhance the dough, you can add more spices. Consider adding ground ginger or allspice for warmth. You can also mix in some lemon zest for a fresh taste. If you love nuts, try adding chopped walnuts or pecans to the batter. These additions will give your whoopie pies some nice textures and flavors. You can easily make these whoopie pies vegan. Replace the butter with coconut oil or vegan butter. Use a flax egg instead of a regular egg. For a gluten-free option, swap the all-purpose flour with a gluten-free blend. Make sure your baking powder is gluten-free as well. These adjustments let everyone enjoy this tasty treat! For more detailed steps and the complete process, check out the Full Recipe. To store your leftover whoopie pies, place them in an airtight container. This keeps them soft and fresh. You can also layer parchment paper between the pies to prevent sticking. Keep the container in a cool, dry place. Avoid direct sunlight, as it can dry out the cookies. If you want to save whoopie pies for later, freezing is a great option. First, let the pies cool completely. Then, wrap each pie tightly in plastic wrap. Place the wrapped pies in a freezer-safe bag or container. They can stay in the freezer for up to three months. When ready to enjoy, thaw them in the fridge overnight. Homemade whoopie pies can last for about 3-5 days at room temperature. They stay fresh longer in the fridge, up to a week. If frozen, they maintain quality for three months. Just remember, the sooner you eat them, the better they taste! For the full recipe, check out the detailed instructions above. To make apple cider whoopie pies, simmer 2 cups of apple cider. Reduce it to about 1 cup. Mix your dry ingredients in one bowl: flours, baking powder, baking soda, cinnamon, nutmeg, and salt. In another bowl, cream softened butter and brown sugar. Add an egg and vanilla, mixing well. Combine the cooled cider with the butter mix. Gradually add the dry mix until combined. Drop rounded tablespoons on baking sheets. Bake at 350°F for 12-15 minutes. Cool, fill with apple butter, and sandwich them. Yes, you can use store-bought apple butter. It saves time and still tastes great. Just spread about a tablespoon on one cookie half and sandwich it with another. If you want a homemade touch, you can make your own apple butter. The whoopie pies are done when their edges turn lightly golden. The tops should look set and slightly spring back when touched. Overbaking can lead to dry pies, so keep an eye on them. Serve whoopie pies at room temperature or chilled. Dust them with powdered sugar for a nice touch. Pair them with a warm drink like cider or coffee for a cozy treat. You might want to cut them in half to show off the filling! For the full recipe, check the detailed instructions. Now you know how to make tasty apple cider whoopie pies. We covered key ingredients, step-by-step instructions, and helpful tips. You discovered flavor variations and how to store your treats. Baking can be fun and rewarding. Enjoy testing new flavors or sharing with friends. Creating whoopie pies adds joy to any gathering. I'm excited for you to try these recipes and enjoy the results. Happy baking!

Delectable Apple Cider Whoopie Pies Simple Recipe

Love the taste of fall? You’ll enjoy making delicious apple cider whoopie pies! This simple recipe combines sweet apple flavor

- 6 large eggs - 3 tablespoons mayonnaise - 1 tablespoon Dijon mustard - 1 teaspoon apple cider vinegar The main ingredients come together to create a creamy and tangy filling. Start with fresh eggs for the best taste. Mayonnaise gives a rich texture, while Dijon mustard adds a nice kick. The apple cider vinegar brightens the flavor. - 1 teaspoon garlic powder - 1 teaspoon smoked paprika - Salt and pepper to taste - 2 tablespoons finely chopped chives These flavor enhancers take your deviled eggs to the next level. Garlic powder adds depth, and smoked paprika brings warmth. Adjust the salt and pepper for your taste. Chives offer a fresh and mild onion flavor that makes the filling pop. - 1 tablespoon capers, rinsed and chopped - Handful of crispy fried onions for garnish If you want to mix it up, try these optional add-ins. Capers lend a tangy brininess that contrasts well with the creamy filling. Crispy fried onions add texture and crunch on top. For the full recipe, check out Best Deviled Eggs Ever. To hard boil eggs perfectly, start by placing six large eggs in a saucepan. Cover them with cold water, ensuring the water is about an inch above the eggs. Heat over medium-high until the water boils. Once boiling, cover the pan and remove it from heat. Let the eggs sit for 12 minutes. This method gives you firm, creamy yolks. Next, cool the eggs in an ice bath. Fill a bowl with ice and cold water. After 12 minutes, transfer the eggs into the ice water. Let them sit for at least five minutes. This process stops cooking and makes peeling easier. Peeling the eggs efficiently is key to a smooth deviled egg. Crack each cooled egg gently on a surface. Peel the shells under cold running water. The water helps remove any little bits of shell stuck to the egg. Now, slice each egg in half lengthwise. Carefully remove the yolks and place them in a mixing bowl. Set the egg whites aside on a serving platter. With a fork, mash the yolks until crumbly. Add three tablespoons of mayonnaise, one tablespoon of Dijon mustard, one teaspoon of apple cider vinegar, one teaspoon of garlic powder, and one teaspoon of smoked paprika. Season with salt and pepper to taste. Stir until smooth and creamy. For added flavor, fold in two tablespoons of finely chopped chives and one tablespoon of chopped capers, if using. Taste the mixture and adjust seasoning as needed. Now it’s time to fill the egg whites. Use a piping bag for a neat look or a spoon to fill them generously with the yolk mixture. Each half should be well-filled. For tips on presentation, sprinkle a bit of smoked paprika on top. This not only adds color but also enhances flavor. Finish with a handful of crispy fried onions for a nice crunch. These small touches make your deviled eggs look as great as they taste. For the complete recipe, refer to the [Full Recipe]. For the best deviled eggs, the mayonnaise you choose is key. I recommend using a high-quality mayonnaise. It makes the filling rich and smooth. You can also try a homemade version for extra flavor. Balancing flavors is important too. To enhance your filling, add a bit of Dijon mustard. The tanginess gives your eggs a nice kick. A splash of apple cider vinegar can add brightness. Adjust seasonings like salt and pepper to your taste. Peeling the eggs can be tricky. To avoid tearing the egg whites, start with older eggs. Fresh eggs tend to stick to the shell. After boiling, cool the eggs quickly in an ice bath. This stops the cooking and helps loosen the shells. When you peel, do it under cold running water. This helps wash away any small shell pieces. Deviled eggs pair well with many drinks. A crisp white wine or a light beer complements them nicely. For a non-alcoholic option, consider iced tea or lemonade. When it comes to serving, get creative! Arrange the eggs on a colorful platter. You can even add fresh herbs or sliced veggies for a pop of color. Enjoy these delicious bites at parties or family gatherings. For the full recipe, check out the Best Deviled Eggs Ever. {{image_2}} When it comes to deviled eggs, the fun never stops! You can make many tasty twists on the classic recipe. Here are some variations that I love. - Bacon deviled eggs: Add crispy bacon bits to the yolk mixture. The salty crunch of bacon makes every bite better. It adds a smoky flavor that many will love. - Spicy Sriracha deviled eggs: Mix in Sriracha for a kick. Just a little can take your eggs to the next level. Adjust the amount to fit your heat preference. - Avocado deviled eggs: Swap some mayonnaise for mashed avocado. This gives a creamy texture and fresh flavor. Plus, it's a healthy twist that many enjoy. - Mediterranean-style deviled eggs: Use feta cheese, olives, and a splash of lemon. This adds a zesty flair and a taste of the Mediterranean. - Vegan deviled eggs using tofu: Blend silken tofu with mustard and spices. This creates a creamy filling without any eggs. It's a great option for those who avoid animal products. - Gluten-free options: The classic recipe is already gluten-free. Just check your mayonnaise and spices to ensure they meet your needs. With these variations, you can impress your friends and family. Feel free to mix and match flavors to find your favorite! For the full recipe, check out the Best Deviled Eggs Ever. To keep your deviled eggs fresh, refrigerate them right away. Place the eggs in a clean, airtight container. This will help prevent them from drying out or absorbing odors from other foods. Make sure not to cover them too tightly. Use parchment paper or wax paper between layers if stacking. This keeps the filling intact. Store deviled eggs in the fridge for up to two days. If the eggs look or smell off, do not eat them. Trust your senses. Freezing deviled eggs is not the best idea. The filling can change texture and taste when frozen. It may become grainy or watery upon thawing. However, if you want to freeze them, consider freezing the egg whites and yolks separately. For the best results, freeze the egg whites unfilled. Wrap them tightly in plastic wrap and then place them in a freezer bag. Fill the egg whites later when ready to eat. If you freeze filled eggs, use them within a month. Always label and date your containers for easy tracking. For a great deviled eggs recipe, check out the Full Recipe. To make the best deviled eggs, focus on flavor and texture. Start with fresh eggs. Use high-quality mayonnaise for creaminess. I love using Dijon mustard for a tangy kick. Add apple cider vinegar for brightness. Season with garlic powder and smoked paprika for depth. The right balance of salt and pepper enhances all these flavors. Lastly, fold in finely chopped chives for freshness. The key is to mix well but not overdo it. You want a smooth filling that’s easy to pipe into the egg whites. Yes, you can make deviled eggs ahead of time! Prepare the eggs and filling a day in advance. Keep the egg whites and filling separate until you are ready to serve. Store the egg whites in an airtight container in the fridge. Place the filling in another container. When it’s time to serve, just fill the whites and garnish. This way, the eggs stay fresh and look great. Green yolks happen due to overcooking or a reaction with air. To avoid this, follow these steps: - Boil the eggs gently and avoid high heat. - Cool the eggs in an ice bath right after boiling. - Peel them under cold water to minimize exposure to air. These tips help keep the yolks bright yellow and tasty. Deviled eggs pair nicely with many dishes. Here are some ideas: - Fresh vegetable sticks like carrots and celery. - Light salads with vinaigrette for a refreshing touch. - Crackers or bread for crunch. - Fruit platters for a sweet contrast. These pairings make a great spread for parties or gatherings. Deviled eggs are simple yet delightful. We covered the right ingredients for creamy filling, like mayonnaise and Dijon mustard. You learned how to boil eggs perfectly and avoid peeling snags. I provided tips for both classic and unique variations to keep things fresh. Lastly, we discussed storage methods to keep your deviled eggs tasty. Remember, with these steps, your deviled eggs will shine at any gathering. Enjoy making them with friends and family!

Best Deviled Eggs Ever Flavorful and Simple Recipe

Are you ready to impress your friends and family with the best deviled eggs ever? This simple yet flavorful recipe

- Corn types: You can use either fresh corn or canned corn. Fresh corn gives a sweet crunch, while canned corn is easy and quick. If you choose canned, make sure to drain it well. - Cheese options: I like to use a mix of shredded cheddar cheese and grated parmesan cheese. Cheddar adds creaminess, and parmesan gives a nice salty touch. You can also experiment with other cheeses like mozzarella or feta if you want. - Optional ingredients for extra flavor: For a little kick, add cayenne pepper. You can also include fresh herbs like cilantro or chives. They brighten up the fritters and add freshness. These ingredients come together to create crispy, cheesy corn fritters that are perfect for any occasion. For a full recipe, check out the details above! 1. Mixing dry ingredients with corn Start by taking a large mixing bowl. Add 2 cups of fresh corn kernels or 1 can of sweet corn that’s drained. Then, sprinkle in 1 cup of all-purpose flour, 1/2 cup of shredded cheddar cheese, 1/4 cup of grated parmesan cheese, 1/2 teaspoon of baking powder, 1/2 teaspoon of garlic powder, 1/2 teaspoon of onion powder, and 1/4 teaspoon of cayenne pepper if you want some heat. Mix everything well. This helps the dry ingredients coat the corn evenly. 2. Combining wet ingredients In a separate bowl, whisk together 2 large beaten eggs and 1/2 cup of milk. You want to combine these until they blend smoothly. This mixture will help bind everything together. 3. Pouring the mixtures together Now, pour the egg and milk mixture into the bowl of dry ingredients. Stir gently until combined. Make sure not to overmix; a few lumps are perfectly fine. Season with salt and pepper to your taste. 1. Preparing the skillet with oil Heat about 1/4 inch of vegetable oil in a large skillet over medium-high heat. To check if the oil is ready, drop a small spoonful of batter into it. If it sizzles, you’re good to go. 2. Frying the fritters to perfection Use a spoon or a small ice cream scoop to drop the corn batter into the hot oil. Fry each fritter for about 3-4 minutes on each side. You want them golden brown and crispy. Fry in batches, so you don’t crowd the pan. 3. Tips for checking doneness Once the fritters are golden brown, transfer them to a plate lined with paper towels. This helps soak up any extra oil. Enjoy them warm, garnished with fresh cilantro or parsley, and pair with your favorite dipping sauce. For the full recipe, check out the detailed instructions above. To make your fritters crispy, oil temperature is key. You need the oil hot enough. If the oil is too cool, the fritters soak up oil and turn soggy. Heat about 1/4 inch of oil over medium-high heat. You can test it by dropping a small spoonful of batter in the oil. It should sizzle right away. Moisture can ruin your fritters. If your corn is wet, the batter will be too thin. Drain canned corn well if you use it. If you use fresh corn, pat it dry with a towel. This keeps the batter thick and helps the fritters hold their shape. Spices can make your fritters sing! Adding cayenne pepper gives them a nice kick. If you want milder flavors, skip it. You can also try adding paprika or cumin for a different taste. Dipping sauces make a big difference. I love serving these fritters with ranch or spicy mayo. A fresh salsa or avocado dip also works well. These pairings add a fun twist to your meal. For the full recipe, check out the [Full Recipe]. Enjoy cooking! {{image_2}} You can easily swap ingredients in this recipe to suit your needs. For a gluten-free version, use a gluten-free flour blend. This keeps the fritters crispy and tasty. If you want to add more veggies, consider adding chopped bell peppers or zucchini. Both bring fresh flavors and colors. You can also mix in cooked proteins like shredded chicken or crumbled bacon for a heartier dish. These fritters make a great snack or side dish. Pair them with a crisp salad for a light meal. A fresh tomato salad or a simple green salad works well. You can also serve them as appetizers at parties. For a fun twist, stack the fritters on a platter and drizzle with a tangy sauce. Try a yogurt dip or spicy mayo on the side for extra flavor. Enjoy experimenting with your serving ideas! To keep your crispy cheesy corn fritters fresh, cool them quickly. Place them on a wire rack. This allows air to flow around them, preventing sogginess. Once cooled, store the fritters in an airtight container. A glass or plastic container works well. If you think you will eat them within two days, keep them in the fridge. For longer storage, use the freezer. To reheat your fritters and retain their crunch, use the oven. Preheat it to 375°F (190°C). Place the fritters on a baking sheet and warm them for about 10-15 minutes. This method keeps them crispy. You can also use an air fryer for about 5-7 minutes. Fritters last for up to 3 days in the fridge and 2 months in the freezer. Always check for freshness before eating. Yes, you can make these fritters ahead of time. Prepare the batter and store it in the fridge for up to 24 hours. This saves time when you want to cook them later. Just remember to mix well before frying. You can also cook the fritters and freeze them. Store them in an airtight container. When you're ready to eat, reheat them in the oven for a crisp texture. If your batter seems too thick, add a little milk. Start with one tablespoon at a time. Mix well after each addition until you reach a smooth consistency. A good fritter batter should be thick but spoonable. You want it to hold together but still drop from a spoon easily. Yes, you can bake these fritters! Preheat your oven to 400°F (200°C). Line a baking sheet with parchment paper. Drop spoonfuls of batter on the sheet, leaving space between them. Bake for 15-20 minutes or until golden brown. Baking may not give the same crispy texture, but it’s a healthier option. For a crispier finish, you can broil them for the last 2 minutes. Enjoy your crispy cheesy corn fritters! For the complete recipe, check out the Full Recipe. This blog covered everything you need to make tasty corn fritters. We started with essential ingredients, then moved to the preparation and cooking steps. I shared tips for achieving that perfect crispy texture and ways to boost flavors. You learned how to store leftovers properly and common FAQs, so you can troubleshoot your fritters. Now, it's time for you to get cooking. Enjoy these versatile treats, and make them your own!

Crispy Cheesy Corn Fritters Perfect for Any Occasion

Looking for a tasty snack or appetizer that’s easy to make? Crispy Cheesy Corn Fritters are your answer! With simple

To make a rich and tasty soup, gather these main ingredients: - 2 pounds ripe tomatoes - 1 medium onion - 4 cloves garlic - 2 tablespoons olive oil These ingredients form the base of the soup. The ripe tomatoes bring sweetness and depth. The onion adds a nice savory touch, while garlic gives it that warm, rich flavor. Olive oil enhances everything, making it smooth and luxurious. Now, let’s add some seasonings and optional ingredients for extra flavor: - Salt and pepper to taste - 1 teaspoon dried oregano - 1 tablespoon balsamic vinegar - ½ cup heavy cream (optional) Salt and pepper help balance the flavors. Dried oregano adds a touch of herbs. Balsamic vinegar brings a hint of tanginess that brightens the soup. If you want a creamy texture, add heavy cream at the end. It makes the soup velvety and rich. To make your meal even better, consider these side pairings: - Crusty bread - Fresh basil leaves for garnish Crusty bread is perfect for dipping into the soup. It adds a nice crunch. Fresh basil leaves on top not only look nice but also give a fresh burst of flavor. Enjoy your soup with these sides for a complete experience. For the full recipe, check the details above! - Preheat oven to 400°F (200°C). - Prepare and arrange vegetables on a baking sheet. First, I always preheat my oven. This step is key for roasting. While the oven heats, I prepare my vegetables. I take the ripe tomatoes and quarter them. I chop the onion roughly and leave the garlic unpeeled. I spread them out on a large baking sheet. Then, I drizzle two tablespoons of olive oil over the veggies. I add salt, pepper, and one teaspoon of dried oregano. Gently tossing everything helps ensure all the flavors mix. - Roast the vegetables and cool. - Blend soup ingredients and simmer. Now, I roast the vegetables in the oven for about 30 to 35 minutes. I check to see if they are soft and slightly caramelized. Once done, I remove the sheet from the oven and let it cool for a few minutes. After it cools, I take the garlic and squeeze it out of its skin. I discard the skins and put the roasted tomatoes, onions, and garlic into a large pot. I also add one tablespoon of balsamic vinegar and three cups of vegetable broth. Next, I bring this mix to a simmer over medium heat. I let it cook for 10 to 15 minutes. This step helps blend all the flavors. - Adjust seasoning and add cream if desired. - Serve and garnish. After simmering, I remove the pot from heat. I stir in one cup of roughly chopped fresh basil leaves. I love using an immersion blender to make the soup smooth. If I want a creamier soup, I add half a cup of heavy cream. Finally, I taste it and adjust the seasoning with more salt and pepper if needed. I serve the soup hot, garnished with extra basil leaves or a drizzle of olive oil. For the full recipe, check the details above. Enjoy this comforting bowl of Roasted Tomato Basil Soup! To get the best flavor from your roasted tomatoes, use ripe ones. They should be deep red and firm. Roasting makes them sweet. I like to cut them into quarters. This helps them caramelize. Add some onion and unpeeled garlic to the mix. The garlic will roast sweet, too. If you want to boost flavor, use fresh herbs. Fresh basil really shines in this soup. Dried herbs work, but fresh has more punch. One big mistake is not preheating the oven. You want that heat ready to roast the veggies. If the oven isn't hot, your tomatoes won't caramelize well. Also, don’t overcook or under-season your soup. Taste it as you go. Adjust with salt and pepper until it's just right. Remember, a little goes a long way. For serving, use hearty bowls. They keep the soup warm and look nice on the table. I love to pair this soup with crusty bread. It’s perfect for dipping. If you like wine, try a light white wine. A chilled Sauvignon Blanc works great. This meal feels cozy and rich, perfect for chilly days. For more ideas, check out the Full Recipe for extra tips. {{image_2}} To make the soup vegan, skip the heavy cream. You can use coconut milk instead. It adds a nice creaminess. You can also try blending in some soaked cashews. This gives a rich taste without any dairy. For cream substitutes, use almond milk or oat milk. They both work well in soups. If you want a tangy flavor, try adding a splash of lemon juice. You can add beans or meat for more protein. Chickpeas or white beans blend well in this soup. They also boost nutrition and flavor. If you prefer meat, shredded chicken or turkey makes a great option. For cheese toppings, try crumbled feta or shredded mozzarella. They melt nicely and enhance the flavor. Parmesan cheese also adds a nice touch when sprinkled on top. For a spicy version, add red pepper flakes. Start with a pinch and taste as you go. This way, you control the heat. It brings warmth and depth to the soup. For a Mediterranean twist, include olives and feta cheese. Chop some olives and stir them in before serving. The salty taste complements the soup's sweetness. This variation makes it unique and delicious. To keep your soup fresh, use airtight containers. Glass or plastic containers work well. Make sure the soup cools to room temperature before sealing. For best results, store your roasted tomato basil soup in the refrigerator. It will stay fresh for up to five days. If you want to keep it longer, freezing is a great choice. You can freeze the soup for up to three months. Just leave some space in the container for expansion. When it’s time to enjoy your leftovers, you have a few options to reheat the soup. The stovetop is the best method. Just pour the soup into a pot and heat over medium heat. Stir often to avoid burning. You can also use a microwave. Place the soup in a microwave-safe bowl, cover it loosely, and heat in short bursts. Stir after each burst to make sure it heats evenly. To keep the flavor and texture, avoid boiling the soup when reheating. How long can you store roasted tomato basil soup? In the fridge, it lasts about five days. In the freezer, it can keep for up to three months. Look for signs of spoilage before eating. If the soup smells sour or has an off-color, it’s best to throw it away. Always trust your senses; if it doesn’t look or smell right, don’t eat it. Enjoy your delicious soup while it’s fresh! Making roasted tomato basil soup is quick and easy. The prep time is only 10 minutes. You will need about 30 to 35 minutes to roast the vegetables. The total cooking time is 55 minutes. This means you can enjoy a warm bowl of soup in under an hour. Yes, you can use canned tomatoes. They save time and can still taste great. Canned tomatoes are often picked at peak ripeness. This means they can be sweeter and more flavorful. However, fresh tomatoes add a bright taste and texture. Canned tomatoes may also have added salt or preservatives, so check the label. Roasted tomato basil soup pairs well with many foods. Here are some great options: - Crusty bread for dipping - Grilled cheese sandwich for a classic combo - Fresh basil leaves for extra flavor - A side salad for a balanced meal These pairings make the soup even more satisfying and enjoyable. Roasted Tomato Basil Soup is simple and delicious. We covered the main ingredients, like ripe tomatoes and garlic. You learned the cooking steps and tips to get the best taste. We also discussed ways to store leftovers and quick reheating methods. There are many fun variations that fit your diet. Make it vegan or add protein to suit your taste. Now you can create this soup with ease. Enjoy the warmth and flavor it brings to your table.

Roasted Tomato Basil Soup Flavorful and Easy Recipe

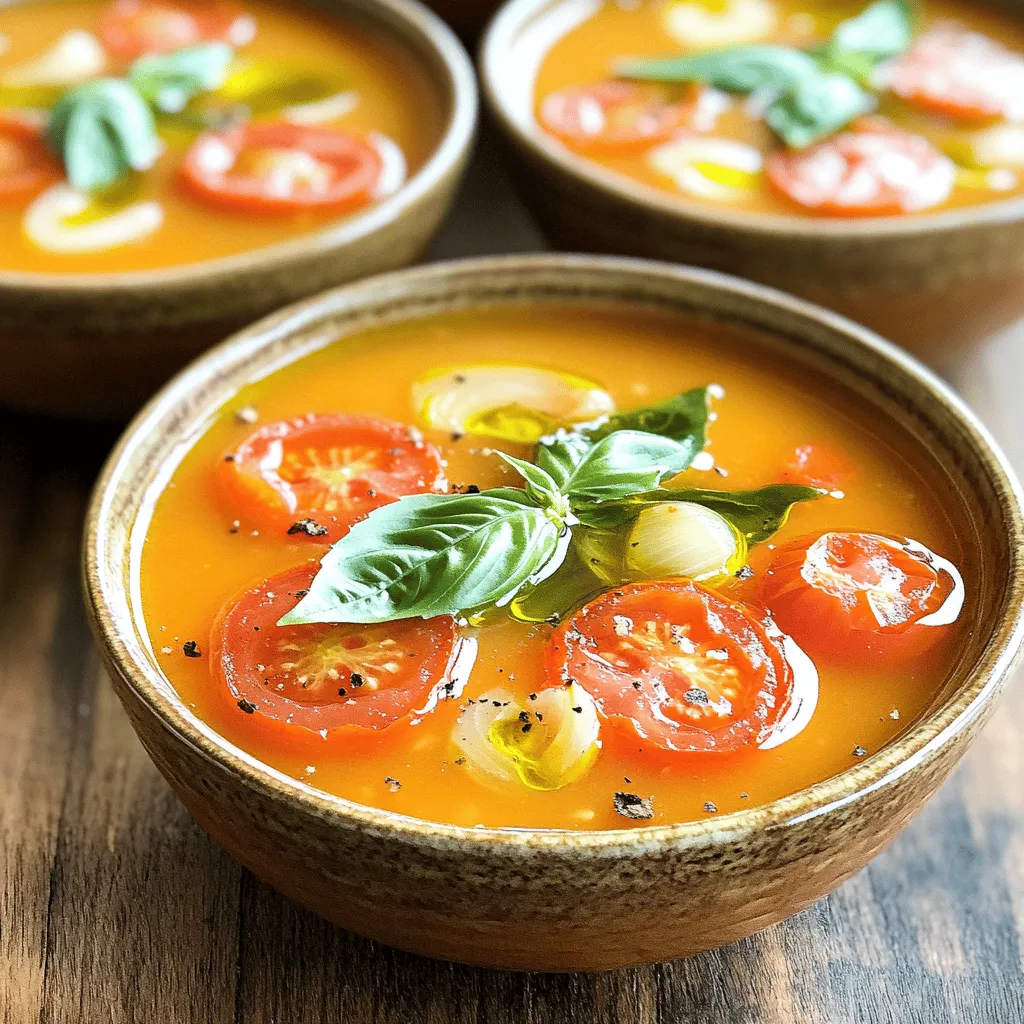
Are you ready to indulge in a cozy bowl of Roasted Tomato Basil Soup? This easy recipe combines juicy tomatoes,

To make pumpkin cheesecake cupcakes, you need the following ingredients: - 1 cup all-purpose flour - 1/2 teaspoon baking powder - 1/2 teaspoon baking soda - 1/4 teaspoon salt - 2 teaspoons ground cinnamon - 1/2 teaspoon ground nutmeg - 1/2 cup unsalted butter, softened - 1 cup brown sugar, packed - 1/2 cup granulated sugar - 2 large eggs - 1 teaspoon vanilla extract - 1/2 cup canned pumpkin puree - 8 ounces cream cheese, softened - 1/4 cup granulated sugar (for cheesecake filling) - 1 egg (for cheesecake filling) - 1 teaspoon vanilla extract (for cheesecake filling) - Whipped cream and cinnamon for topping (optional) You can swap some ingredients for similar ones. For example, if you need a gluten-free option, use a gluten-free flour blend instead of all-purpose flour. If you want a lighter option, use low-fat cream cheese for the filling. You can even use maple syrup instead of brown sugar for a different taste. To make great pumpkin cheesecake cupcakes, start by mixing the dry and wet ingredients well. First, in a medium bowl, sift together your flour, baking powder, baking soda, salt, cinnamon, and nutmeg. This helps to avoid lumps and ensures even flavor. Next, in a large bowl, beat the softened butter, brown sugar, and granulated sugar together until light and fluffy. This step adds air and makes your cupcakes rise nicely. Add in the eggs and vanilla extract, mixing until everything is well combined. Then, stir in the pumpkin puree. This gives the cupcakes their rich flavor and moisture. Now, gradually add the dry mixture into the wet ingredients. Mix just until combined. Overmixing can make the cupcakes tough, so be gentle. Temperature matters. Make sure all your ingredients are at room temperature. This allows them to mix better and creates a smooth batter. Preheat your oven to 350°F (175°C). Line your muffin pan with cupcake liners to make removal easy later. Fill each cupcake liner halfway with the pumpkin batter. Then, add a dollop of the cheesecake mixture on top. Use a toothpick to swirl the two batters together. This creates a pretty marbled effect. Bake your cupcakes in the preheated oven for 20-25 minutes. To check if they are done, insert a toothpick into the center. If it comes out clean, they are ready. Let the cupcakes cool in the pan for 10 minutes. After that, move them to a wire rack to cool completely. This prevents sogginess and helps them keep their shape. You can find the full recipe for detailed instructions and measurements. Enjoy your baking! To make great pumpkin cheesecake cupcakes, avoid common mistakes. One pitfall is overmixing the batter. This can make the cupcakes tough. Mix the dry and wet ingredients until just combined. Another issue is not measuring ingredients correctly. Use a scale or proper measuring cups. This helps ensure the right texture. For a moist texture, use fresh ingredients. Room temperature butter and eggs mix better. Topping your cupcakes adds fun and flavor. Whipped cream is a classic choice. You can also sprinkle cinnamon on top. Chopped nuts like pecans or walnuts add crunch. For presentation, use colorful cupcake liners. Arrange cupcakes on a nice platter. You can even add a small pumpkin or fall leaves for decoration. These little touches make your treats stand out. Check the Full Recipe for more tips! {{image_2}} You can easily personalize your pumpkin cheesecake cupcakes. Here are some fun ideas: - Cupcake Base: Try adding ginger or allspice for a warm taste. You can also mix in some cocoa powder for a chocolate twist. A bit of maple extract gives a nice fall flavor too. - Cheesecake Filling: For the cheesecake part, consider mixing in chocolate chips or caramel. You can also add a layer of fruit, like cranberry or apple, for a fruity surprise. Want to make these cupcakes fit your diet? Here are some great swaps: - Gluten-Free: Use a gluten-free flour blend in place of regular flour. This keeps the texture nice and light. - Vegan Options: Replace the eggs with flax eggs and use vegan cream cheese. Swap butter for coconut oil or vegan butter. This keeps the cupcakes rich and tasty without animal products. These variations and adjustments help you enjoy pumpkin cheesecake cupcakes your way! Check the full recipe for detailed steps. To keep your pumpkin cheesecake cupcakes fresh, follow these tips: - Cool Completely: Let the cupcakes cool on a wire rack before storing. - Use an Airtight Container: Place them in an airtight container. This helps keep them moist. - Chill in the Fridge: They stay fresh for about 5 days in the fridge. - Freeze for Longer Storage: For longer storage, freeze them. They can last up to 3 months in the freezer. When you freeze them, wrap each cupcake in plastic wrap. This prevents freezer burn and keeps the flavor. When you're ready to enjoy, let them thaw in the fridge overnight. To reheat cupcakes without drying them out, follow these steps: - Use the Oven: Preheat the oven to 350°F (175°C). Place cupcakes on a baking sheet. Heat for about 10 minutes. - Cover with Foil: Cover them with foil to keep moisture in while reheating. To revive the flavor, you can add a little whipped cream on top after reheating. This adds moisture and enhances the taste. Enjoy your delicious pumpkin cheesecake cupcakes even after storing! How do I know when my cupcakes are fully baked? Check your cupcakes at 20 minutes. Insert a toothpick in the center. If it comes out clean, they are done. If it has batter on it, bake a few more minutes. Can I make these cupcakes ahead of time? Yes, you can. Make them a day before serving. Store them in an airtight container at room temperature. Just add whipped cream right before serving. What is the best way to serve pumpkin cheesecake cupcakes? Serve them at room temperature. Add a dollop of whipped cream on top. A sprinkle of cinnamon adds a nice touch too. Can I freeze leftover cupcakes? Yes, you can freeze them. Wrap each cupcake in plastic wrap, then place in a freezer bag. They stay fresh for up to three months. What to do if the cupcakes sink in the middle? If your cupcakes sink, check your oven temperature. Too much mixing can also cause this. Make sure to mix just until combined. Why is my cheesecake filling runny? A runny filling can happen if the cream cheese is not softened enough. Ensure it’s at room temperature for best results. Also, avoid over-mixing the filling. You’ve learned how to make delicious pumpkin cheesecake cupcakes. I covered the right ingredients and their key substitutes. You also found clear steps for mixing, baking, and decorating. Plus, I shared variations for different tastes and dietary needs. Remember to store them well and reheat properly to keep them fresh. Baking these cupcakes can be fun and rewarding. Enjoy sharing your treats with friends and family!

Pumpkin Cheesecake Cupcakes Delightful Fall Treat

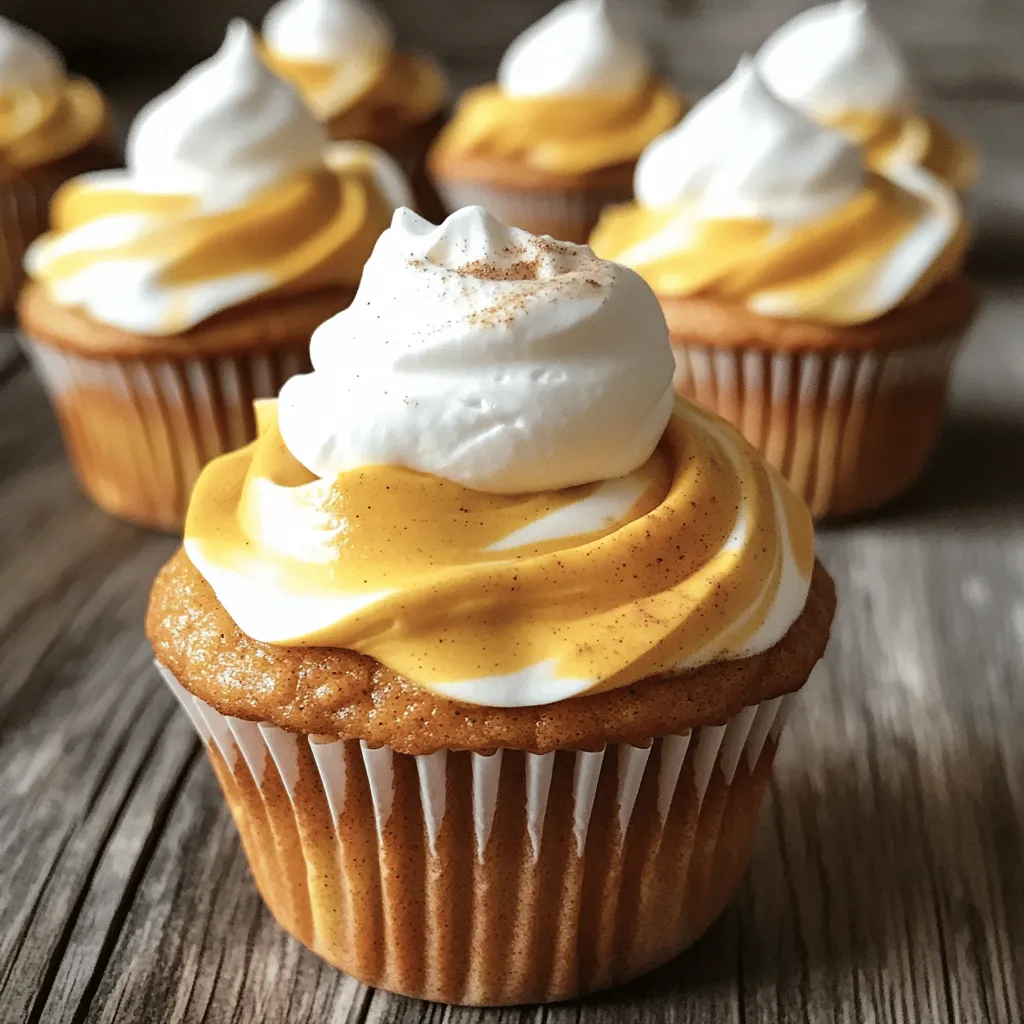
Fall is here, and that means it’s time for pumpkin treats! If you’re looking for a dessert that is easy

To make crispy roast potatoes, you'll need the following: - 2 lbs baby potatoes, halved - 4 tablespoons olive oil - 4 cloves garlic, minced - 2 teaspoons fresh rosemary, chopped - 2 teaspoons fresh thyme, chopped - 1 teaspoon paprika - Salt and pepper to taste - Fresh parsley, chopped (for garnish) You can swap some ingredients if needed: - Potato types: Use Yukon Gold or red potatoes for a different flavor. - Oil options: Try avocado oil or melted butter for a richer taste. - Herb alternatives: Use dried herbs or other fresh ones like sage or oregano. To get the best results: - Selecting the best baby potatoes: Look for firm, smooth potatoes. Avoid any with spots or wrinkles. - Choosing fresh herbs: Check for bright green leaves and no browning. Fresh herbs add bold flavors to your dish. Start by halving the baby potatoes. This makes them cook faster and helps them get crispy. You want uniform pieces for even cooking. Try to keep the sizes close. Next, coat the potatoes evenly with oil. I use olive oil for a rich flavor. Toss them in a bowl so every piece is coated well. This step is key to getting that golden crunch. In a clean bowl, mix olive oil with minced garlic, chopped rosemary, and thyme. Add paprika, salt, and pepper. This mix gives the potatoes a tasty kick. Make sure to combine them thoroughly. An even coating ensures all potatoes get the same flavor. Set your oven to 425°F (220°C). High heat helps achieve that crispy outer layer. Spread the potatoes on a baking sheet lined with parchment paper. This helps with easy cleanup and prevents sticking. Roast the potatoes for 30-35 minutes. Halfway through, flip them with a spatula. This step allows for even browning. You’ll know they’re done when they turn golden and crispy on the outside. For the full recipe, check out the link. To get that perfect crunch, spacing is key. When you place your potatoes on the baking sheet, make sure to give them room. If they touch, they won’t crisp up. Aim for a single layer. This allows hot air to move around each piece. Preheating your oven is also important. Set your oven to 425°F (220°C) at least 15 minutes before roasting. A hot oven helps to kickstart the crisping process. Overcrowding the baking tray is a common mistake. When you pack too many potatoes together, they steam instead of roast. This leads to soft potatoes instead of crispy ones. Flipping at the right time matters, too. You should turn the potatoes halfway through cooking. This ensures even browning on all sides. If you forget to flip, one side may burn while the other stays pale. For best results, use a heavy-duty baking sheet. Look for one that has a rim. This keeps any oil or juices contained. You'll also need a sharp knife for cutting the potatoes. A sturdy mixing bowl will help when you combine the oil and seasonings. These tools make prep easier and faster. Check out the Full Recipe for more details on making crispy roast potatoes. {{image_2}} You can easily change the taste of crispy roast potatoes. Adding spices can make a big difference. Try cumin or chili powder for a warm kick. Just a sprinkle can wake up your dish. Herbs also add great flavor. An Italian seasoning blend gives a fresh taste. You can use dried or fresh herbs. Just mix them in with the potatoes before roasting. Crispy roast potatoes are not just for the oven. You can make them in an air fryer too. The air fryer cooks them fast and makes them very crispy. Set it to 400°F (200°C) and cook for about 20 minutes. Shake the basket halfway through to ensure even crispiness. Another great method is using an Instant Pot. You can cook them fast with steam first. Then, transfer them to the oven or a pan to crisp them up. This method saves time and gives you soft potatoes inside, with a crunchy outside. Crispy roast potatoes can fit many diets. For vegan options, stick to the basic recipe. Just skip any non-vegan toppings. You can also use olive oil to keep them vegan-friendly. If you are gluten-free, you’re in luck! This recipe is naturally gluten-free. Just check any seasoning mixes or toppings to ensure they are gluten-free. Enjoy your crispy roast potatoes without worry! For the full recipe, check out the details above. After making crispy roast potatoes, let them cool down. Place them in an airtight container. This keeps them fresh. Store them in the fridge. They can last about 3 to 5 days. Always check for any signs of spoilage before eating. When it comes to reheating, I prefer the oven. It helps keep the potatoes crispy. Preheat your oven to 400°F (200°C). Spread the potatoes on a baking sheet. Heat for about 10 to 15 minutes. This method adds back some crunch. If you need a faster option, use the microwave. But be careful! Microwaving can make them soft. If you use the microwave, try a low power setting. Heat them in short bursts, checking often. You might wonder, can you freeze crispy roast potatoes? While it’s possible, they may lose their texture. If you want to freeze them, do it right after cooking. Let them cool and spread them on a tray. Freeze them until solid, then transfer to a freezer bag. To thaw, place them in the fridge overnight. When ready to eat, reheat in the oven. This method keeps them as tasty as possible. For the full recipe, check my Crispy Roast Potatoes with Herbs and Garlic. Yukon Gold and red potatoes work best for roasting. They have a creamy inside and a nice skin. These types hold their shape well when cooked. You can also use russet potatoes. They get crispy but may fall apart if you are not careful. Yes, you can prepare them ahead. Cook the potatoes and let them cool. Store them in the fridge for up to two days. When you are ready, just reheat them in the oven. This will help them get crispy again. Check the color and texture. They should be golden brown and crispy on the outside. Use a fork to poke them. If they feel soft inside, they are done. You can also use a meat thermometer. It should read around 205°F (96°C) for perfect doneness. Crispy roast potatoes pair well with many dishes. Try them with roast chicken or beef. They also go great with fish or a veggie stir-fry. Add a side salad for a fresh touch. You can find the full recipe for crispy roast potatoes with herbs and garlic here. Crispy roast potatoes can elevate any meal. We covered everything from choosing fresh ingredients to expert cooking tips. Remember to keep your potatoes spaced and flip them for even browning. You can also explore different flavors and cooking methods to keep things interesting. With these guidelines, you can enjoy perfectly roasted potatoes every time. Now, go ahead and put these ideas into practice. Happy cooking!

Crispy Roast Potatoes Perfectly Golden and Tasty

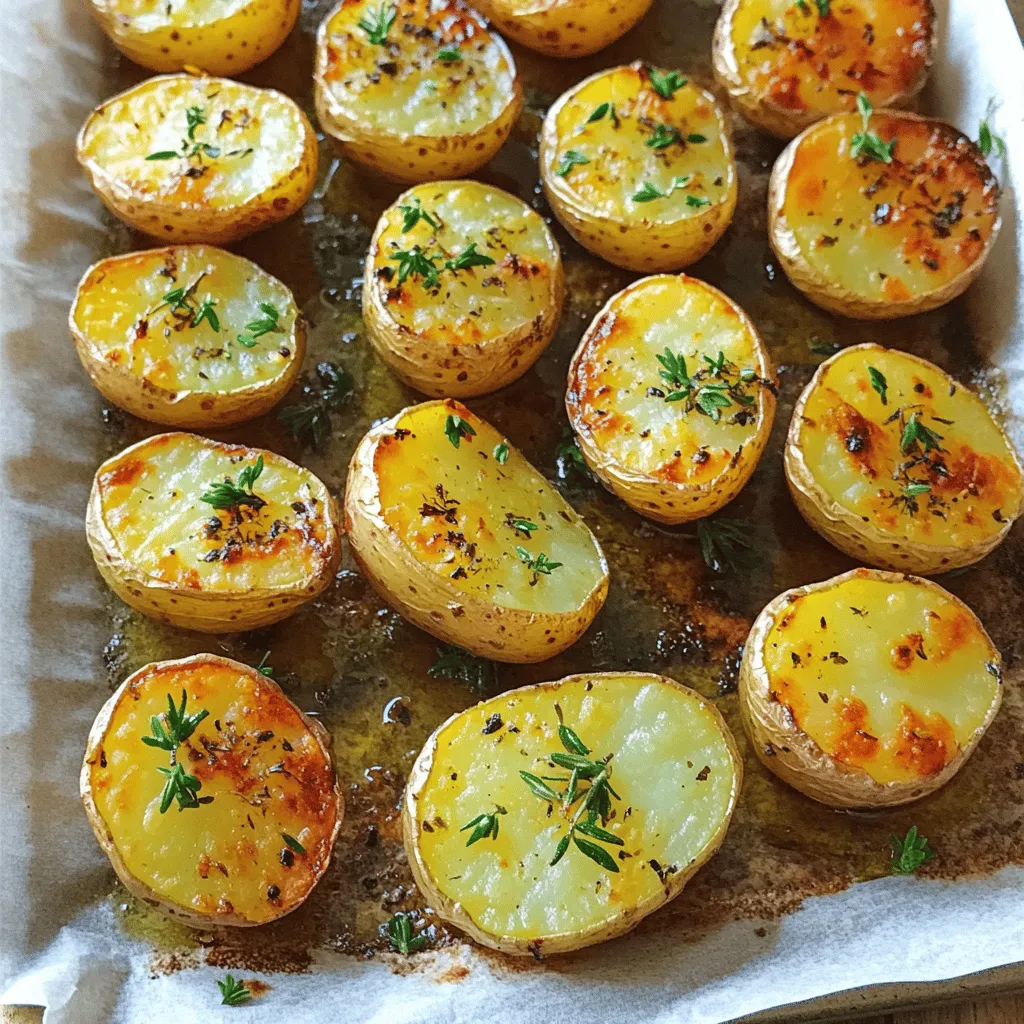
Are you ready to elevate your dinner game? Crispy roast potatoes are golden, tasty, and easy to make. With the

Older posts
Page1 Page2 … Page170 Next →
© 2025 Chelles Recipes • Built with GeneratePress

More Information

  • Home
  • Contact
  • About
  • Dinner
  • Appetizers
  • Dessert

Our Policies

  • Privacy Policy
  • GDPR Policy
  • Terms Of Use
  • Copyright Policy
  • Cookie Policy
  • Disclaimer
©2025, Chelles Recipes About Privacy Policy Back To Top